Special Offer Text
Introduction
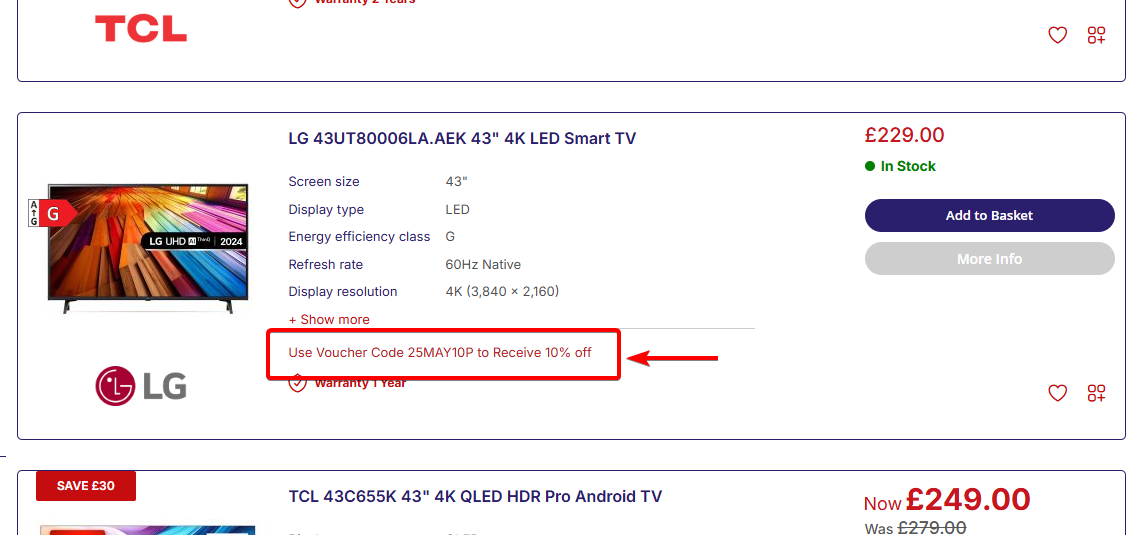
The following guide will take you through how to setup Special Offer Text to display on listings in both list view and product pages. These can be used to advertise voucher codes available to the product, or simply just a way to present any kind of promotion to your customer using this effective strategy which can be applied on both your product and catalogue pages.
Configuring your feature
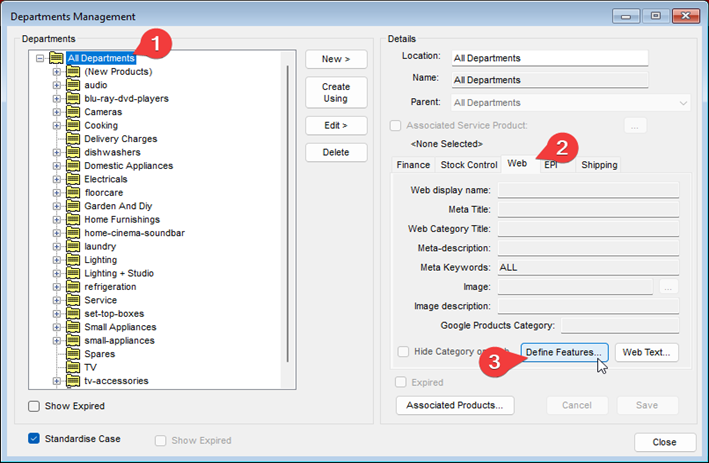
Open NCompass and navigate to Administration > Department Management
Select the top category known as All Departments > open the Web tab from the right hand side menu, and select Define Features in that section of the menu.
Now follow this step carefully. If you select Create New from the middle menu buttons, populate exactly as defined in the below steps 1 through 4,
Display Name: Special Offers Text 1
Use as filter: Unchecked
Feature Type: Dropdown
Display Priority: -1
Map To Web Attribute ID: special_offer_text_1
For marker number 5 in the below screenshot, you will notice that you can use this same feature up to 5 times, simply change the Display Name and Map To Web Attribute IDs number from 1, to 2 all the way through to 5 for each feature will allow you to stack multiple special offers.
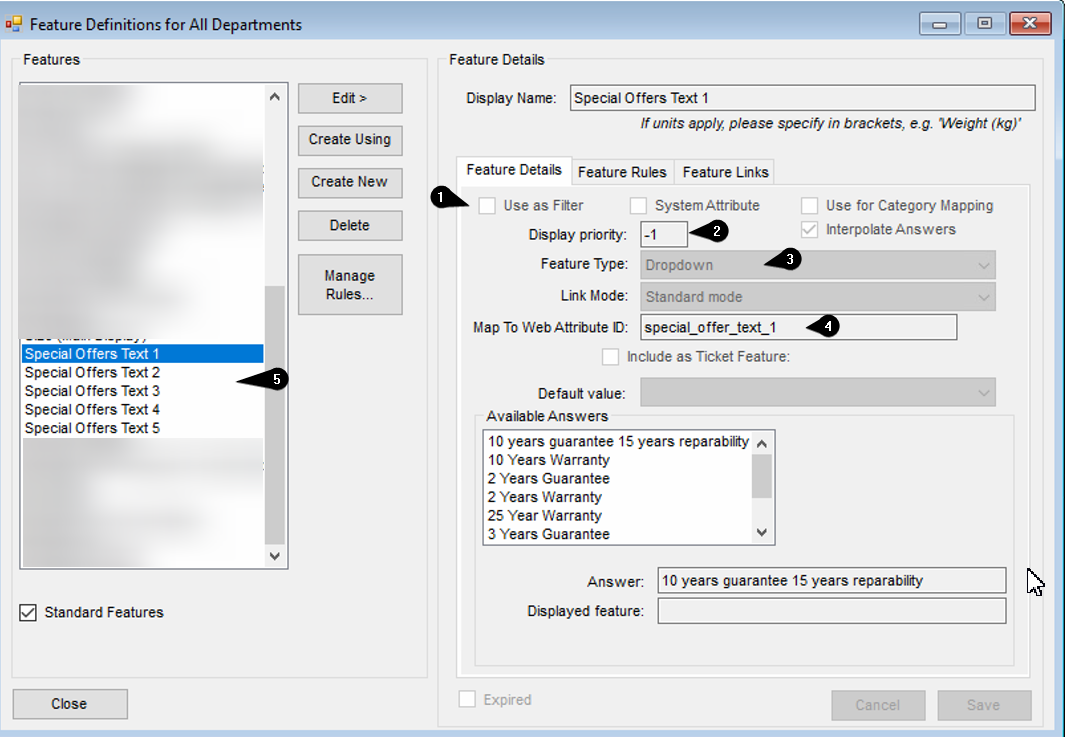
The Available answers will be what you would like to show on the website. if you'd like to know more about feature answers, please refer to the main webpresence documentation by clicking here
Applying Special Offer text to your products
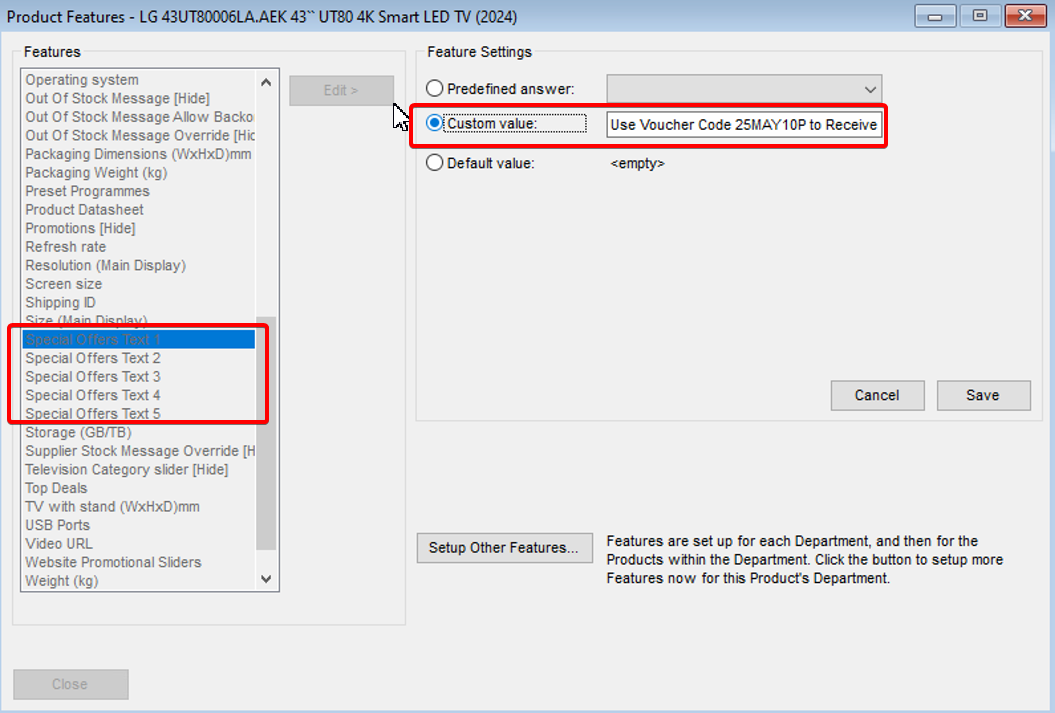
Again within NCompass, open a designated product of your choice by navigating to Products > Enquiry, search for any product and open the product info for the item.
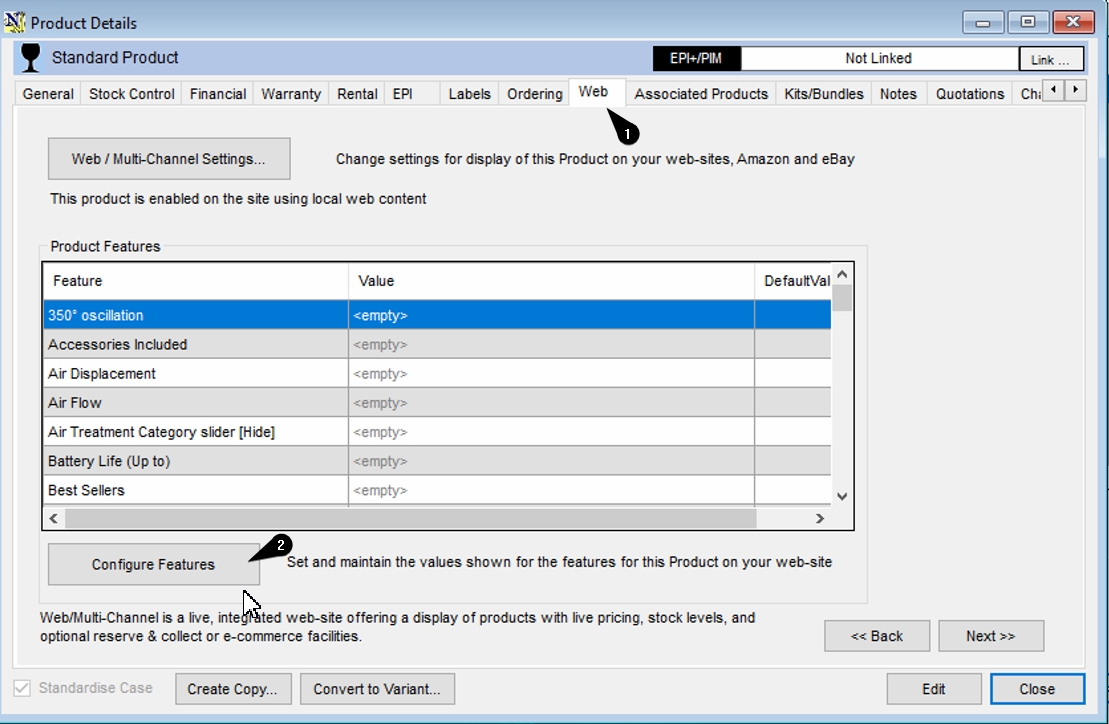
From the list of features available to you, find your special offer text features from the left hand menu, and select edit from the middle section of this window. You may either use Predefined answer, or custom value, populate the value with what you wish to display in your catalogue/product pages. You can see i've set a custom value here which allows me to write anything i'd like in this field. be sure to click save found in the bottom right of the window to set the feature.
if you'd like to know how to use predefined answer, please refer to the webpresence management guide mentioned earlier in this guide.
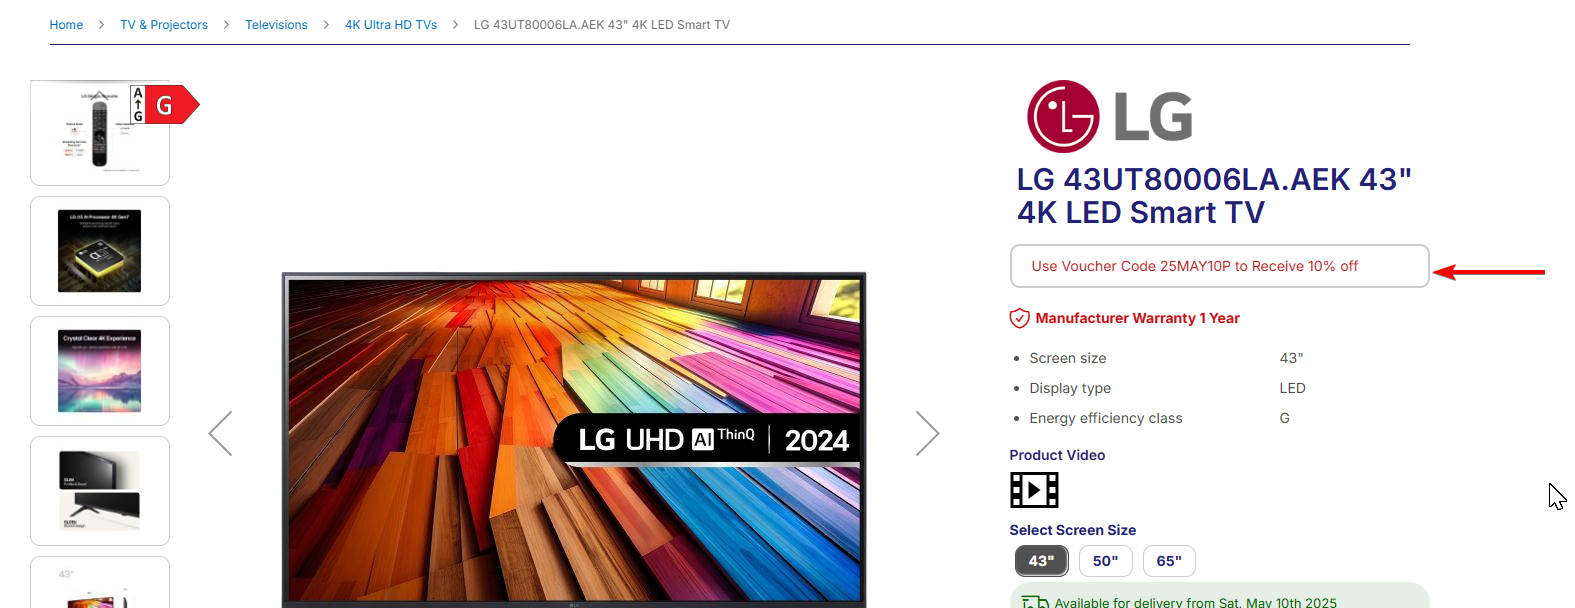
These changes will now be sync to the website and you will see the special offer text now displays on the product listing, or catalogue page.
Changing the Appearance
Now we have the special offer text showing on the website, we can begin to adjust how the text is displayed. This is done in Magento Admin.
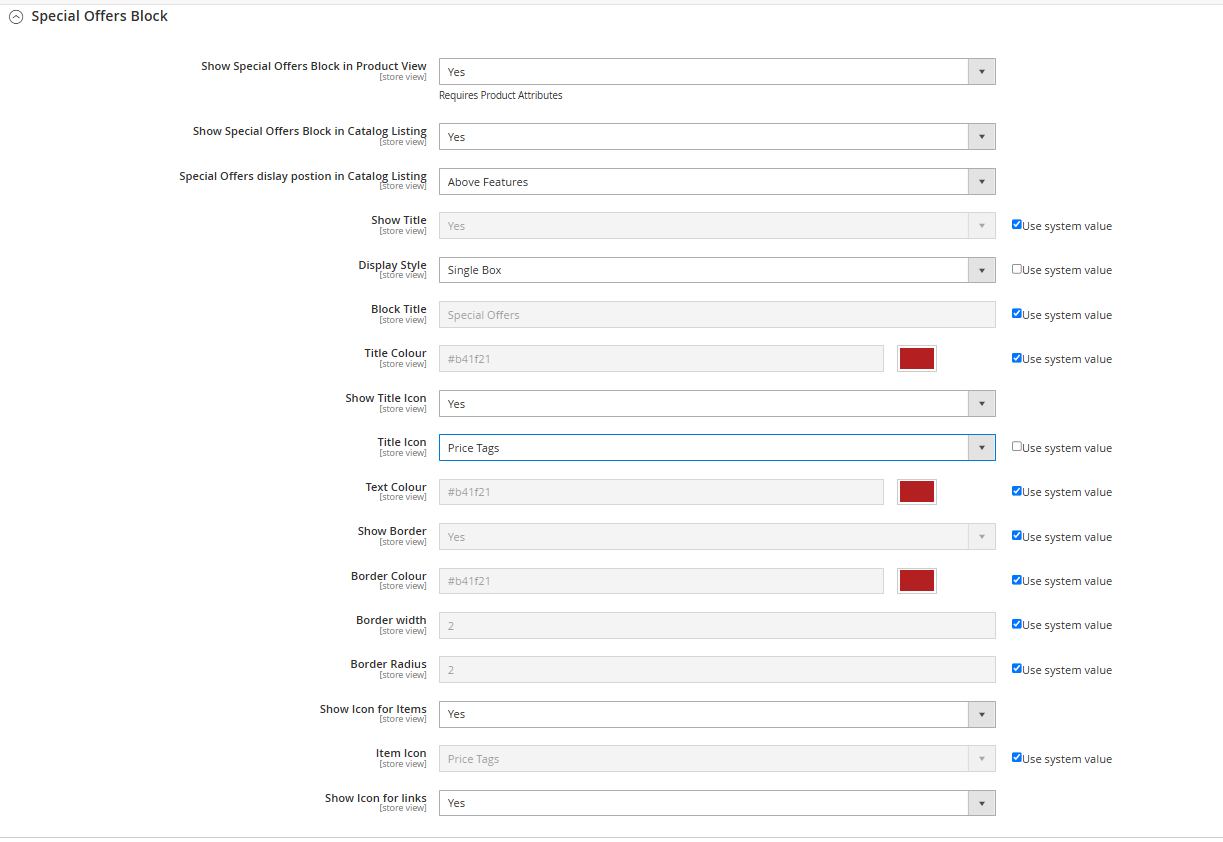
Special Offers Block Configuration (Field-by-Field Explanation)
This configuration panel allows you to control the appearance and behaviour of the Special Offers Block on product and catalogue pages.
Visibility & Positioning
-
Show Special Offers Block in Product View
Enables or disables the Special Offers block on individual product pages. Requires that the appropriate product attributes are set. -
Show Special Offers Block in Catalogue Listing
Controls whether the block appears on catalogue listing pages (e.g., category views). -
Special Offers display position in Catalogue Listing
Defines where the block appears relative to other product details. Options include "Above Features" or "Below Features".
Title and Display Style
-
Show Title
Toggles the visibility of the Special Offers block title. -
Display Style
Choose how the offers are displayed:-
Single Box: All offers are grouped in one styled container.
-
Individual Boxes: Each offer is displayed in a separate box with its own border.
-
-
Block Title
Set the text that appears as the heading for the block, e.g., “Special Offers”. -
Title Colour
Choose the colour of the block title text. -
Show Title Icon
Enables an icon next to the block title. -
Title Icon
Select an icon to display beside the title. Options include Price Tags, Thumbs Up, Tick, Recycle, etc.
Offer Content Styling
-
Text Colour
Defines the colour used for the offer text within the block. -
Show Border
Enables a border around each offer (or the entire block, depending on the Display Style). -
Border Colour
Sets the colour of the border. -
Border Width
Determines how thick the border line appears (in pixels). -
Border Radius
Controls the roundness of the corners on the offer box(es). Higher values result in more rounded corners.
Icons for Offers and Links
-
Show Icon for Items
Displays an icon before each individual offer item (not just the title). -
Item Icon
Choose the icon used for each item (same list of options as the Title Icon field). -
Show Icon for Links
If links are included in your offer content, this option toggles whether an icon should appear next to those links.
After making changes, press save config in the top right of the magento dashboard,
A cache flush may be required before changes are reflected on the website. This can be done by navigating to System > Cache Management from the left hand menu