Stock Take
Stock Take By Location
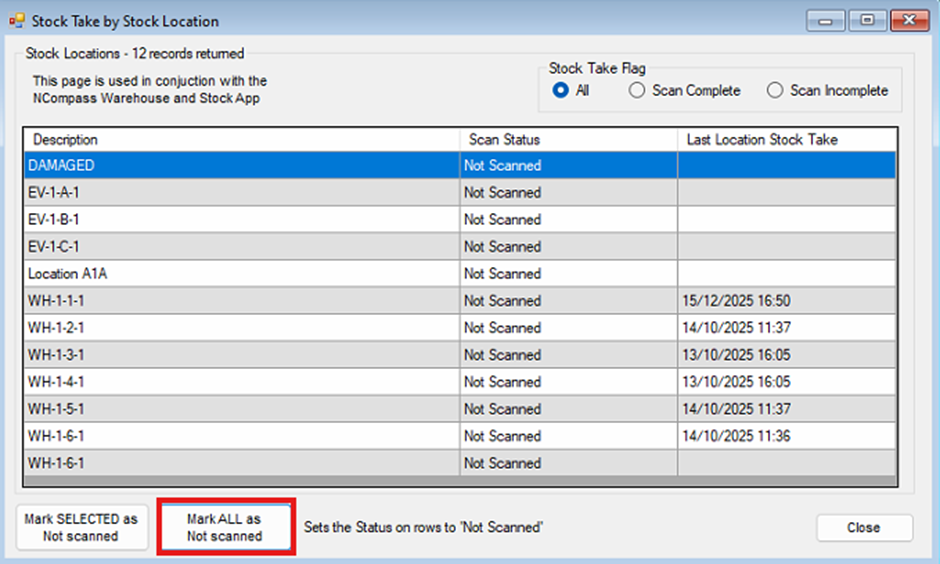
Inside the desktop version of NCompass, navigate to Products > Stock Count > Stock Take by Location.
This will bring up a list of all stock locations that you currently have set up in your system, along with the last time they were stock checked.
Click the Mark ALL as Not Scanned button to set the scan status of all locations to Not Scanned. This will help you track which stock locations still need to be scanned as you undertake your stock take.
Stock Take Detailed Mode
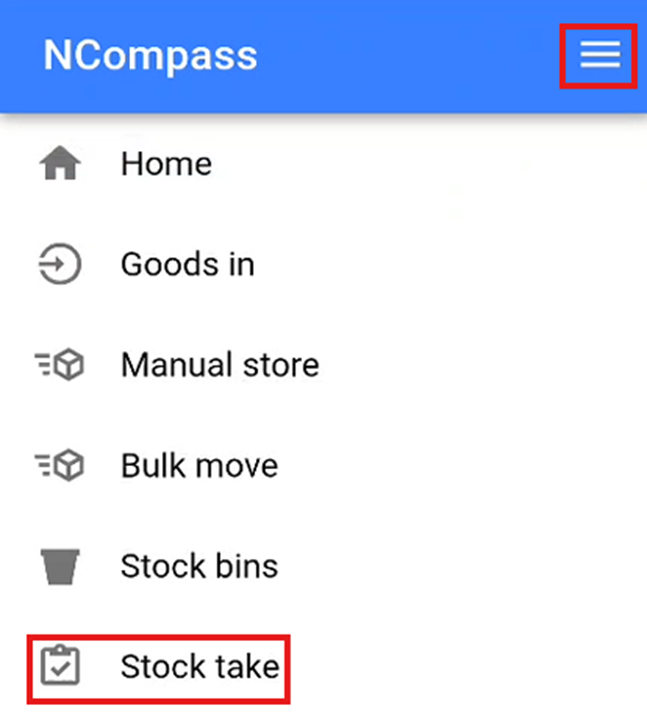
On the warehouse scanner, click the burger menu in the top right of the screen to open the menu. Then click the Stock Take option to start undertaking your stock take.
You will now need to scan the stock location that you wish to undertake a stock take on. This will populate all the stock numbers that are currently stored in this location and that you would expect to find.
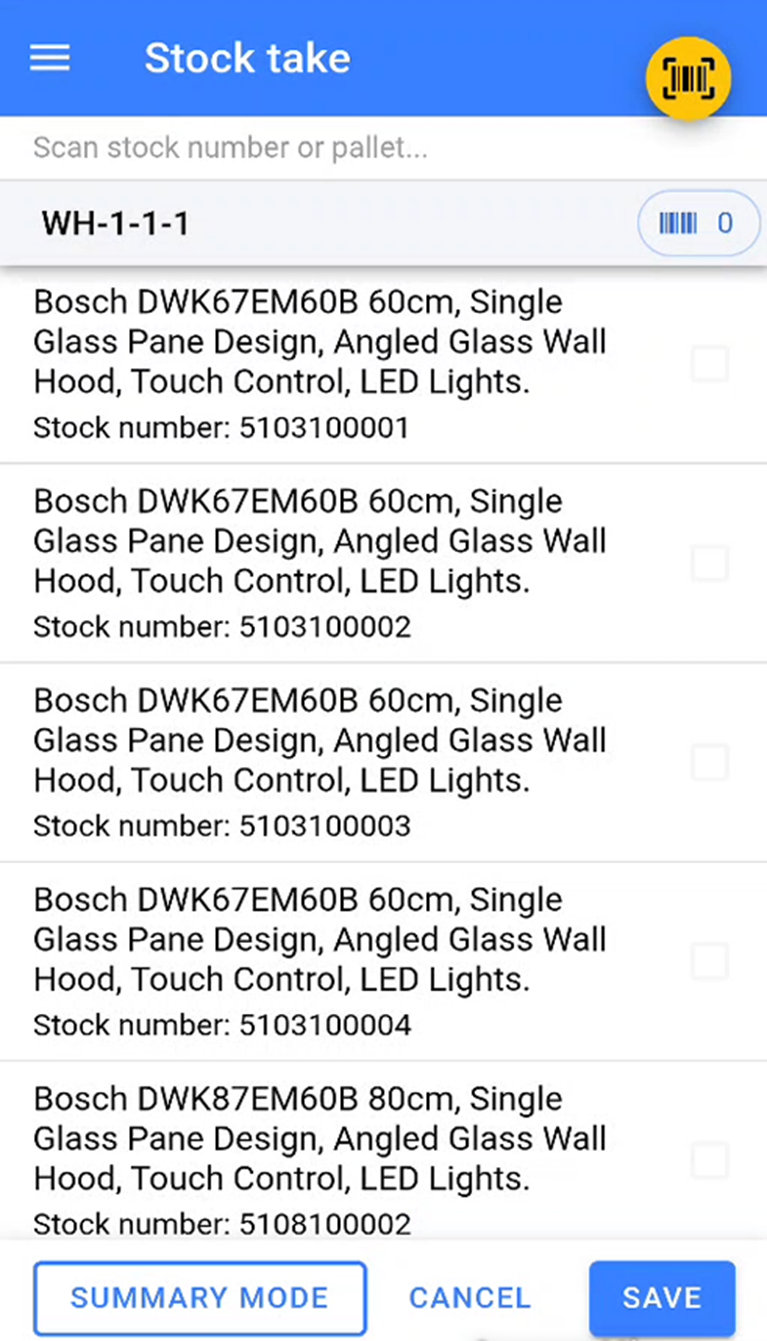
You will now need to start scanning the stock numbers that are physically sitting inside that location in the warehouse.
Once you have started a stock take, you must ensure that you scan all items in that location. If you complete a stock take halfway through scanning, you will need to restart the stock take and scan all items inside the physical location again.
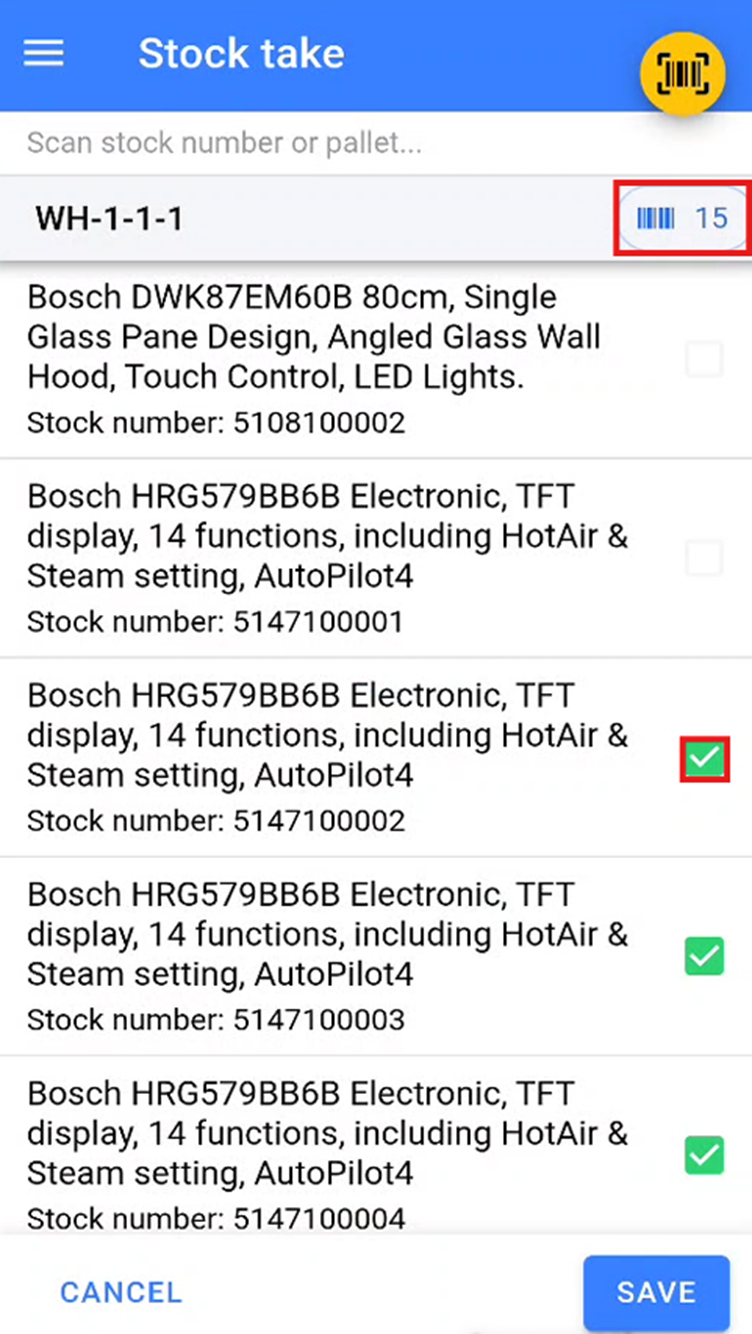
As you scan the stock numbers, the warehouse app will tick off the stock numbers as they are scanned. You will be able to see how many stock numbers have been scanned in this location by the number next to the small barcode icon.
Any items that remain unticked are items that the system expects to be in this location but are not physically there.
Once all stock numbers that are physically in that location have been scanned, click Save to complete the stock take.
Any items that were expected in that stock location but were not scanned during the stock take will be moved to a temporary Missed During Stock Take location to be dealt with at a later point.
Any items that are stored in another location but are scanned during the stock take are automatically moved to the location where the stock take is being conducted.
Stock Errors
During your stock take, you may encounter a stock error. This occurs when a stock number that has been scanned is marked as not physically in stock in the warehouse. This is most likely due to the wrong stock number being marked as delivered to a customer.
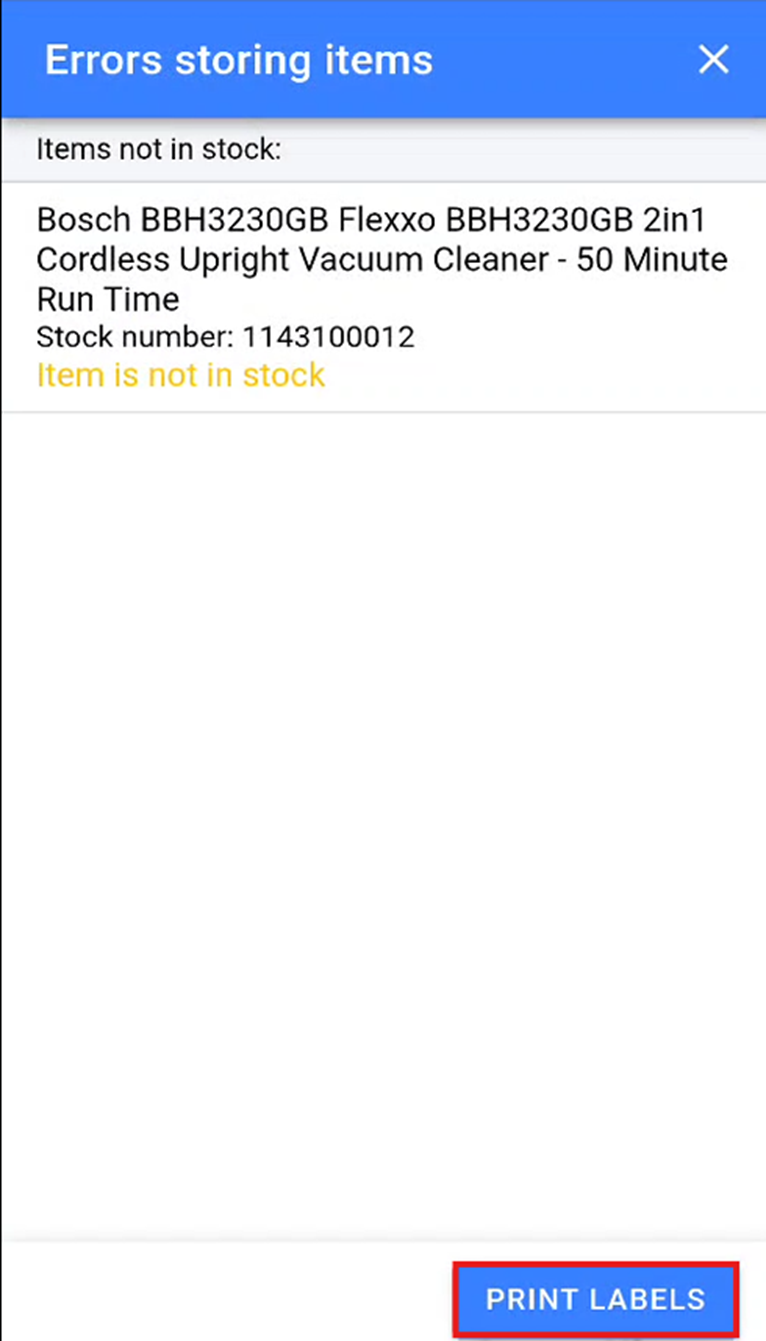
We suggest that you print two stock error labels for each stock error and physically remove the item with the stock error from the bay. You will then need to stick one of the stock error labels directly over the existing stock number to indicate that the stock number for this product needs to be amended.
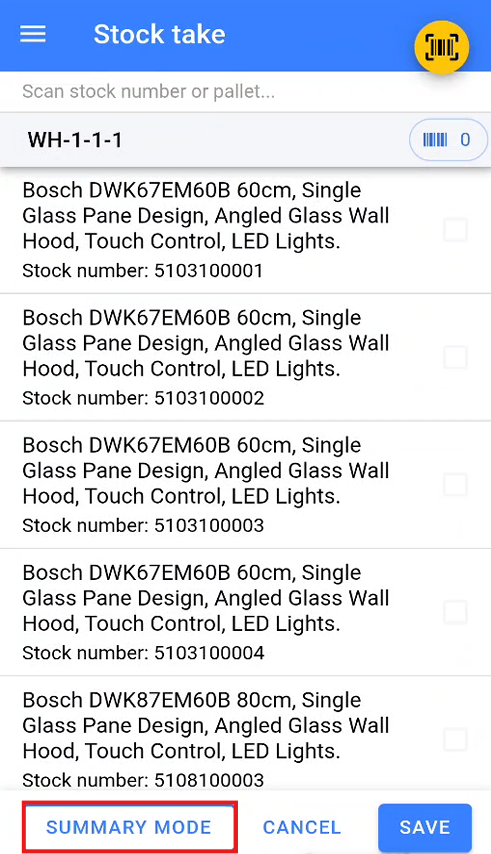
Summary Stock Take Mode
If you store multiple units of the same item within a stock location, you can undertake a stock take using summary mode. To enter summary mode, click the Summary Mode button at the bottom left of the screen after selecting a location to undertake your stock take on.
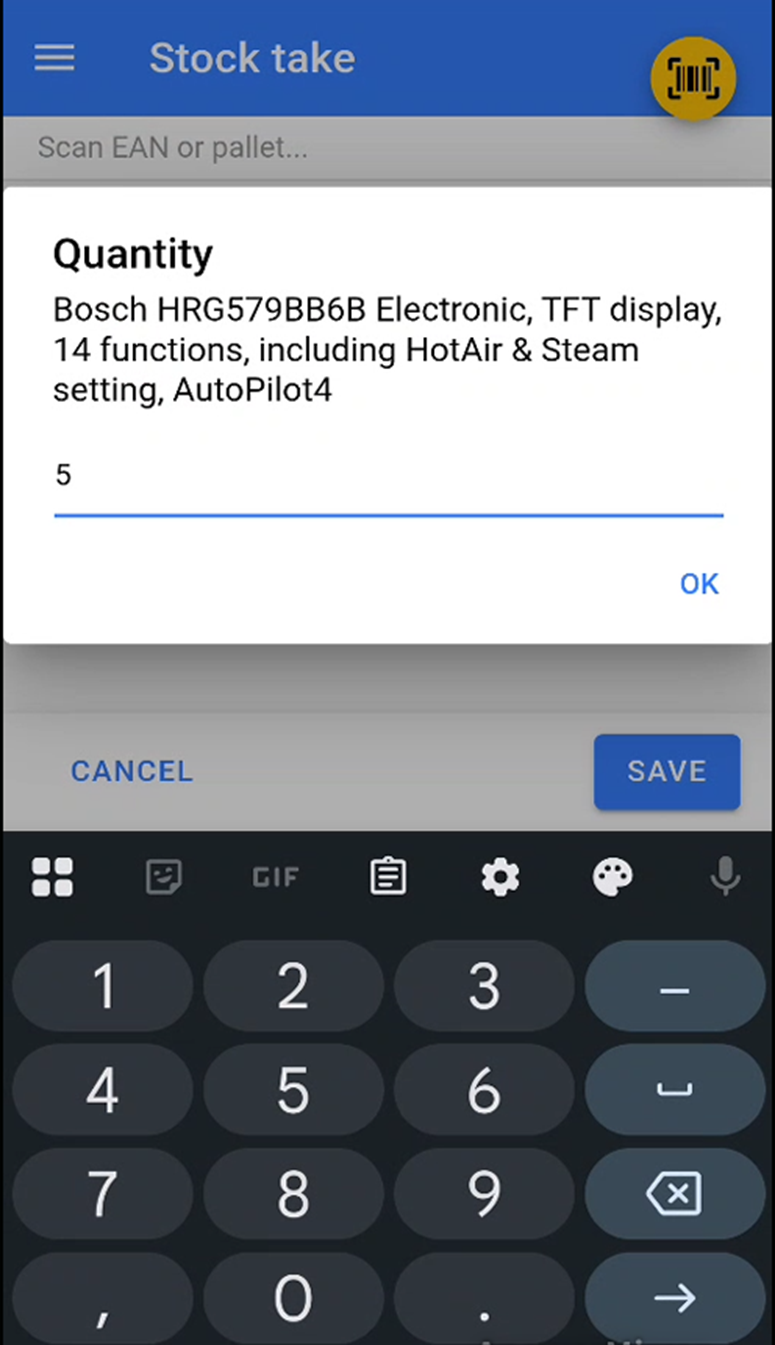
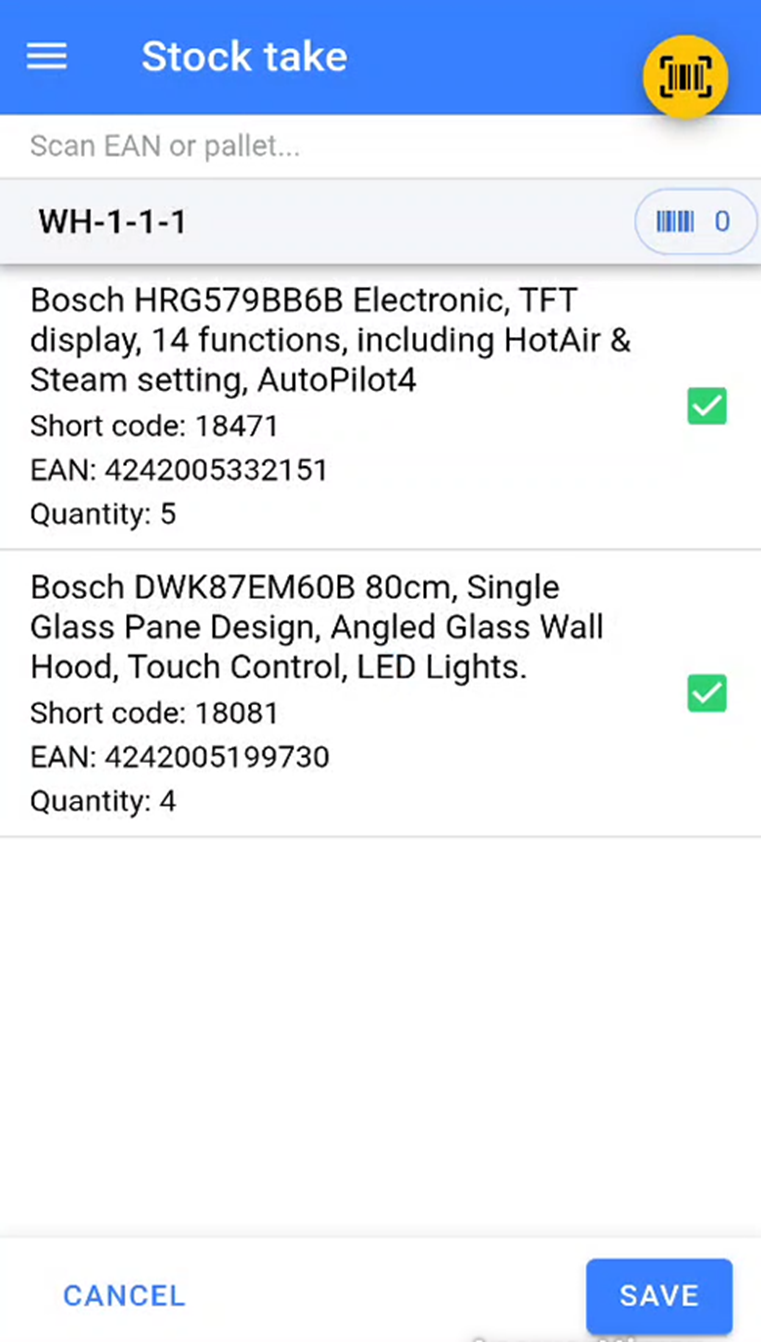
This will display a blank list ready for you to populate. During the summary stock take, you will need to scan the EAN of the product you wish to count. Once the EAN has been scanned, enter the quantity of the item that has been counted in the physical location.
Once you have scanned and entered the quantity for all items within the location, click Save to complete the stock take.
If the items and quantities entered match what is already stored in that location, the stock take will be completed.
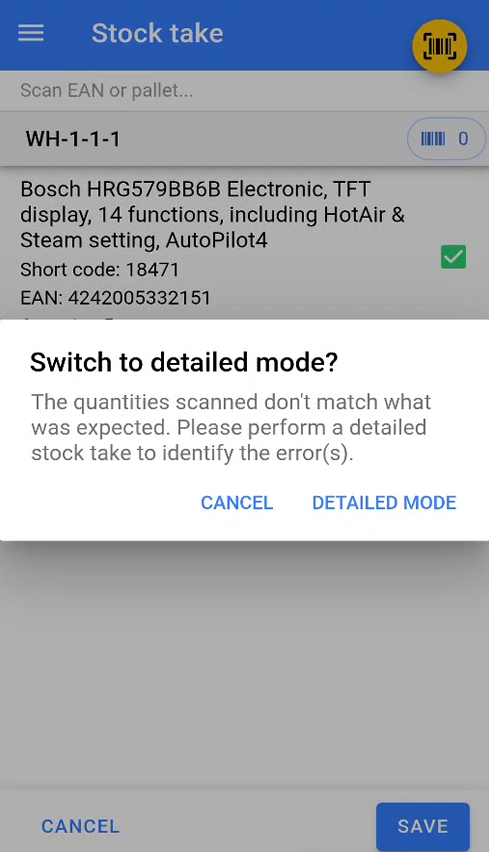
If the items and quantities differ from what is already stored in that location, the warehouse scanner will warn you and prompt you to undertake a detailed stock take to identify where the discrepancies lie.
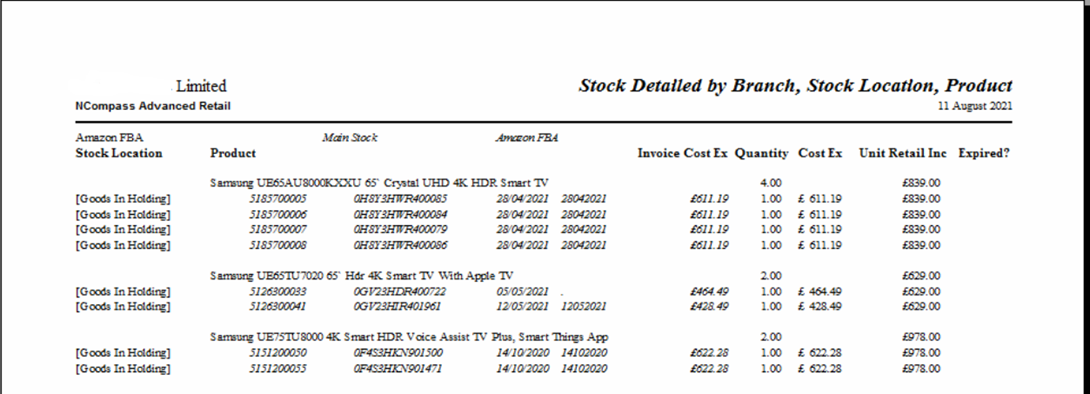
Stock Reports by location
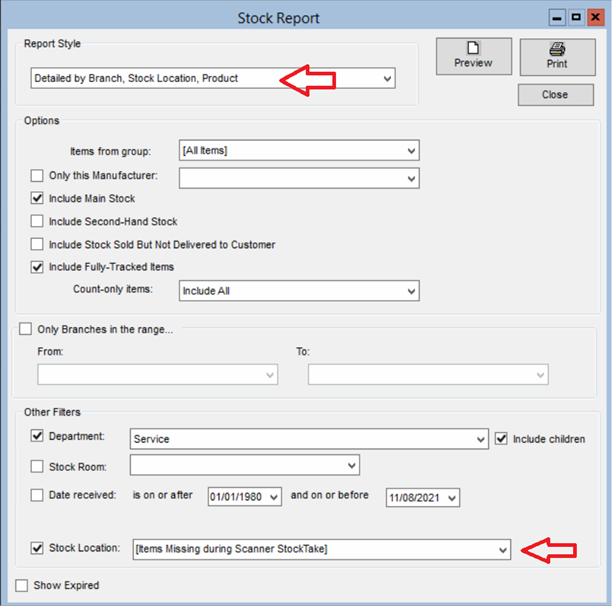
Then select one of the report styles that include location. You can also limit the report to just a single location.
There is a missing location ‘Items missing during scanner stock take’. This location will show all items which were missing during a details stock take.
Scan History
If you need to check where an item has been stored, you can search for the item via product enquiry, then click on item history.
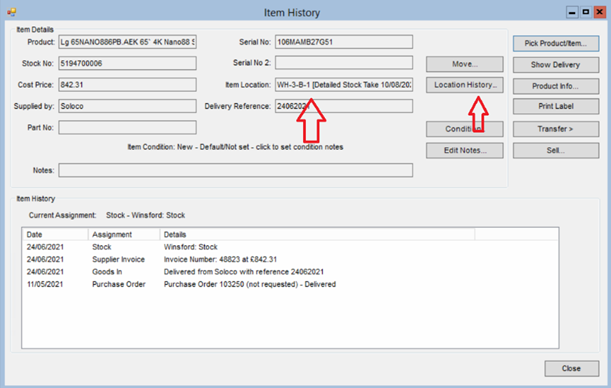
Its current location is shown along with the date it was scanned at that location
If you click the location history button, you will get a history of the locations the item has been stored in.
The initial location ‘Goods in holding’ may not have been scanned, it’s the default location, item are placed in this location if none has been specified at goods in or since.