Purchase Invoice Assistant
- Creating a Storage Location (Azure)
- Splitting Multiple Supplier Invoices from a Single PDF
- Processing Supplier Invoice Files
- Setting up mailbox to strip invoices from emails
- Invoice Assistant Supplier Settings
- How the Invoice Assistant Reads and Matches Invoices
Creating a Storage Location (Azure)
Creating A Storage Account
You must be a member of the NCompass-Invoice-Storage-Blob-Admins Entra group to be able to follow this process
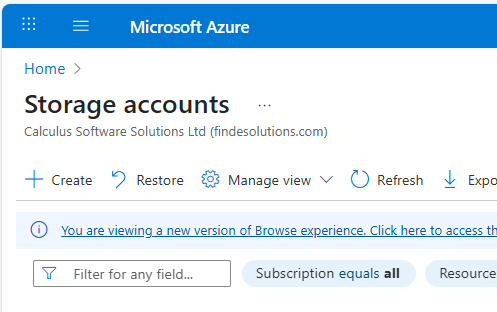
Access Storage Locations in the Azure portal by using the following link:
https://portal.azure.com/#browse/Microsoft.Storage%2FStorageAccounts
Click to Create a new one
Use settings:
| Setting | Value |
| Subscription | NCompass |
| Resource group | ncompassstorage |
| Storage account name | 3401009999inv Replace the numbers with the numeric part of their serial number |
| Region | UK South |
| Primary service | Azure blob storage |
| Performance | Standard |
| Redundancy | GRS |
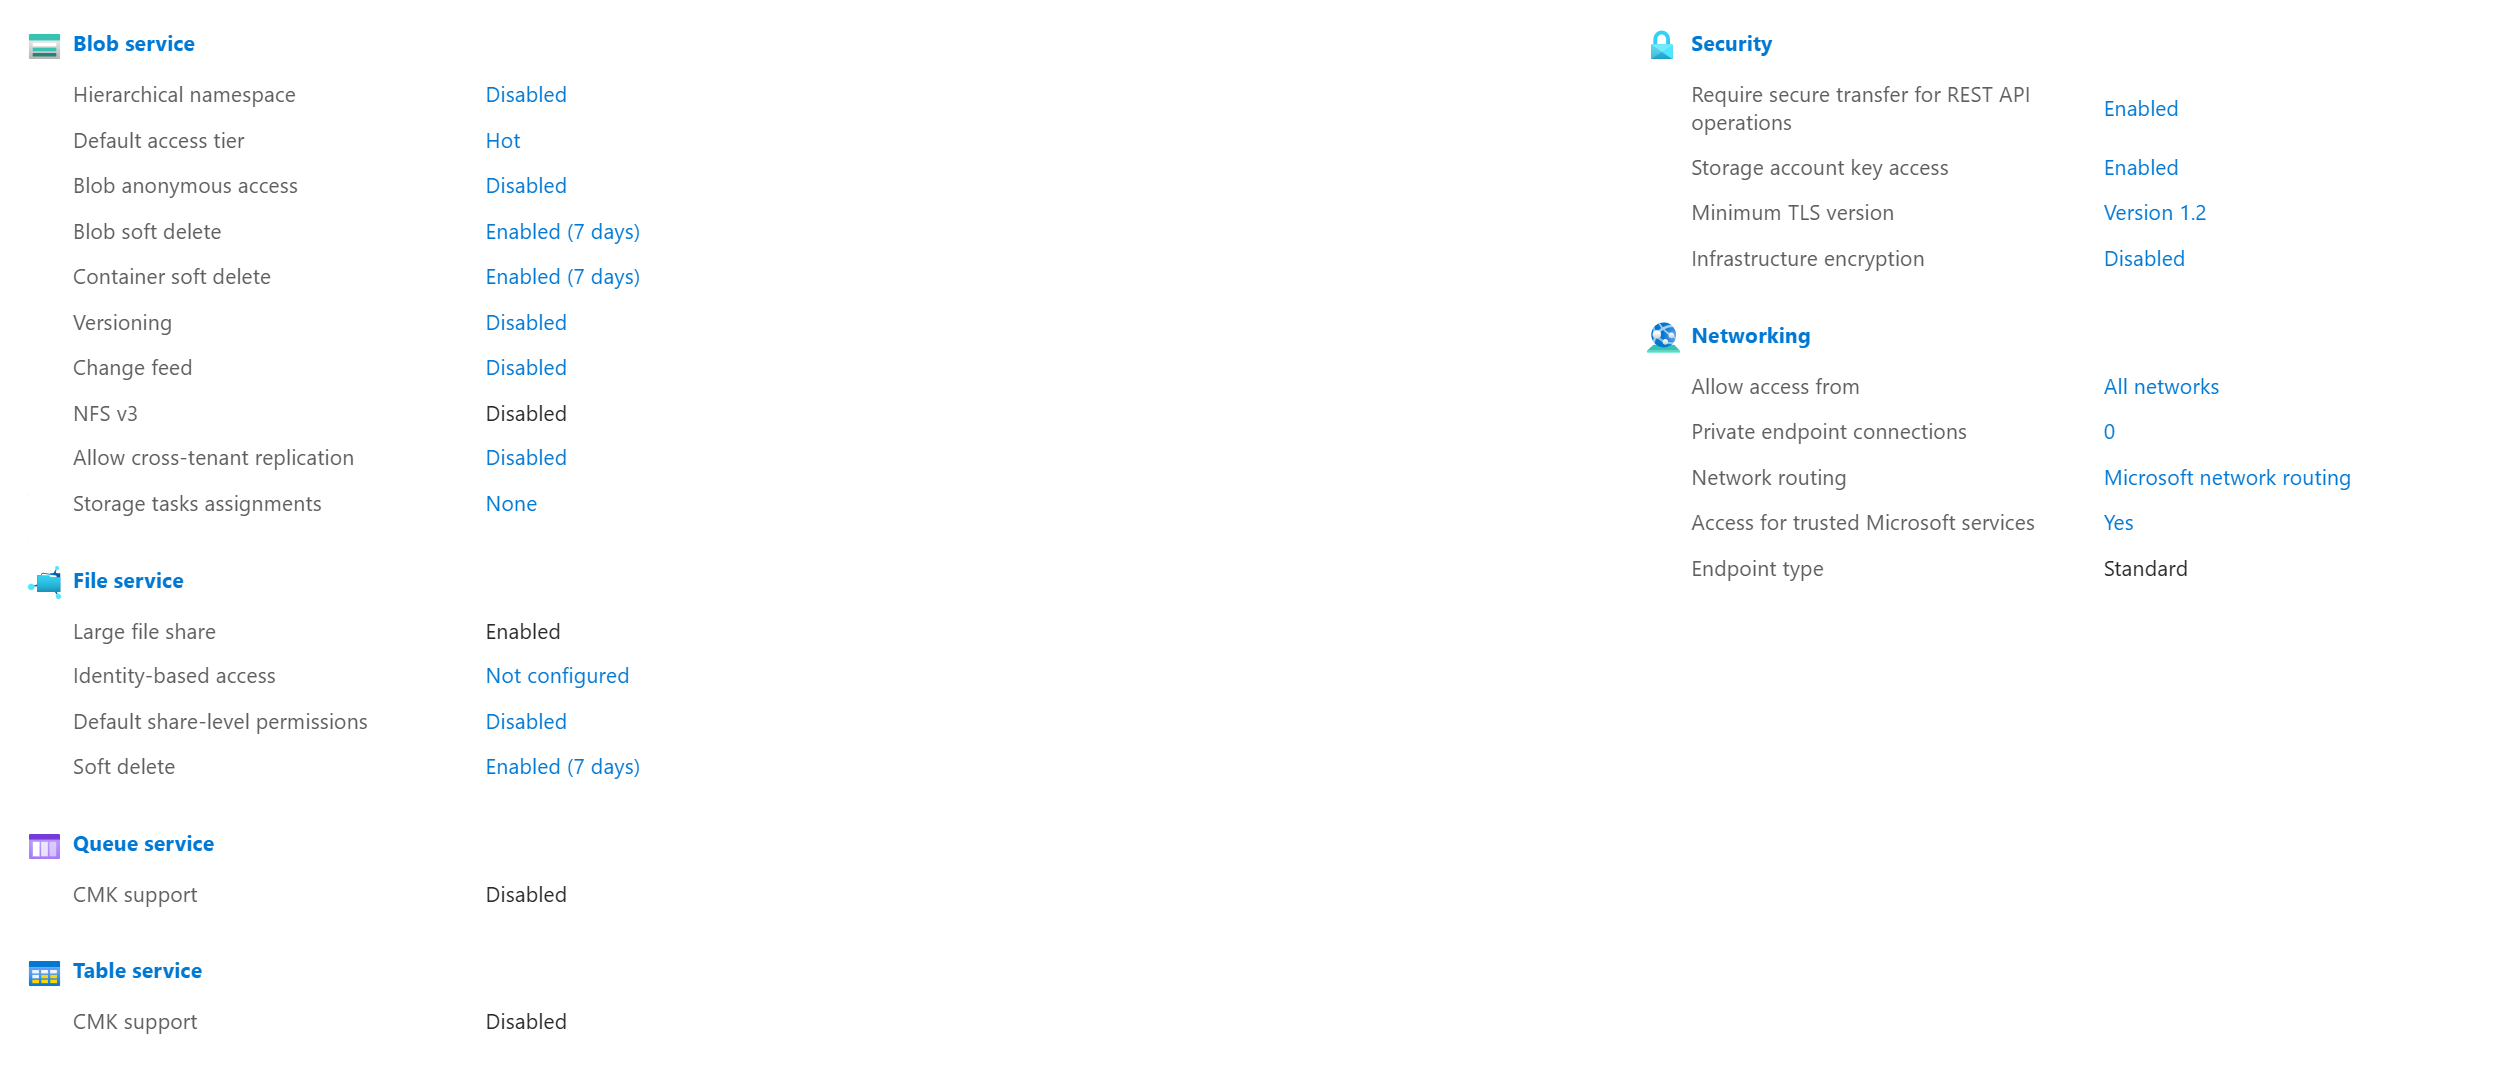
On the following pages, at time of writing the defaults are correct, but verify they match these before completing:
Creating a Container
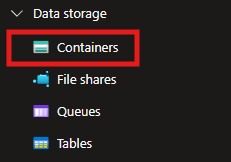
Once you have created your storage location, you will then need to add a container to store the invoices.
Click on Add Container to create a new container
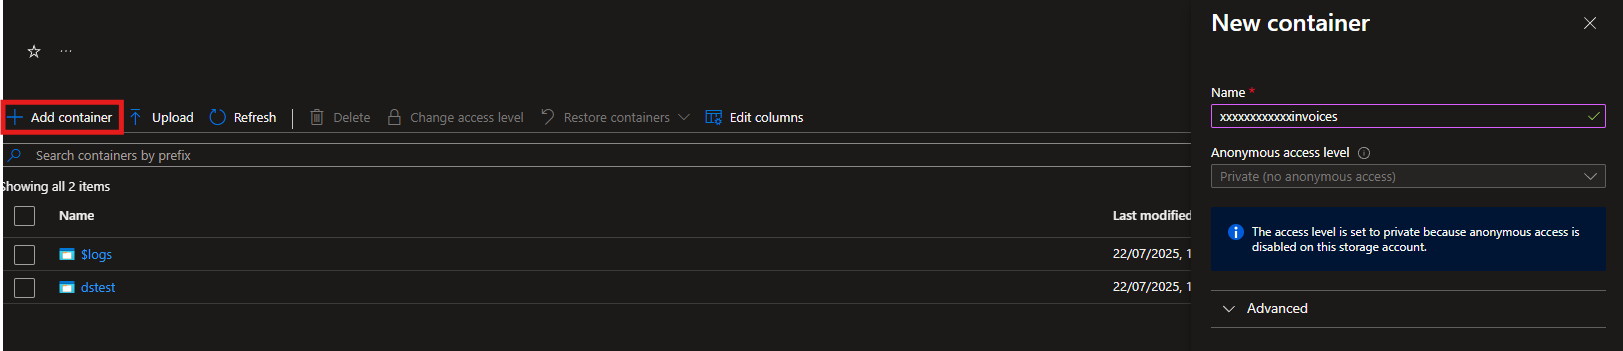
This new container should be named xxxxxxxxxxxxinvoices with the customers serial number replacing the x's.
Leave the rest of the settings as the default.
Getting the details from Azure for population in NCompass.
Give the below details to the Support Engineer configuring the customer's system.
| NCompass Field | Azure Location | Example |
| Description | N/A (value doesn't need to match Azure) | |
| Account Name | Security + Networking -> Access Keys -> Storage Account Name |
|
| Container Name | Data Storage -> Containers -> Name of the Container Created |
|
| Container Endpoint | Settings -> Endpoints -> Blob service -> Blob service |
https://ncompassstoragebeta.blob.core.windows.net/ |
| Account Key 1 | Security + Networking -> Access Keys -> Key 1 | LxN8uQp1zKaM7fT+YrjGdVbHcwXqEo9sRm== |
| Account Key 2 | Security + Networking -> Access Keys -> Key 2 | |
| Connection String | Security + Networking -> Access Keys -> Connection String | DefaultEndpointsProtocol=https;AccountName=ncompassstoragebeta;AccountKey=LxN8uQp1zKaM7fT+YrjGdVbHcwXqEo9sRm==;EndpointSuffix=core.windows.net |
| Connection String 2 (If Present) | Security + Networking -> Access Keys -> Connection String 2 |


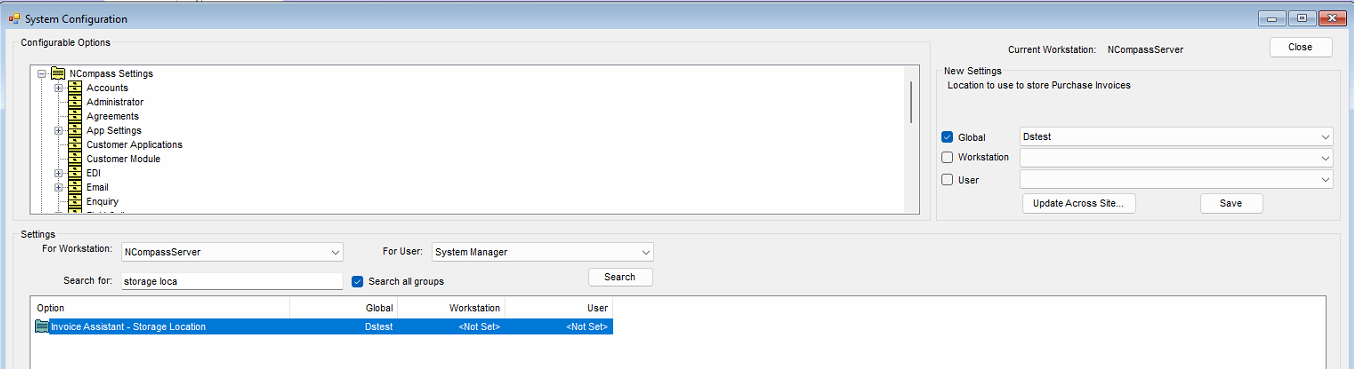
The following config needs to be set with the storage location once created and set up inside of NCompass.
Splitting Multiple Supplier Invoices from a Single PDF
If a supplier sends multiple invoices within a single PDF file, NCompass can automatically split the document into separate invoice files during processing.
Prerequisites
Before enabling this feature, ensure you know the text that consistently appears on either the first or last page of every invoice (for example, "Page 1").
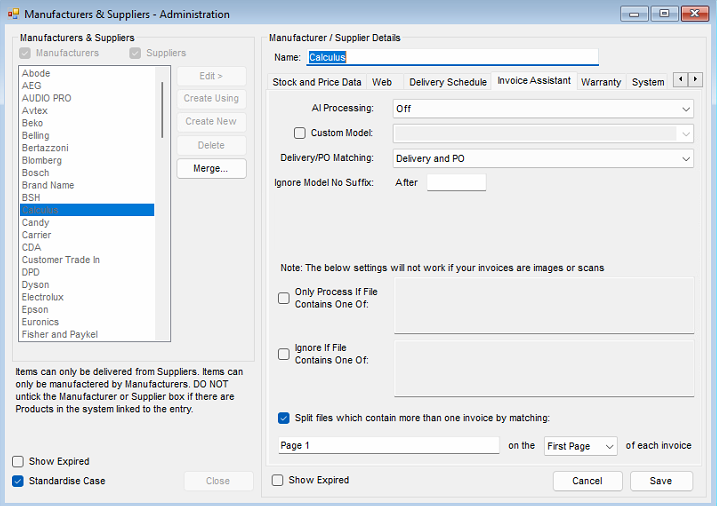
Enabling Invoice Splitting
Configuring the Split
Once enabled, NCompass will split the PDF whenever it finds a specified piece of text.
Split on First Page
Choose this option if the matching text appears on the first page of every invoice.
For example:
- Split On: First Page
- Matching Text:
Page 1
This will create a new invoice each time "Page 1" is detected, ensuring that invoices spanning multiple pages remain together.
Split on Last Page
Choose this option if the matching text appears on the last page of every invoice.
NCompass will end the current invoice whenever the specified text is found and begin a new invoice on the following page.
Processing Supplier Invoice Files
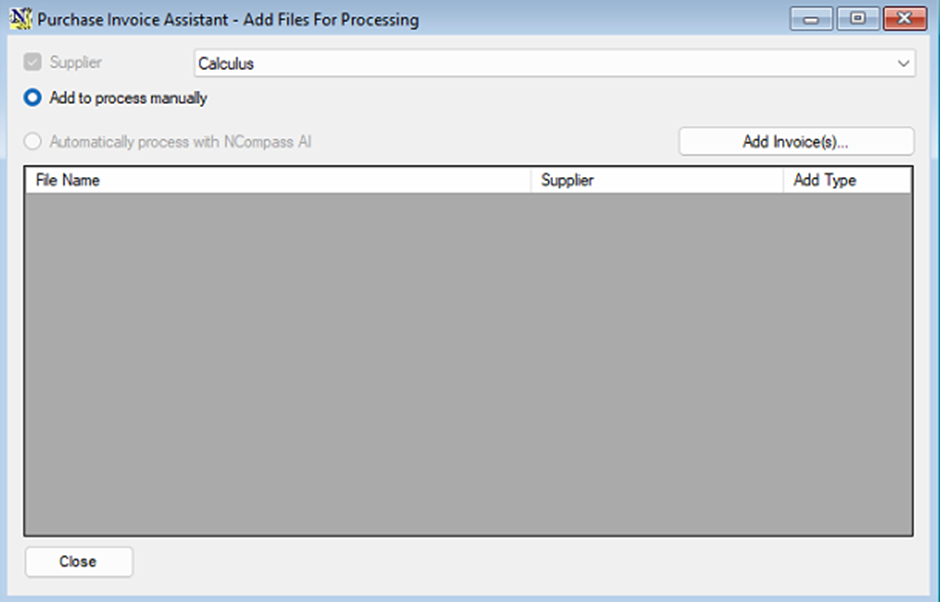
The Invoice Assistant allows you to upload supplier invoice PDFs into NCompass and process them into purchase invoices. This can simplify invoice entry and retain the original invoice document for future reference.
Adding Invoice Files
To upload invoices ready for processing:
Processing Uploaded Invoices
To process the uploaded invoice files:
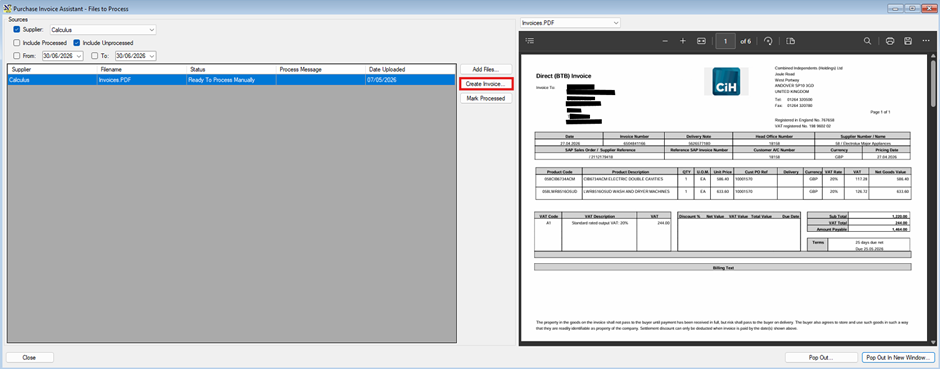
Viewing the Invoice While Processing
Opening the invoice in a separate window can make data entry much easier, particularly when using two monitors.
Recommended setup:
- Monitor 1: Purchase Invoice entry screen
- Monitor 2: Supplier Purchase Invoice popped out in new window.
This allows you to reference the supplier's invoice while entering the details into NCompass.
Exporting Invoice Attachments
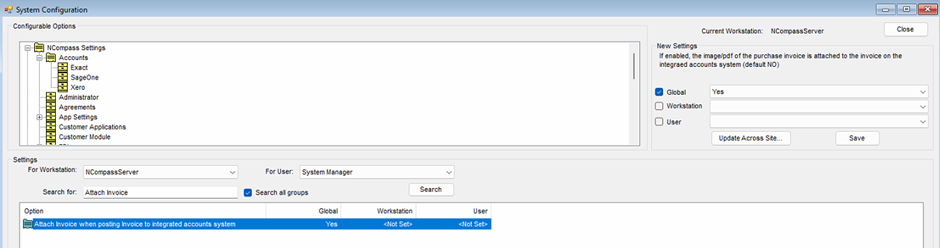
If you export purchase invoices to your accounts package using the NCompass API integration, the original supplier invoice PDF can also be exported and attached to the purchase invoice.
This is supported when exporting to:
- Xero
- Sage
This allows users within the accounts package to view the original supplier invoice directly from the purchase invoice record. The following config needs to be set.
Setting up mailbox to strip invoices from emails
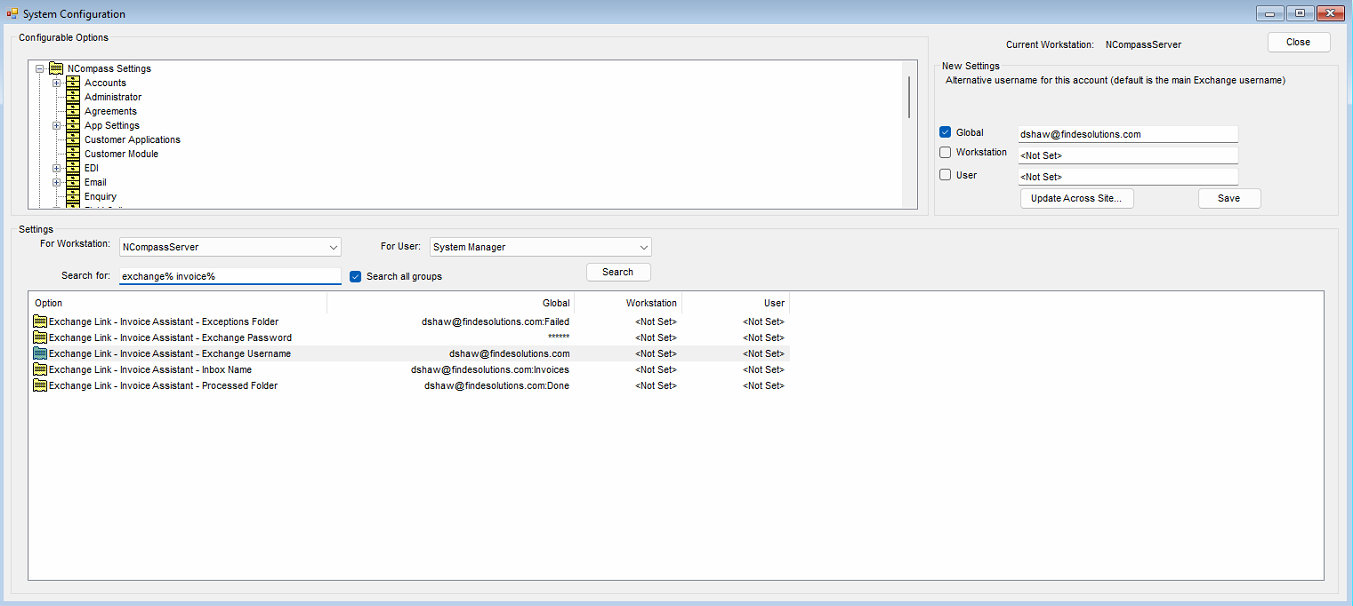
The following configs need to be set
Invoice Assistant Supplier Settings
Most of the behaviour of the Invoice Assistant is controlled per supplier rather than system-wide, because every supplier lays its invoices out differently. This page describes the settings held against a supplier and what each one does.
The AI-assisted parts of the Invoice Assistant are in private beta and are only enabled for selected customers. If the options below are not visible on a customer system, please check with Calculus support.
Where to Find the Settings
Which Supplier to Set Them Against
The file-handling settings (AI processing, custom model, file filters, splitting) belong against the supplier the invoice comes from – the account you upload the files under.
The line-matching settings (Ignore Model No Suffix and Attempt matching on Model No ignoring the first N characters) belong against the supplier the goods were bought from. On a centrally-billed invoice these are not the same record: if a central biller invoices you for goods supplied direct by a manufacturer, set the matching options against the manufacturer, not against the central biller.
AI Processing
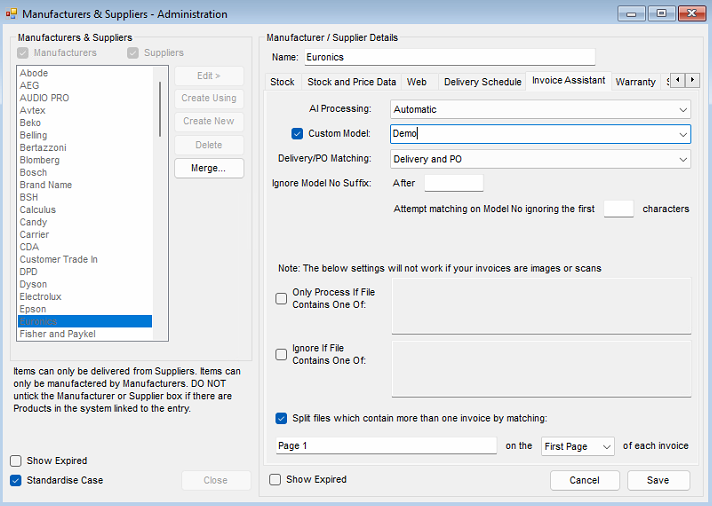
The AI Processing drop-down decides whether files uploaded against this supplier are read automatically:
- Off – files are stored against the supplier but never read by the assistant. Invoices are entered by hand alongside the document.
- Manual – the file is read only when someone selects it and clicks AI Process. Useful while a new supplier is being set up, or when investigating a supplier whose invoices are not reading well.
- Automatic – the file is read as soon as it arrives, so invoices are already matched and waiting when someone opens the assistant. This is the setting to use for suppliers whose invoices arrive by email into a monitored mailbox.
Custom Model
By default the assistant reads invoices using the model named in the configuration setting Invoice Assistant - Default AI Model Name, which ships as a general-purpose invoice model.
Where a supplier's invoices are consistently laid out, a model can be trained specifically for them, which reads their invoices far more reliably. Tick Custom Model and select or type the model name to use it. When a custom model is set against a supplier, that model is used directly – the default model is not tried first.
Both the default model name and any custom model name should only be set on the advice of, or by, Calculus. Entering a model name that does not exist will stop that supplier's invoices being read at all.
Deciding Which Files to Process
Suppliers often send statements, credit notes and remittances through the same route as invoices. Two options let you filter those out before any processing happens:
- Only Process If File Contains One Of – the file is processed only if it contains one of the pieces of text you list.
- Ignore If File Contains One Of – the file is discarded if it contains one of the pieces of text you list, even when it also matched the option above.
Currently only invoices are matched using AI. We suggest the setup is to process only files containing the word “Invoice”, but ignore anything containing “Statement” or “Credit Note”.
Splitting Multi-Invoice Files
Split files which contain more than one invoice by matching handles suppliers who send several invoices inside a single PDF, splitting it into one file per invoice before anything else happens. Enter the text that appears once per invoice and say whether it is on the first or the last page of each invoice. This is covered in full on the Splitting Multiple Supplier Invoices from a Single PDF page.
All three of the options in this section work on the text inside the PDF. They cannot work on invoices that are scans or images, because there is no text to search. The screen shows a reminder of this above the settings.
Delivery/PO Matching
Invoice lines are tied back to what you actually received using the delivery note reference and the Purchase Order number printed on the invoice. The Delivery/PO Matching drop-down says which of those to expect from this supplier:
- Delivery and PO – both are expected.
- Delivery Only
- PO Only – use this for suppliers who do not raise delivery notes at all, for example suppliers of services or non-physical products. Lines are then not held back for review simply because no delivery reference could be found.
Matching Model Numbers
The assistant matches an invoice line to a product using the model number or supplier part number printed on the invoice. Some suppliers print a model number that does not exactly match what is held in NCompass.
Ignore Model No Suffix
Some suppliers add a suffix to the model number on the invoice (a pack or revision indicator such as /3) which does not appear in the price files, so the part number is never stored against the product and the line fails to match.
Enter the character the suffix starts with in Ignore Model No Suffix: After. When a model number on the invoice contains that character, everything from its last occurrence onwards is stripped off before matching is attempted, leaving the base model number to match against your stored supplier part numbers.
Attempt Matching on Model No Ignoring the First N Characters
Other suppliers prefix the model number with a fixed code – typically a three-character manufacturer code. Where the invoices come through a central biller the prefixed form is usually stored as the supplier part number and matches without help, but on invoices received direct from the manufacturer it will not.
Enter the number of leading characters to disregard in Attempt matching on Model No ignoring the first N characters. This is an additional attempt, not a replacement: the full model number is still tried first, so part numbers that are stored in the prefixed form continue to match as before, and the shortened form is only used if the full one finds nothing.
The prefix length varies from supplier to supplier, so set the value per supplier rather than assuming one value fits all.
Leave either box empty to switch that behaviour off.
How the Invoice Assistant Reads and Matches Invoices
When the Invoice Assistant reads a supplier invoice, it tries to work out on its own which supplier the invoice is from, which delivery or Purchase Order each line relates to, and which product each line is for. This page explains what it reads, how it decides, and what the results on screen are telling you.
Where to Find It
The upper part of the window lists the source files, the lower part lists the invoices and lines read out of the selected file. The supplier settings that drive all of this are described on the Invoice Assistant Supplier Settings page.
What Is Read from the Invoice
For the invoice as a whole the assistant looks for the invoice number, invoice date, total including VAT, the supplier's own name, a central supplier name, the document type, payment terms, the bill-to postcode, and any delivery note or Purchase Order reference printed at invoice level.
For each line it looks for the model number, the line description, the quantity, the line price excluding VAT, and any delivery note reference printed against that particular line.
Suppliers label these things differently – one invoice says “Delivery Note”, another “Delivery Ref”, another “Document Type” against what a third calls “Invoice Type”. The assistant accepts several wordings for each field and takes the first one it finds, so a supplier does not need a bespoke setup simply because of their choice of headings.
Documents That Are Not Invoices
Where a document type is printed on the document and it indicates a credit note, debit note or return, the document is skipped rather than turned into a purchase invoice. This keeps credit notes and debit notes out of the list when a supplier sends them through the same route as their invoices, and works alongside the file-level filters on the supplier record.
Matching the Supplier
The assistant first tries the central supplier name if the invoice carries one, and only falls back to the supplier name otherwise. On centrally-billed invoices the paying account and the supplier of the goods are different, and it is the supplier of the goods that the deliveries and Purchase Orders in NCompass are held against – so this is what allows those lines to match.
Supplier names as printed rarely match your supplier records exactly. Use Unmatched Suppliers... to record what a printed name corresponds to; once mapped, later invoices carrying that name match automatically.
Matching Deliveries and Purchase Orders
Each line is tied back to the goods you received using the delivery note reference and the Purchase Order number, within the supplier that has been matched. Which of the two is expected is set per supplier by the Delivery/PO Matching option.
Delivery note numbers printed on invoices are frequently padded with leading zeros that are not present on the delivery notes as received. If a delivery reference does not match as printed and it begins with a zero, the assistant automatically tries again with the leading zeros removed, so these still match without anyone having to correct them by hand.
Where a reference is wrong or missing altogether, the Edit References panel lets you type the correct Delivery Ref or PO Ref and apply it to the selected lines. View Delivery... and View PO... open the matched record so you can check it.
Matching the Product
A line is matched to a product on the model number or supplier part number printed against it. Two supplier settings widen the search where a supplier's printed model numbers do not match what is stored – stripping a suffix from the end, and additionally trying the model number with a fixed number of leading characters disregarded. Both are described on the Invoice Assistant Supplier Settings page.
Where a supplier prints a model number but no description against a line, the model number is used as the line text, so the line still carries something meaningful into the purchase invoice.
Once a line is matched to a product, a line price that was read excluding VAT has the VAT calculated from the VAT rate held against that product, so the line arrives on the invoice complete even when the invoice only prints ex-VAT line values.
Other Values Carried Through
- Branch – taken from the matched delivery, and from the Purchase Order where there is no delivery.
- Payment terms – the terms printed on the invoice are mapped to your own payment terms and applied to the new purchase invoice, so the due date is right without anyone setting it.
- Descriptions – description mappings can be recorded so that recurring wording on a supplier's invoices always resolves to the same product.
Reading the Results
Each line is colour-coded so you can see at a glance what needs attention:
- Green – fully matched, including the outstanding quantity. These lines are ticked to be included automatically, so a clean invoice needs no line-by-line work.
- Yellow – matched, but the quantity does not line up with what is still outstanding.
- Orange – the quantity matches but the price differs from the outstanding cost.
- Red – needs review; something could not be matched.
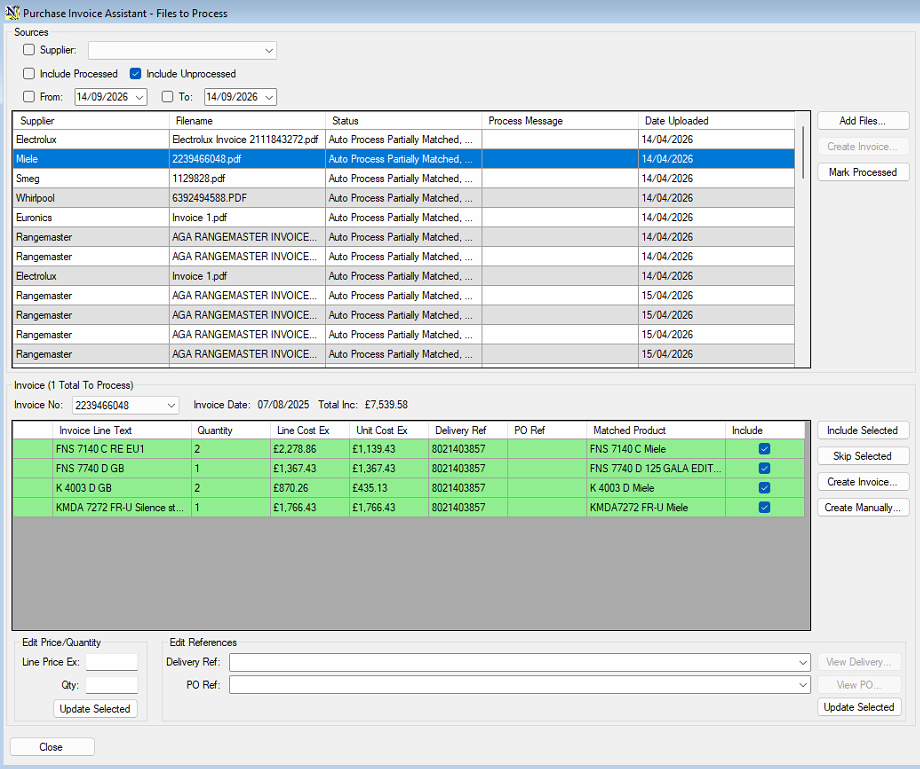
Lines that failed to match carry a warning icon. Hover over it for the reasons, which are specific – for example that the supplier name could not be matched, that the delivery reference could not be matched to a delivery for that supplier, that no delivery or PO reference was provided, that no product could be matched, or that there is no outstanding quantity left to invoice for that line.
Working Through an Invoice
- Include Selected – tick the selected lines to go onto the invoice.
- Skip Selected – leave the selected lines off.
- Update Selected in Edit References or Edit Price/Quantity – correct what was read from the document.
When the lines are right, Create Invoice... raises the purchase invoice from them, or Create Manually... starts an empty invoice with the document alongside. Mark Processed takes a file off the outstanding list without creating anything.