In the latest release of NCompass, staff selection and PIN entry can be enforced. This ensures: All actions are logged against the signed-in user, Improved auditing and accountability. **Please contact the Support Team if you are interested in enabling this feature.** If you get a Salesperson prompt on the scanner when logging in, select yourself from the drop-down menu. If you have a password set up in NCompass input it or just click 'Confirm' to log in.
Tip: You can return to the home screen at any time. If another user needs to log in, simply scan their QR code to fast-switch users — no logout required.
--- ## Navigation Access the full application menu by selecting the menu icon. [](https://kb.findesolutions.com/uploads/images/gallery/2025-12/AGlwGESWjZbc9Q6H-image.png)Tip: You can open the menu at any time while using the app to quickly switch processes.
--- ## Log Out To Log Out when you are finished with the App: - Click on the **Menu Icon** - Scroll all the way to the bottom of the menu - Click **Log Out**If the Supplier is enabled for **Two Step Goods In** (mentioned in the **Settings** Section) you will not be required to input a date or Delivery Note Number.
#### Add ProductsIf you are using **Two Step Goods In** as you scan the items EAN's the labels will print and stock booked in immediately at Step two bypassing the remainder of this guide. If items are not in the list that you expected you will need to speak to the member(s) of staff who input the delivery note details before the stock arrives to resolve.
[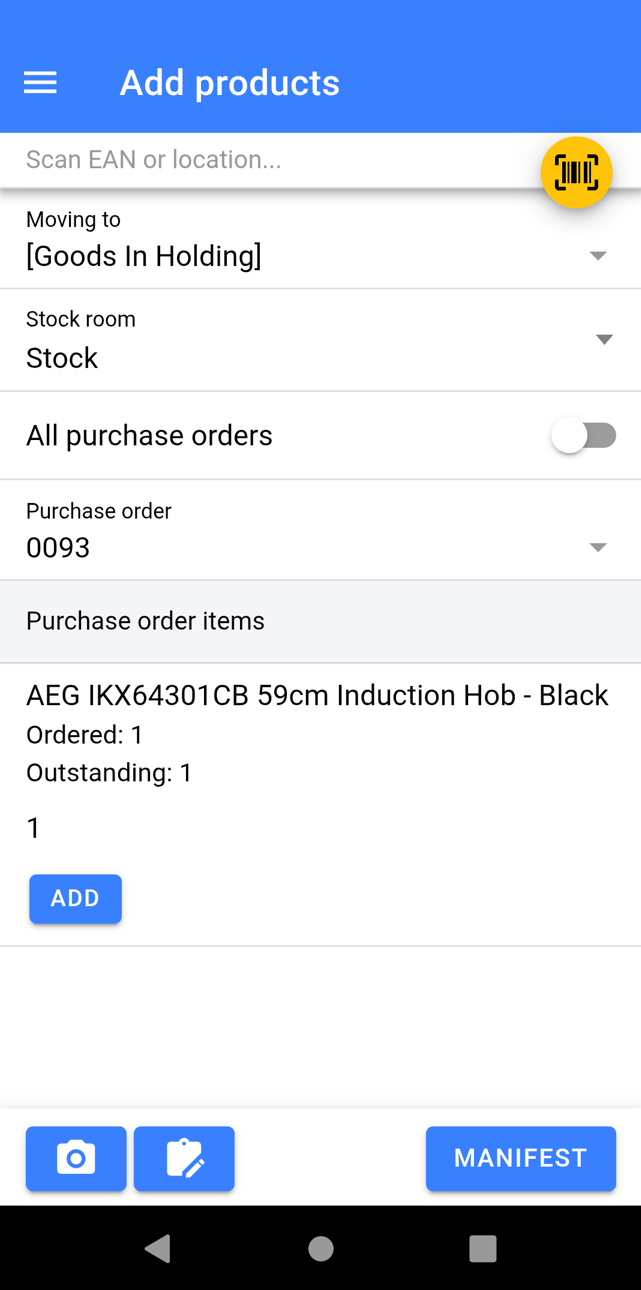](https://kb.findesolutions.com/uploads/images/gallery/2025-12/ZHMLl0MWv673ONh4-image.png) - If your process requires you to, scan a location barcode to store all the stock from the delivery into. All stock will default to be stored in **\[Goods In Holding\]** otherwise (**recommended method)** - Change **Stock Room** If required - Select **All Purchase Orders**, if you wish to book in stock regardless of what PO the item links to. - Select the **Purchase Order numbers** that you are receiving into stock on this **Delivery Note.** You can select multiple. [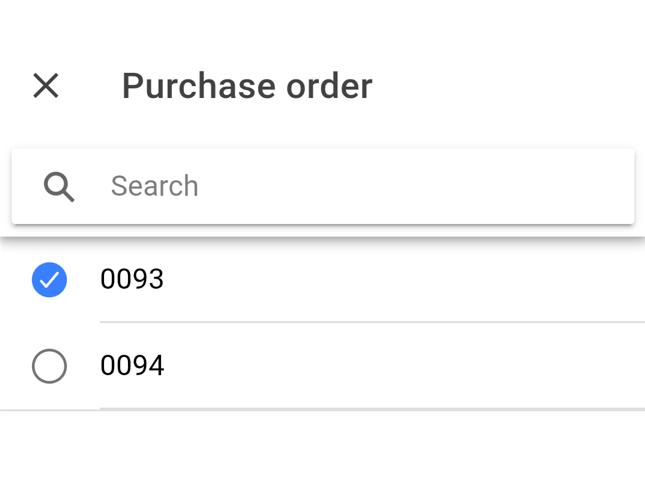](https://kb.findesolutions.com/uploads/images/gallery/2025-12/EqX1TbZsUUXYBAyL-image.png)Booking in from all PO's does come with a risk as if the same item is outstanding on multiple PO's you are losing the ability to select which PO the item has been received in from.
You will now be presented with a list of the item(s) you are expected to receive into stock: - **Scan the EAN** of the product which will book 1 into stock. It will also prompt for a Quantity to receive in. Alternatively: - Against each item in the list specify a quantity for those you have received and click **Add** [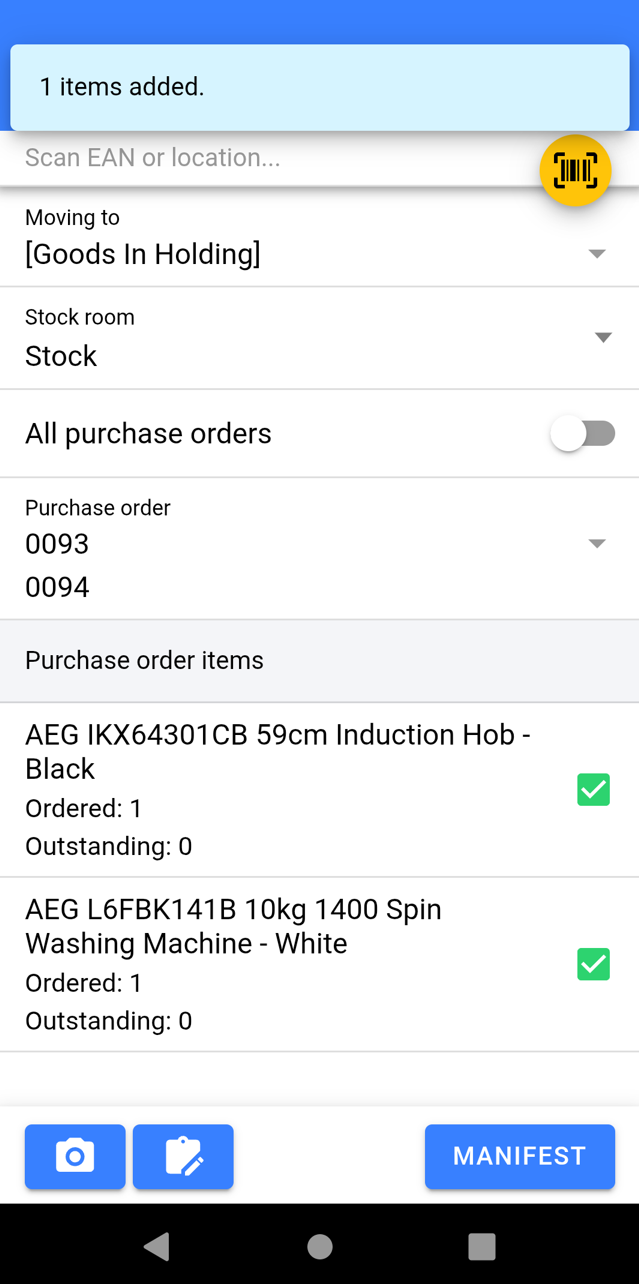](https://kb.findesolutions.com/uploads/images/gallery/2025-12/m9QTAfUWkQlbiSTc-image.png) Once you have scanned/ Added all the items on the Delivery Note: - **Attach images** if required, especially if there were any damages to goods. - Click **Manifest** #### Manifest [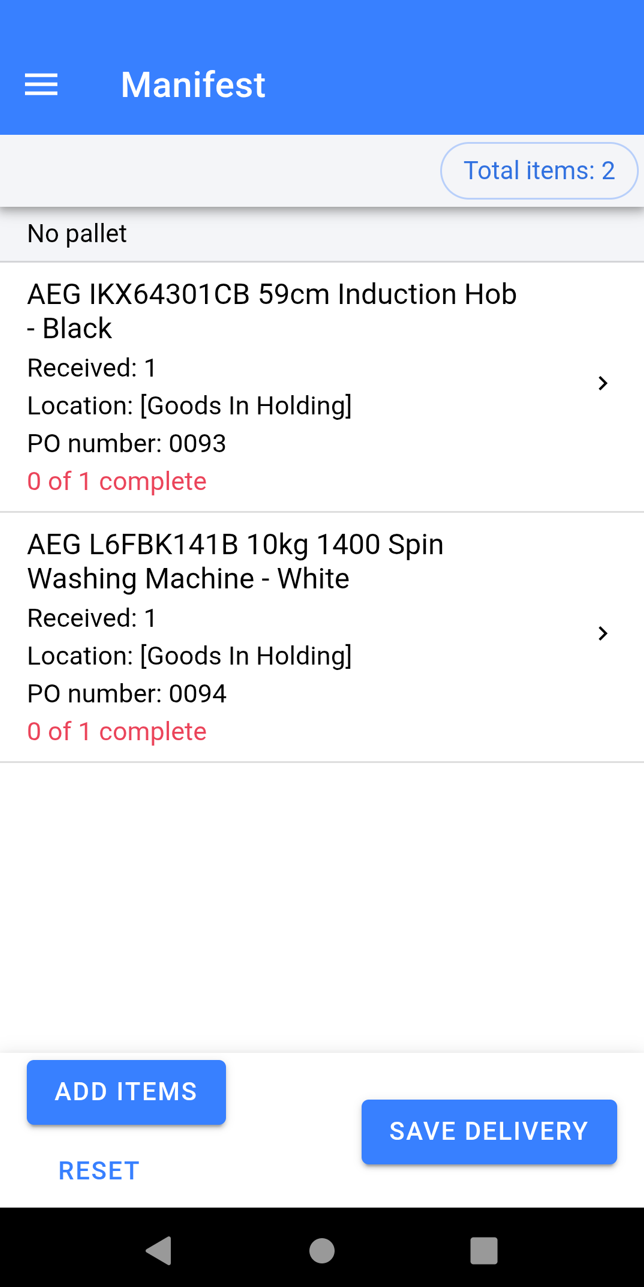](https://kb.findesolutions.com/uploads/images/gallery/2025-12/4k4OxZkESOqsap7f-image.png) - Ensure the Total Quantity matches what you expected. - Check the correct items have been booked in against paperwork/items you have physically received If you have missed item(s): - Click **Add Items** If you have booked something in error: - Click on the item and **Swipe to Remove individual items** or Click **Remove All** to get rid of all of the selected items quantity. [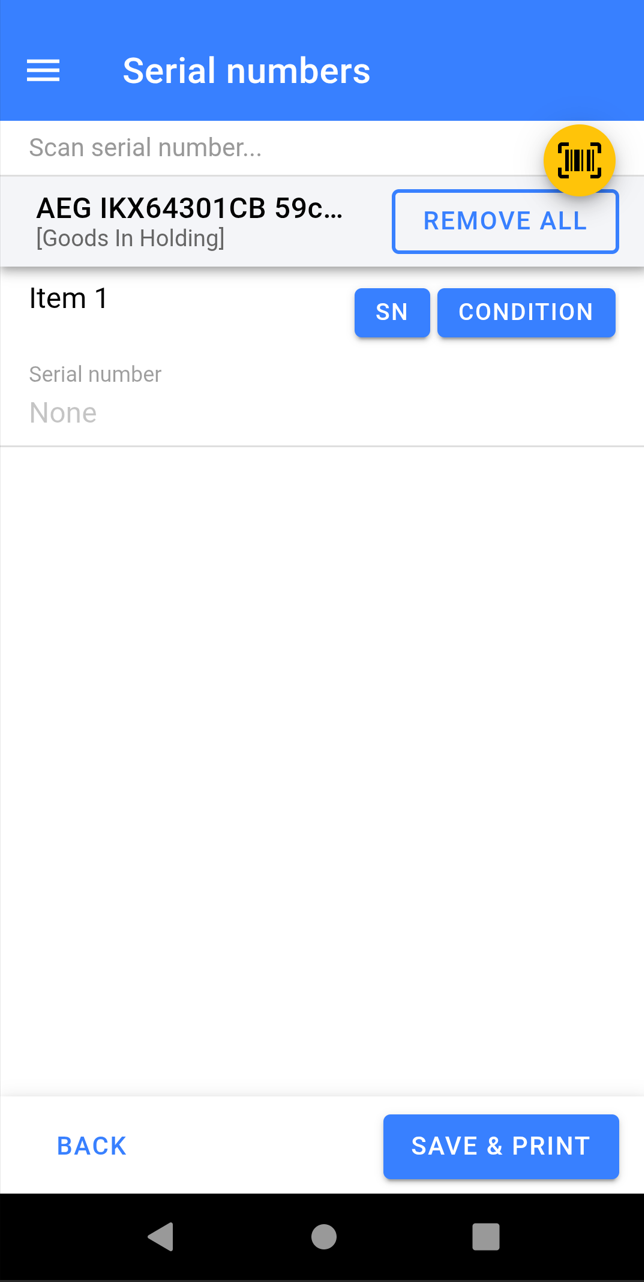](https://kb.findesolutions.com/uploads/images/gallery/2025-12/e25HaBW6H3nOlxFu-image.png) - Once you are happy the items in the Manifest are correct click **Save Delivery**. The items will now book into stock and the labels will print off to be stuck on the boxes. ##### Capturing Serial Numbers and Condition - Click on the item(s) you need to capture Serial Number/Condition for - **Scan the Serial Numbers to Add them** in, you do not need to click into each SN - Click into the Condition Notes to Add Condition, Pricing, and Stock Number Specific Images. - Once finished Click **Save & Print** [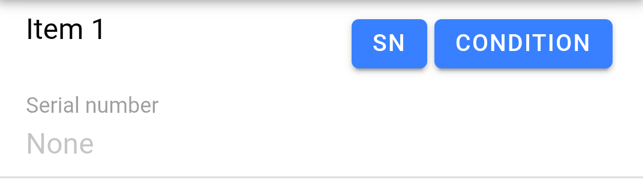](https://kb.findesolutions.com/uploads/images/gallery/2025-12/67rFC5G9KWD3dRRS-image.png) # Supplier Collection When raising a Supplier Return in NCompass you now have the option to mark the returned item as being collected by the Supplier at a later date. This is the advised option at point of raising the Return and can be defaulted in configuration. The Warehouse scanner supports marking the returned item as collected and can obtain evidence such as images, uplift numbers, and signatures during the process. ### Settings - Navigate to **Administration > Manufacturers & Suppliers** - Click on a **Supplier** - Navigate to the **Stock Tab** There are two settings to **change the behavior** in the app upon marking items as collected which need to be done on a Supplier level: 1. **Require signature** for stock returns 2. **Require photo** for stock returns Each can be set to either: - **Yes** - Forces the user - **No** - Skips the step - **Remind** - Prompts the step --- ### Marking Returns as Collected - Navigate to **Supplier Collection** - Select the **Supplier** - All the items which are waiting to be returned from the selected supplier will appear. [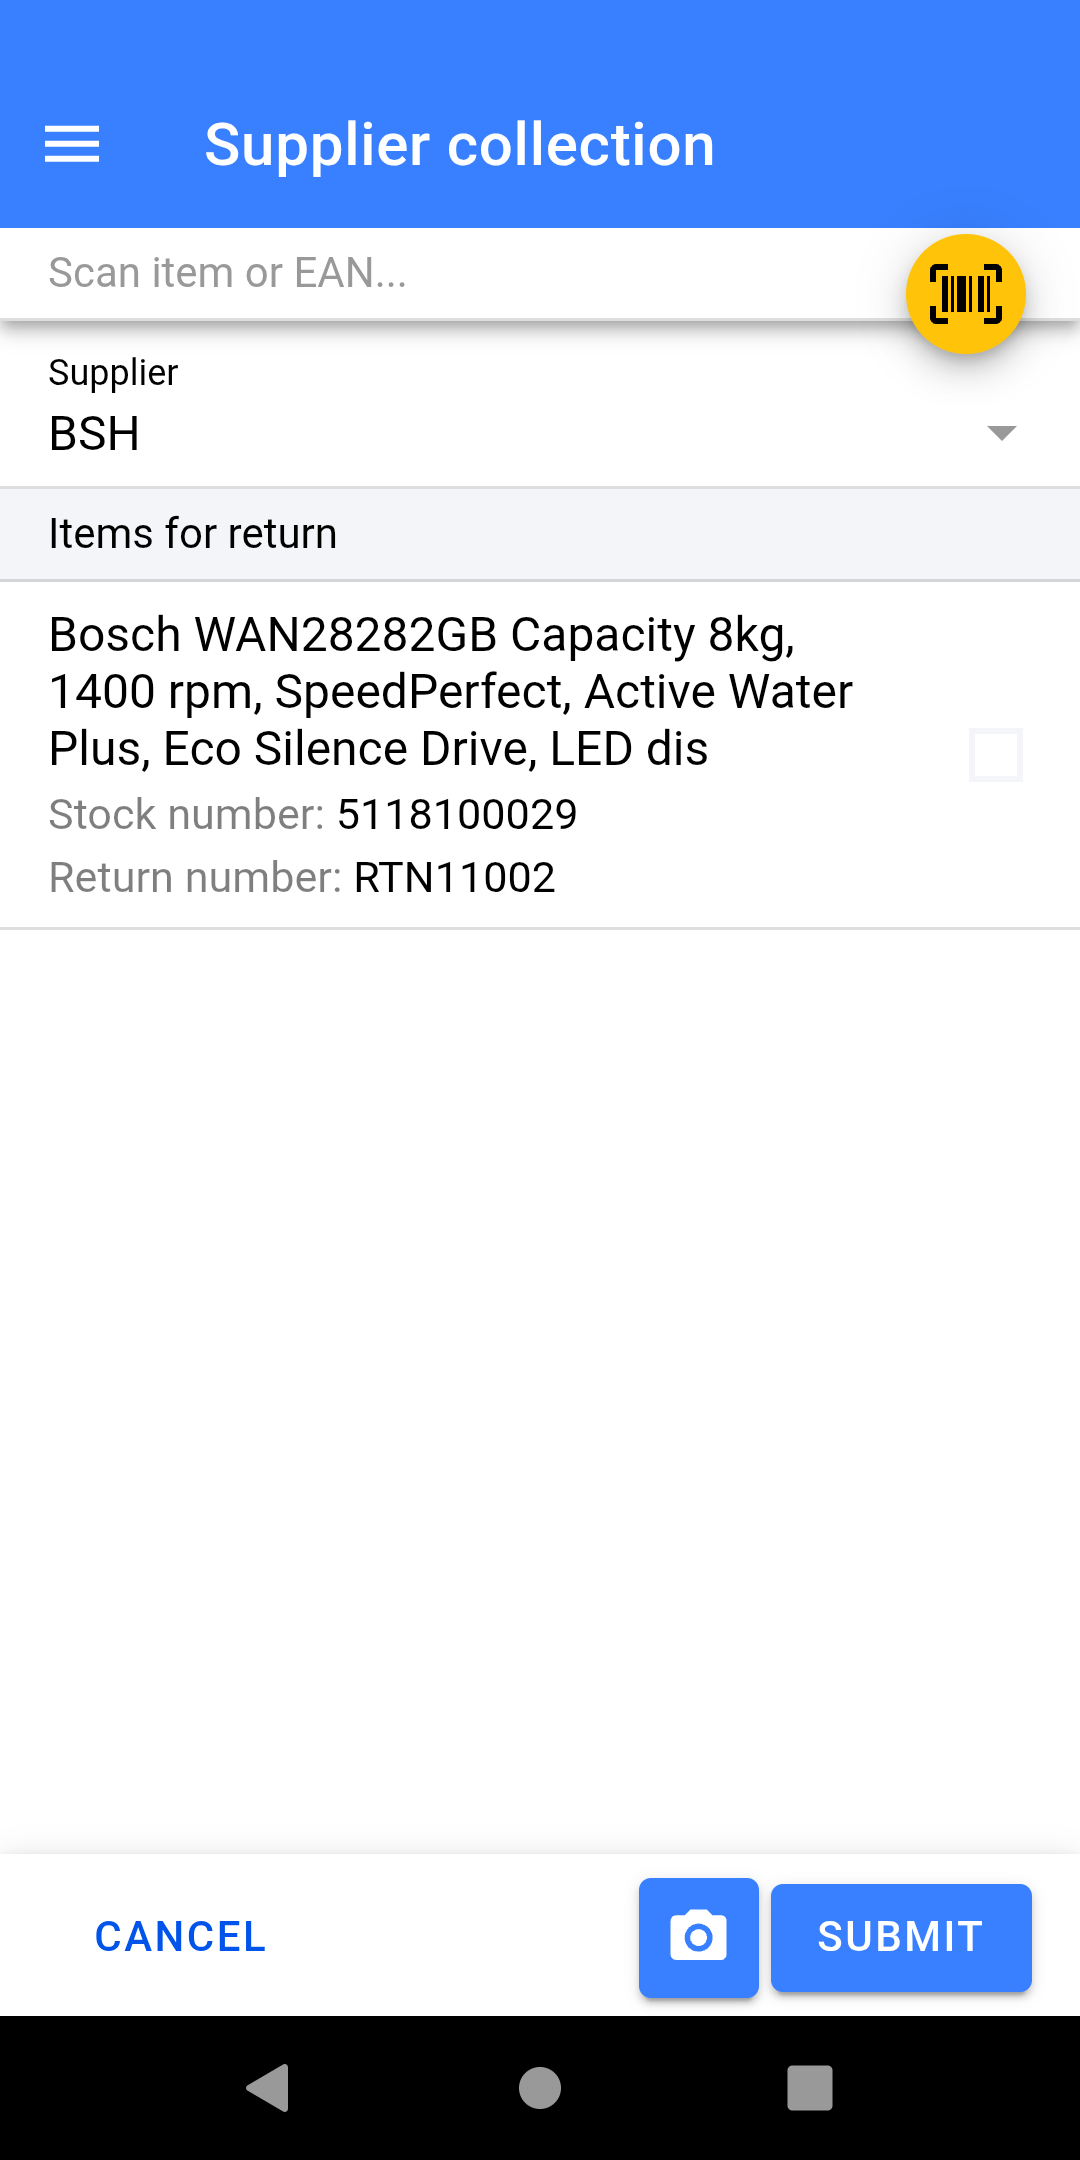](https://kb.findesolutions.com/uploads/images/gallery/2025-12/tneSbBDQAH90GL4c-screenshot-20251223-133604.png) - **Scan the stock number label** for the item being collected. - Enter the **Uplift Number** - Take **Photo** (if required) - Click **Submit** [](https://kb.findesolutions.com/uploads/images/gallery/2025-12/YnWMo7DZDBhwGPjh-screenshot-20251223-133648.png) Depending on your settings you may now be prompted or forced to capture a **signature** from the driver collecting the goods.If you have preset the Uplift number in NCompass before the goods are collected then this step will just ask you to confirm the uplift, rather than inputting it which will save time.
# Manual Store ### Accessing Manual Store The Manual Store feature is used to store specific stock numbers into a stock location. To navigate to the Manual Store section on the warehouse scanner, click the burger menu icon in the top left of the screen. From the menu, select the **Manual Store** option. [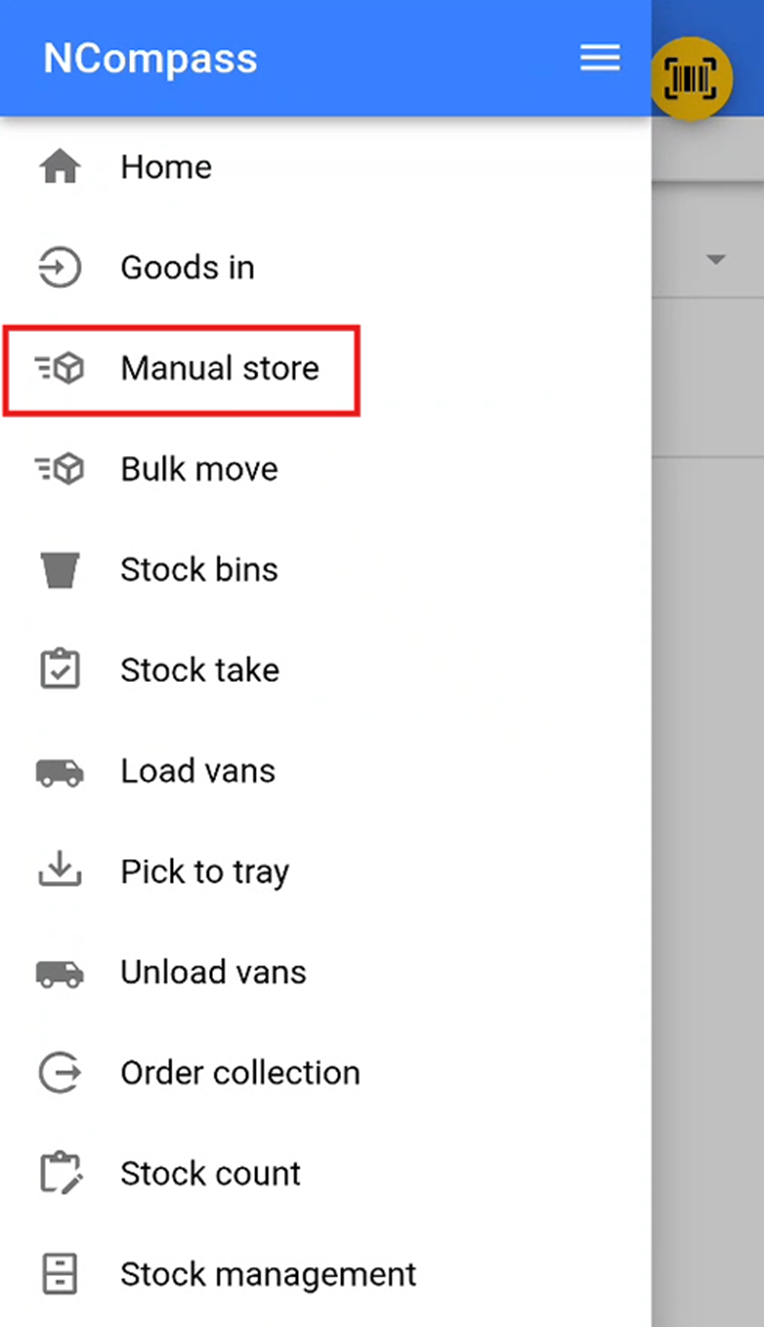](https://kb.findesolutions.com/uploads/images/gallery/2025-12/0UzWSAVgCY3ycuTr-image.png) --- ### Selecting a Stock Location Select the stock location where you wish to store the stock. You can do this by either: - Scanning the stock location QR code or barcode provided, or - Selecting a stock location from the dropdown list by pressing the small **▽** icon. [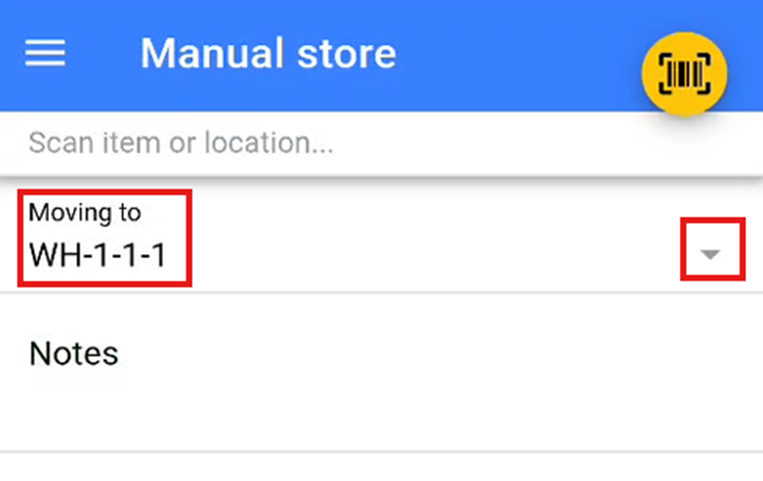](https://kb.findesolutions.com/uploads/images/gallery/2025-12/RP7StqrXo5b7mtxZ-image.png) --- ### Storing Items Scan or add all items that you wish to store in the selected stock location. Once all items have been added, click the **Store** button to move the items into this location. [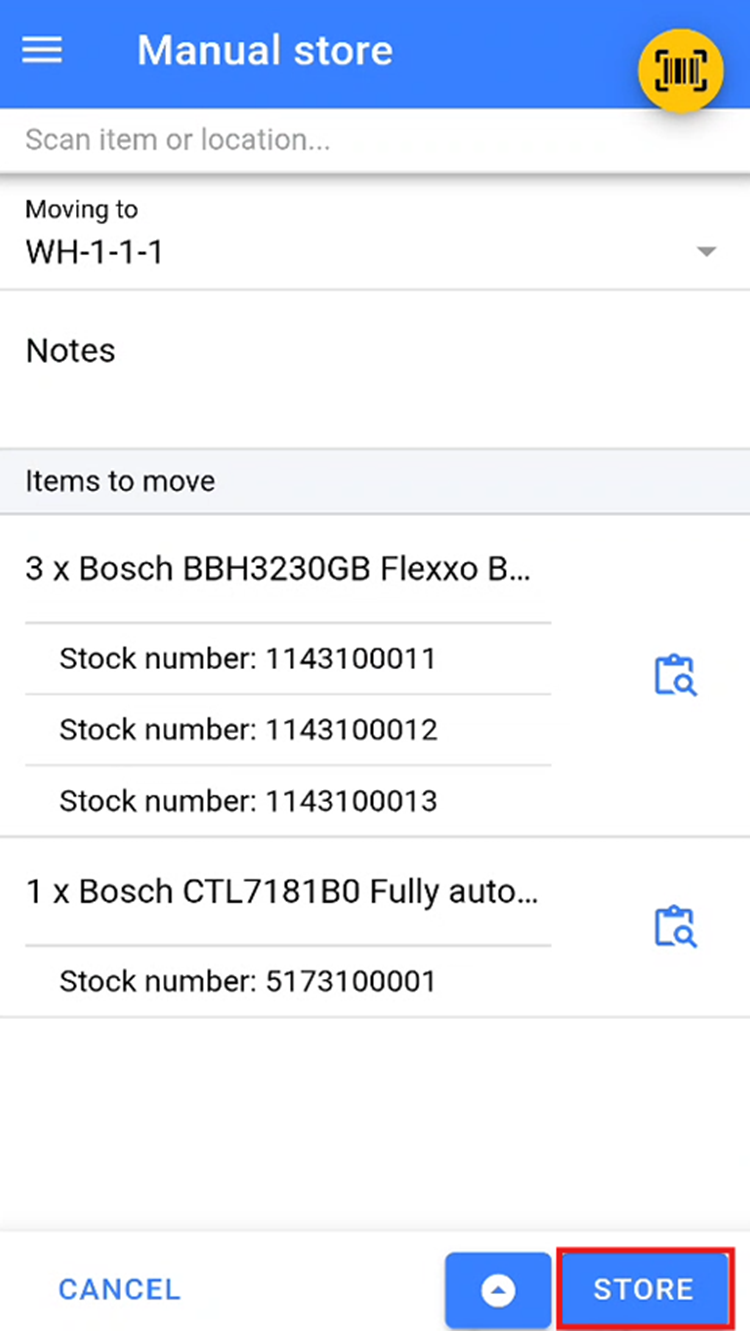](https://kb.findesolutions.com/uploads/images/gallery/2025-12/88ac9f4US8bIJp8D-image.png) # Bulk Move Bulk Move is used to move large quantities of items at one time. To navigate to the Bulk Move section on the warehouse scanner, click the burger menu icon in the top left of the screen. From the menu, select the **Bulk Move** option. [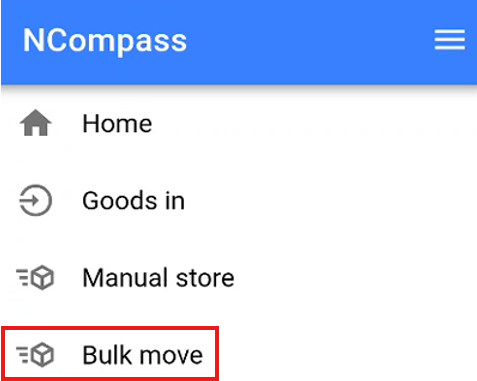](https://kb.findesolutions.com/uploads/images/gallery/2025-12/k4qS2w8hWW7Ir80s-image.png) --- ### Bulk Moving By Stock Number When the Bulk Move screen opens, you will see a message indicating that no items have been picked. [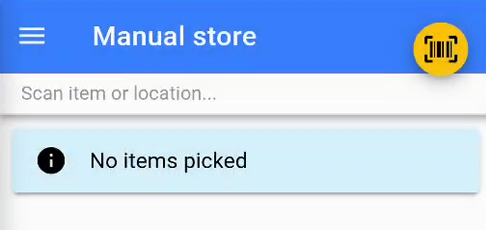](https://kb.findesolutions.com/uploads/images/gallery/2025-12/KdYa0a7gn8LY1AHn-image.png) Begin scanning the individual stock numbers that you wish to move. [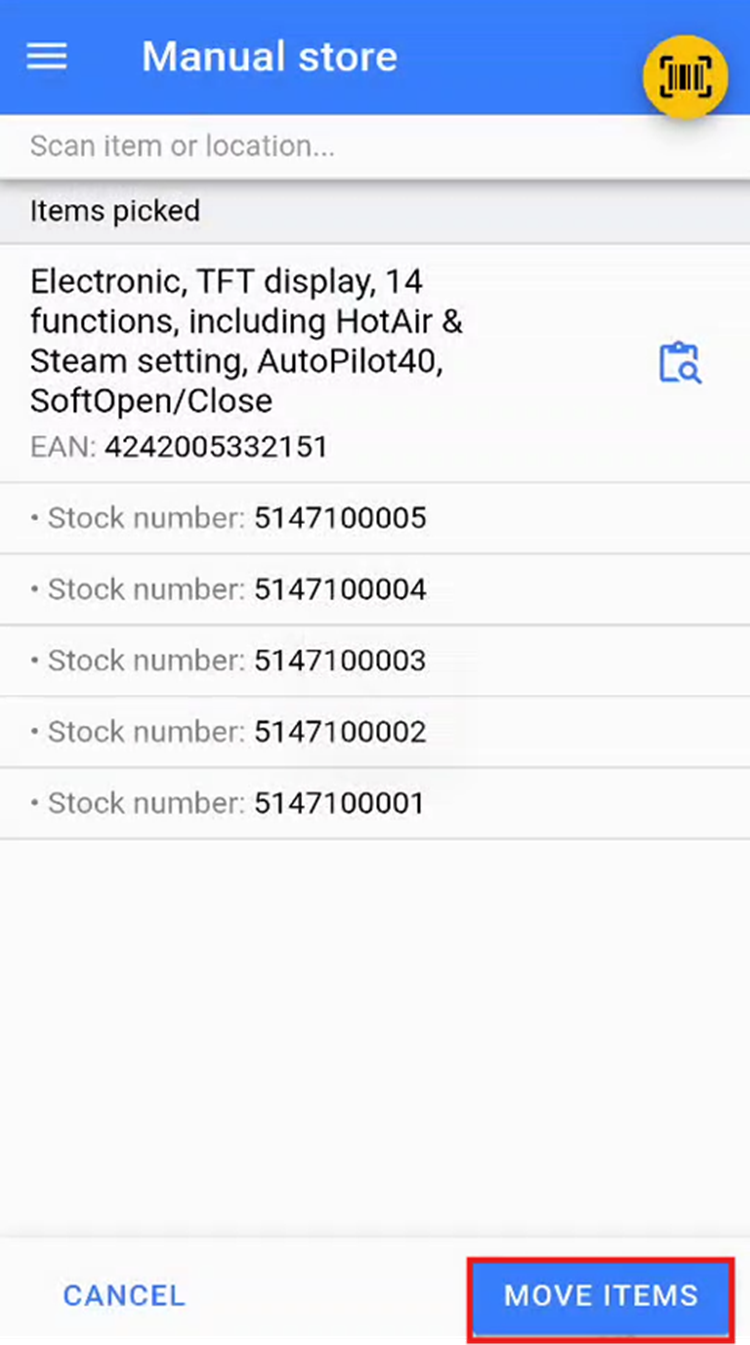](https://kb.findesolutions.com/uploads/images/gallery/2025-12/mYVhb957HOy2NKTb-image.png) Once all required items have been scanned, click the **Move Items** button to confirm the selection. This will open the **Move Items** screen, where you can either scan a stock location or select one from the dropdown menu. Select the location you wish to move these items to, then click **Move Items** to confirm the bulk move. [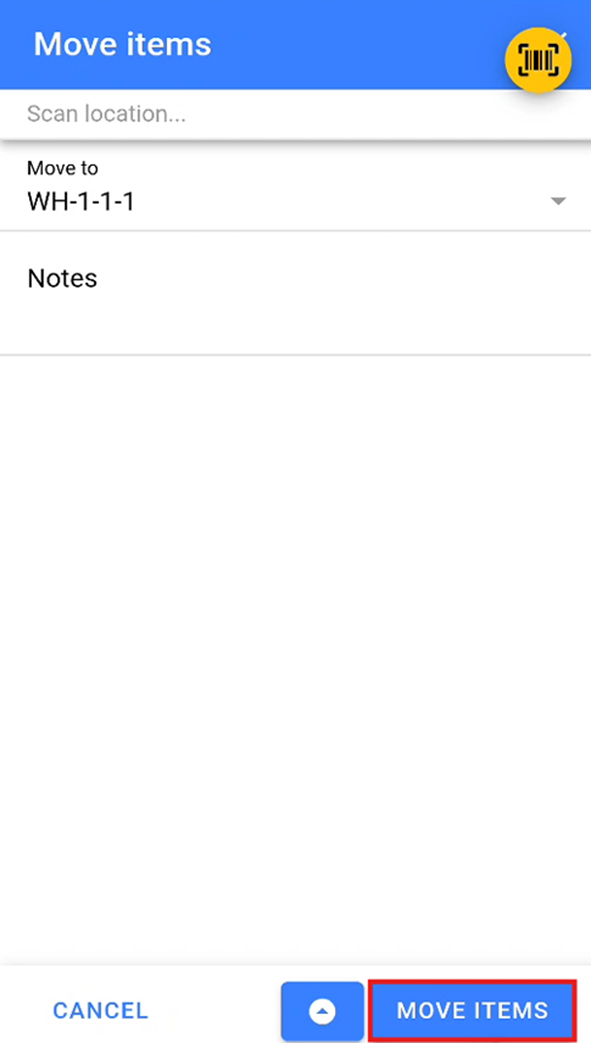](https://kb.findesolutions.com/uploads/images/gallery/2025-12/VNH0fYd0XI0wZC90-image.png) --- ### Bulk Move By Stock Location On the Bulk Move screen, you can also scan a stock location. This will return a list of all items and their associated stock numbers currently stored in the scanned location. [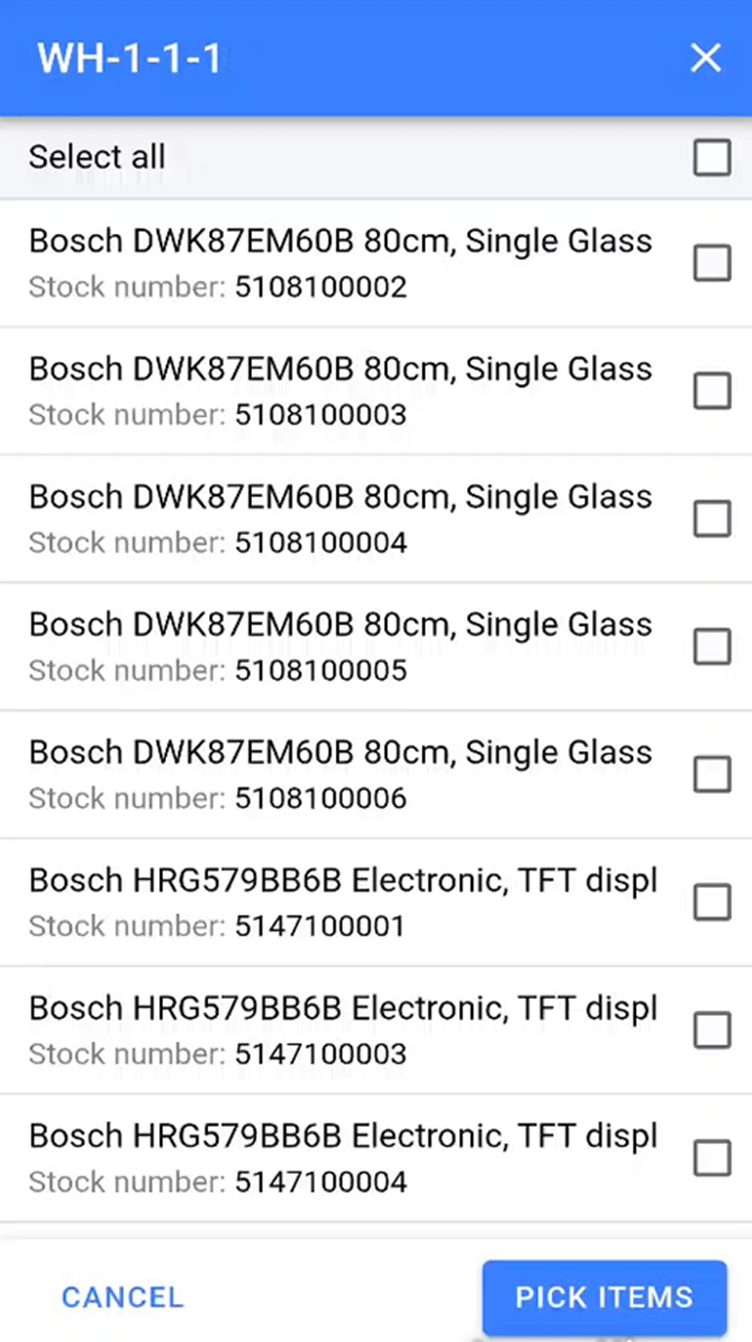](https://kb.findesolutions.com/uploads/images/gallery/2025-12/oKeKXJJJBj7TNyfh-image.png) You can manually select the stock numbers you wish to move by tapping on them. Selected items will be indicated by a checked checkbox to the right of each item. If you wish to bulk move all items from the current location, click the **Select All** option at the top of the list. Once you have selected all items you wish to move, click the **Pick Items** button to confirm the products you are removing from this stock location.Note: You can continue adding products onto this list again by scanning another stock location and repeating the above step or by scanning stock numbers.
Once you have selected all the items you wish to move click the move item button to confirm the items to move. [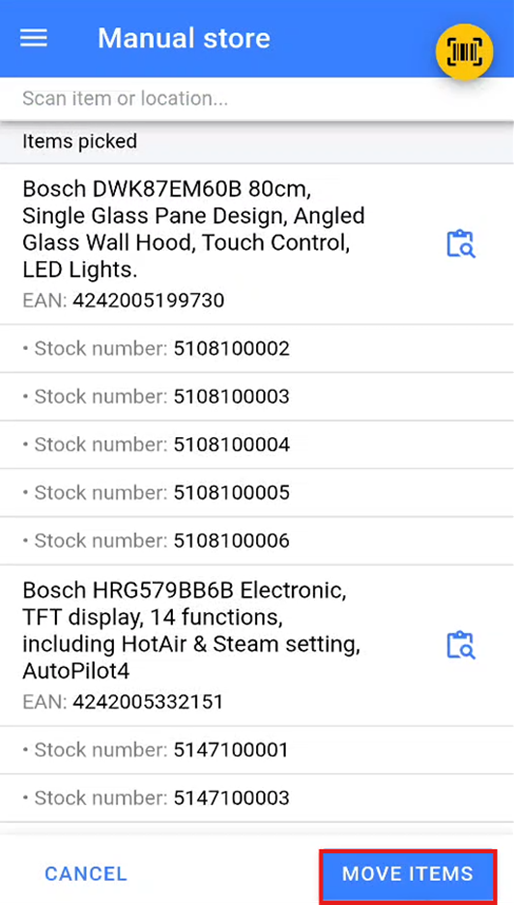](https://kb.findesolutions.com/uploads/images/gallery/2025-12/y60EGBUVvcolKZzw-image.png) This will open the **Move Items** screen, where you can either scan a stock location or select one from the dropdown menu. Select the location you wish to move these items to, then click **Move Items** to confirm the bulk move. [](https://kb.findesolutions.com/uploads/images/gallery/2025-12/VNH0fYd0XI0wZC90-image.png) # Stock Take Stock Take By Location Inside the desktop version of NCompass, navigate to **Products > Stock Count > Stock Take by Location**. This will bring up a list of all stock locations that you currently have set up in your system, along with the last time they were stock checked. Click the **Mark ALL as Not Scanned** button to set the scan status of all locations to *Not Scanned*. This will help you track which stock locations still need to be scanned as you undertake your stock take. [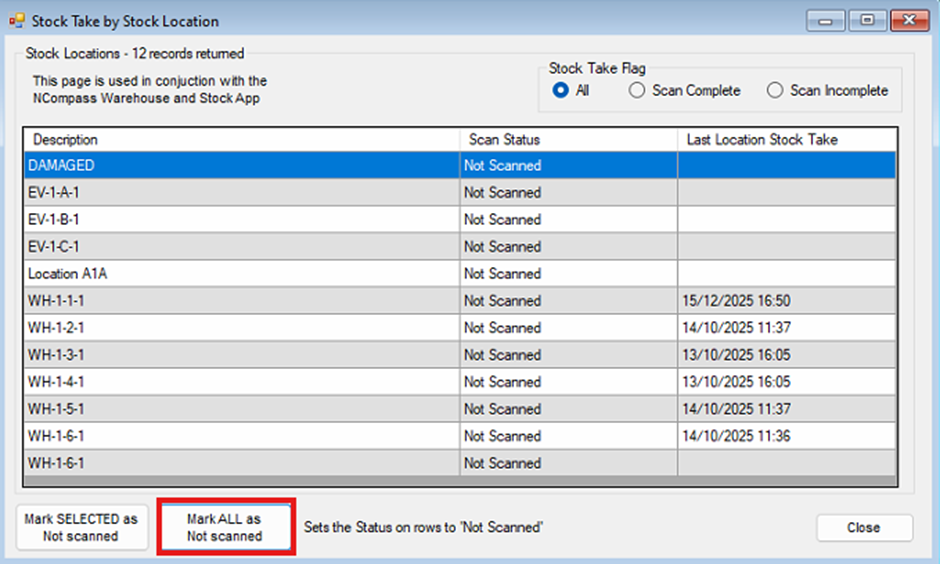](https://kb.findesolutions.com/uploads/images/gallery/2025-12/SnsGDggSS7wNwwCR-image.png) --- ### Stock Take Detailed Mode On the warehouse scanner, click the burger menu in the top right of the screen to open the menu. Then click the **Stock Take** option to start undertaking your stock take. [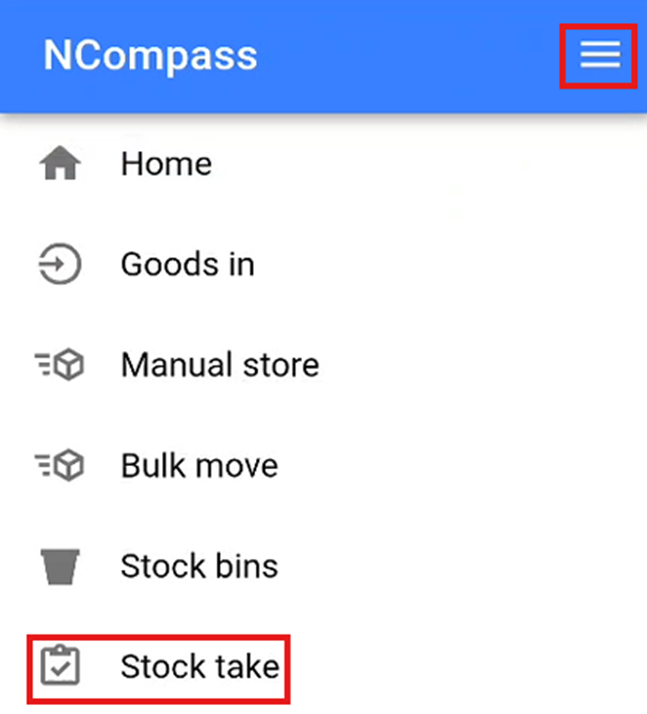](https://kb.findesolutions.com/uploads/images/gallery/2025-12/HZvtbYPJlgCrHBPb-image.png) You will now need to scan the stock location that you wish to undertake a stock take on. This will populate all the stock numbers that are currently stored in this location and that you would expect to find. [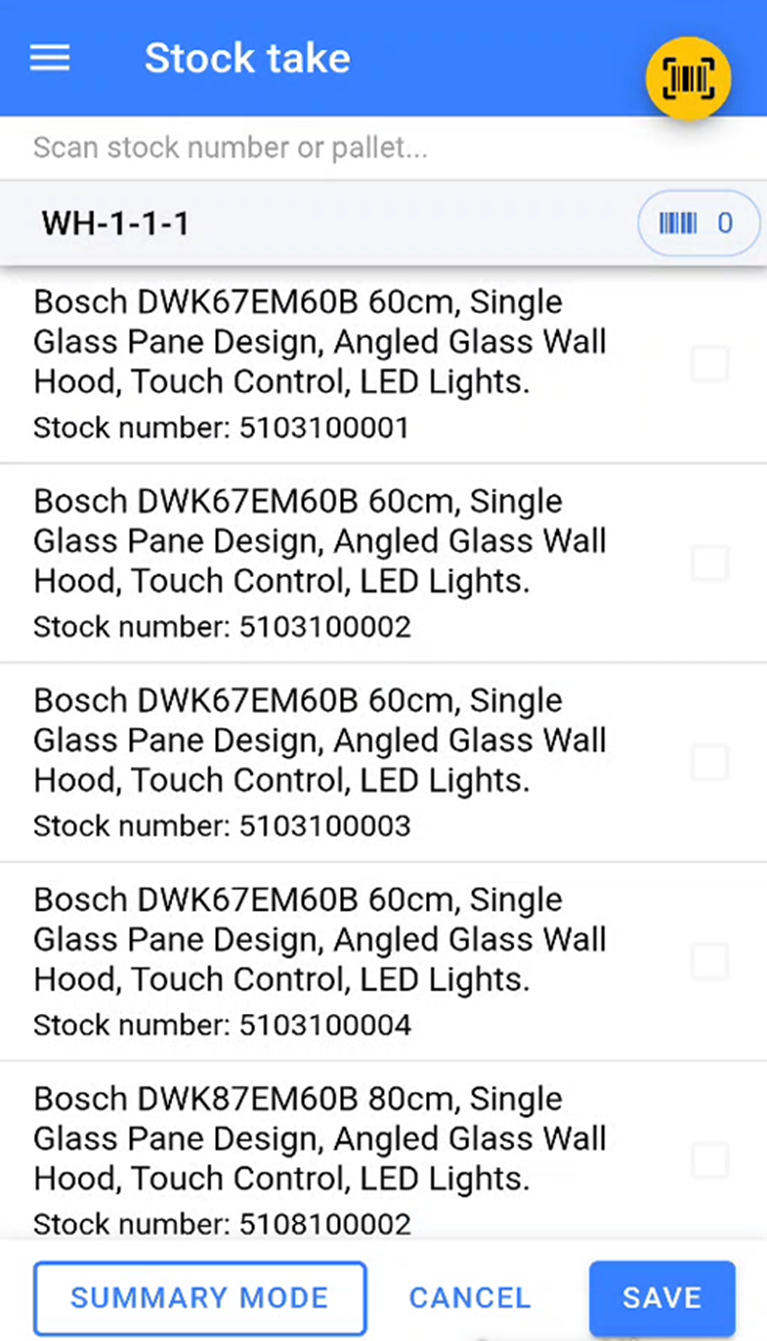](https://kb.findesolutions.com/uploads/images/gallery/2025-12/tOSOOSkVfTCPlgZV-image.png) You will now need to start scanning the stock numbers that are physically sitting inside that location in the warehouse.Once you have started a stock take, you must ensure that you scan all items in that location. If you complete a stock take halfway through scanning, you will need to restart the stock take and scan all items inside the physical location again.
As you scan the stock numbers, the warehouse app will tick off the stock numbers as they are scanned. You will be able to see how many stock numbers have been scanned in this location by the number next to the small barcode icon. Any items that remain unticked are items that the system expects to be in this location but are not physically there. Once all stock numbers that are physically in that location have been scanned, click **Save** to complete the stock take. [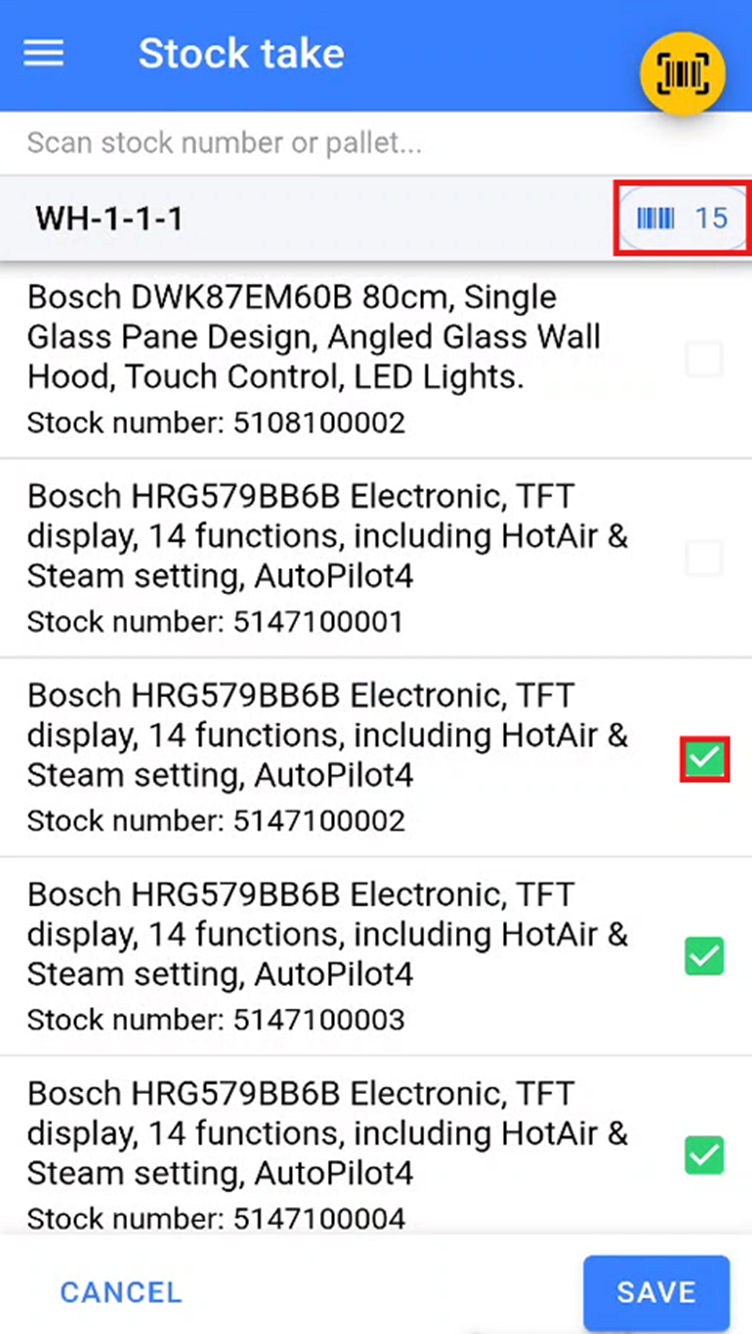](https://kb.findesolutions.com/uploads/images/gallery/2025-12/LZ081kNpyXcYtdxH-image.png)Any items that were expected in that stock location but were not scanned during the stock take will be moved to a temporary \*\*Missed During Stock Take\*\* location to be dealt with at a later point.
Any items that are stored in another location but are scanned during the stock take are automatically moved to the location where the stock take is being conducted.
[](https://kb.findesolutions.com/uploads/images/gallery/2025-12/LZ081kNpyXcYtdxH-image.png) --- ### Stock Errors During your stock take, you may encounter a stock error. This occurs when a stock number that has been scanned is marked as not physically in stock in the warehouse. This is most likely due to the wrong stock number being marked as delivered to a customer. [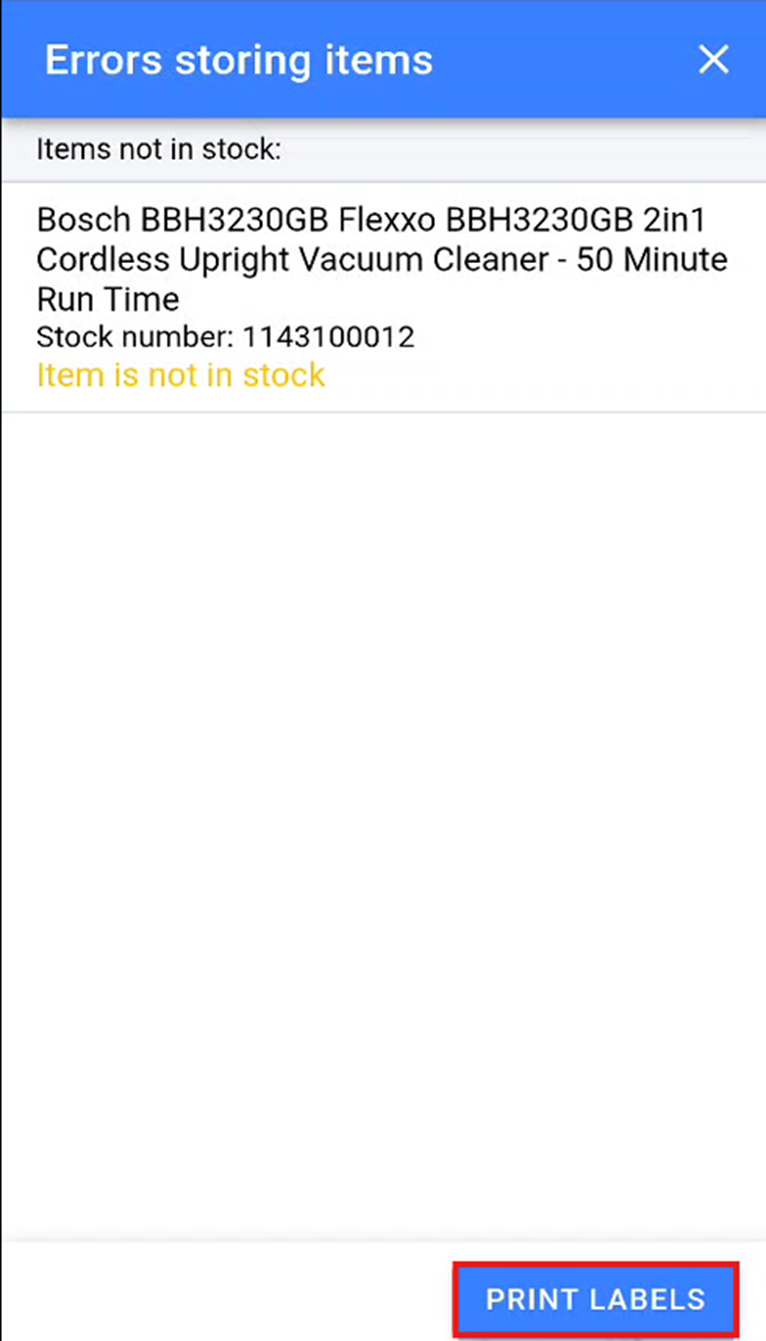](https://kb.findesolutions.com/uploads/images/gallery/2025-12/VNa3O7bHEqbPNKdw-image.png) We suggest that you print two stock error labels for each stock error and physically remove the item with the stock error from the bay. You will then need to stick one of the stock error labels directly over the existing stock number to indicate that the stock number for this product needs to be amended. --- ### Summary Stock Take Mode If you store multiple units of the same item within a stock location, you can undertake a stock take using summary mode. To enter summary mode, click the **Summary Mode** button at the bottom left of the screen after selecting a location to undertake your stock take on. [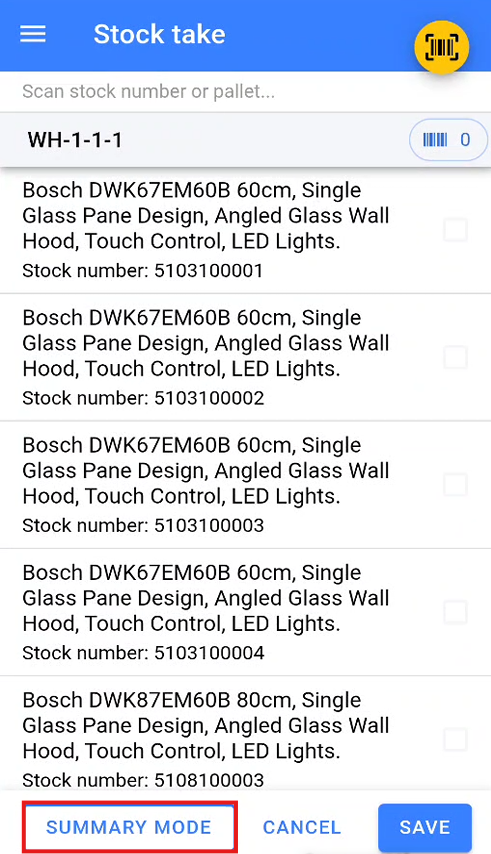](https://kb.findesolutions.com/uploads/images/gallery/2025-12/74ipVNxO84zYtzZP-image.png) This will display a blank list ready for you to populate. During the summary stock take, you will need to scan the EAN of the product you wish to count. Once the EAN has been scanned, enter the quantity of the item that has been counted in the physical location. [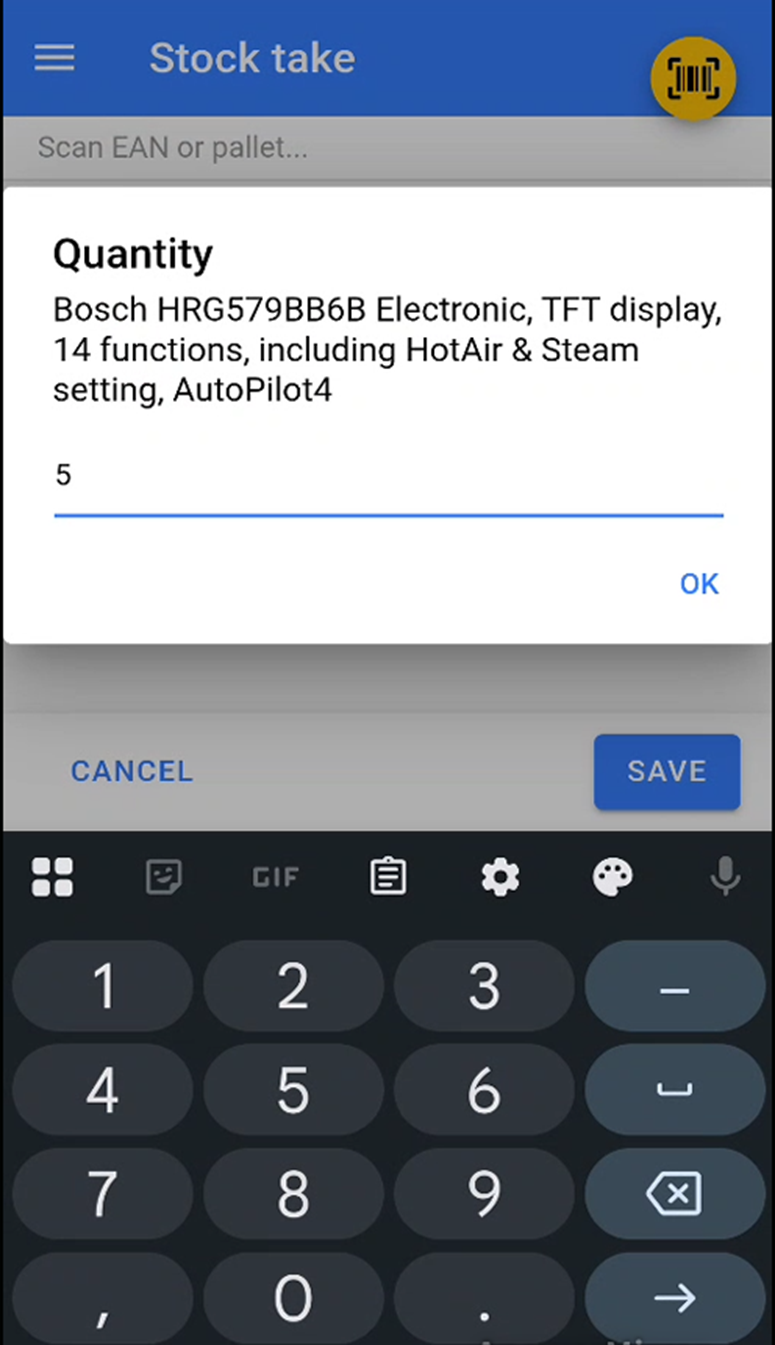](https://kb.findesolutions.com/uploads/images/gallery/2025-12/DbDv5RETnV4iUxk1-image.png) Once you have scanned and entered the quantity for all items within the location, click **Save** to complete the stock take. [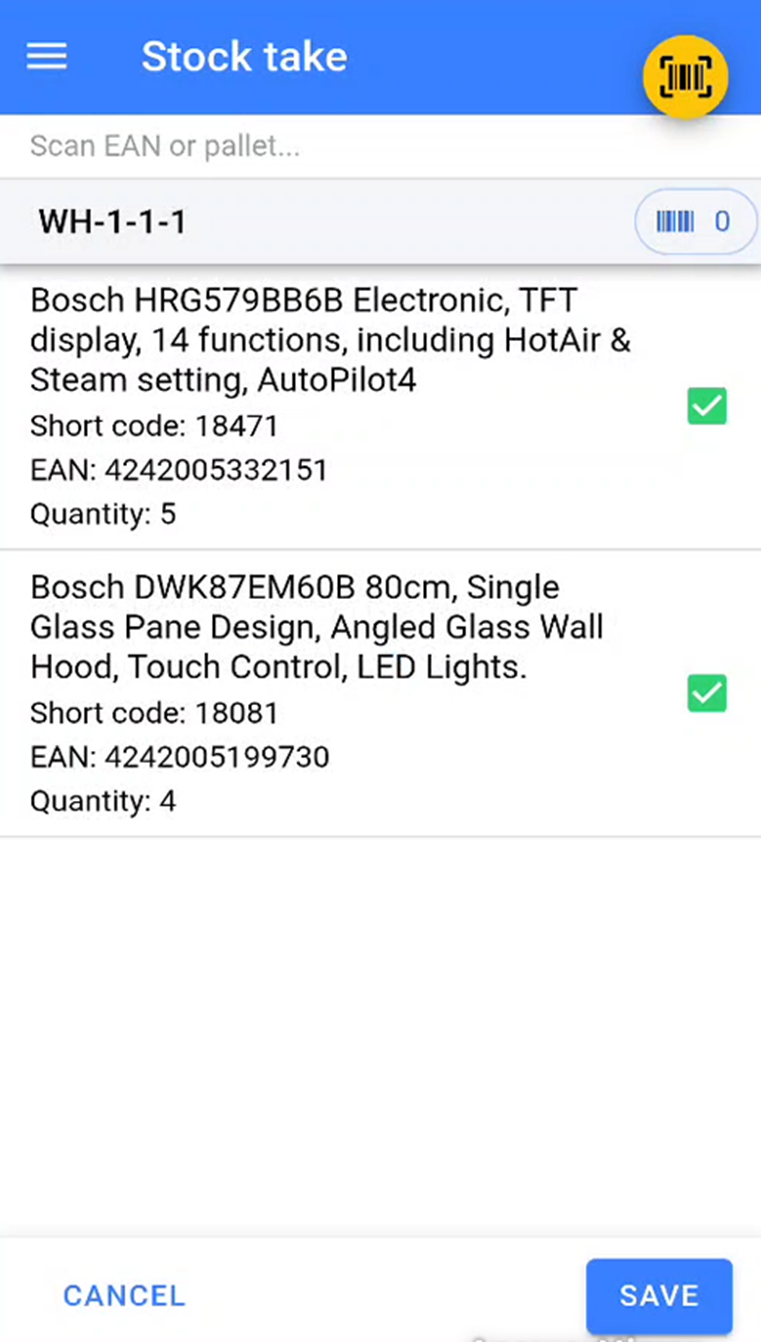](https://kb.findesolutions.com/uploads/images/gallery/2025-12/h46y6TcY0vxXa8x6-image.png) If the items and quantities entered match what is already stored in that location, the stock take will be completed. If the items and quantities differ from what is already stored in that location, the warehouse scanner will warn you and prompt you to undertake a detailed stock take to identify where the discrepancies lie. [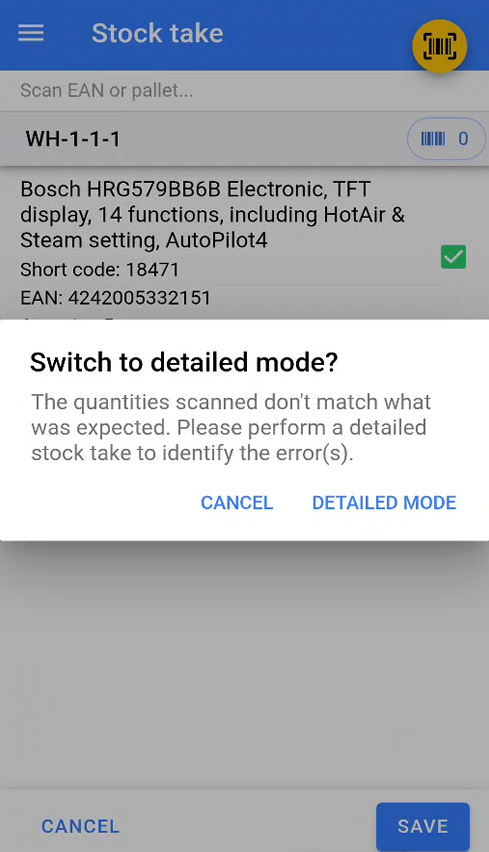](https://kb.findesolutions.com/uploads/images/gallery/2025-12/G54GqDffFl6Y4TB2-image.png) --- ## Stock Reports by location In NCompass navigate to Reports > Stock > Current Stock. [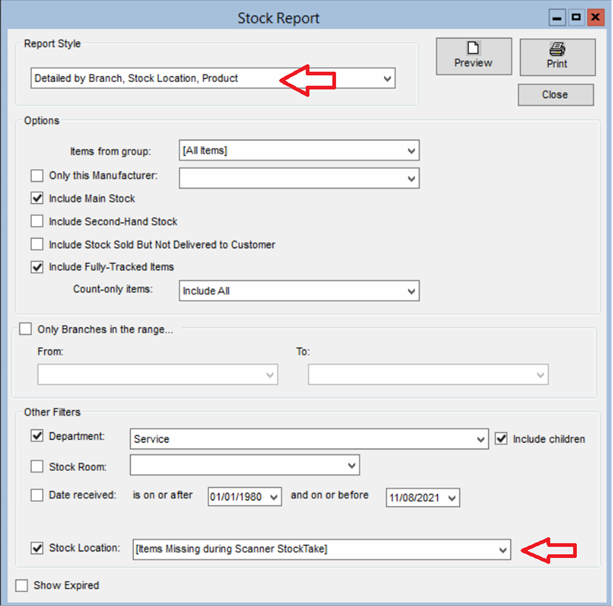](https://kb.findesolutions.com/uploads/images/gallery/2025-12/ZWwWjPBmwpVVeURH-image.png) Then select one of the report styles that include location. You can also limit the report to just a single location.There is a missing location \*\*‘Items missing during scanner stock take’.\*\* This location will show all items which were missing during a details stock take.
[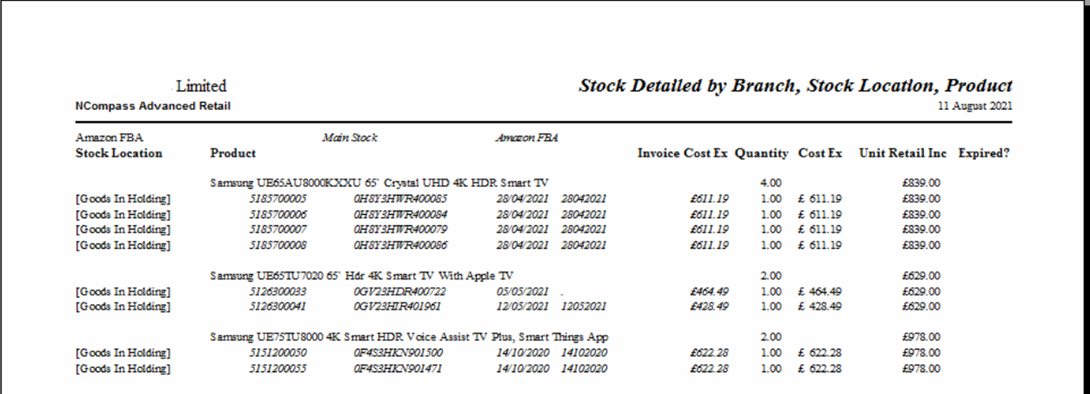](https://kb.findesolutions.com/uploads/images/gallery/2025-12/mXkqHZo4ggND7jb4-image.png) --- ### Scan History If you need to check where an item has been stored, you can search for the item via product enquiry, then click on item history. [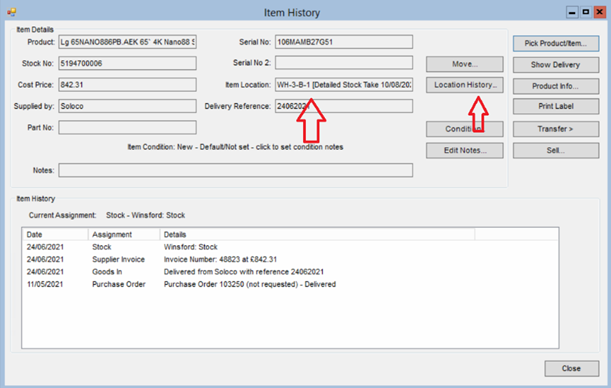](https://kb.findesolutions.com/uploads/images/gallery/2025-12/jto5LWkOB9lAx0nf-image.png) Its current location is shown along with the date it was scanned at that location If you click the location history button, you will get a history of the locations the item has been stored in.The initial location ‘Goods in holding’ may not have been scanned, it’s the default location, item are placed in this location if none has been specified at goods in or since.
# Load Vans Start by pressing the Load Vans option in the menu. [](https://kb.findesolutions.com/uploads/images/gallery/2025-12/sVCLtugb58cMJt7V-screenshot-20250131-161930.png)You can do a multi-stage pick, whereby you pick to a holding location and then on to another location afterwards, much like a multi-stage goods-in where the goods are held before being stored in their final location.
- If you wish to pick for all calls; Click **Select All**, or choose **Morning**/**Afternoon** instead. - Click **Start Picking** [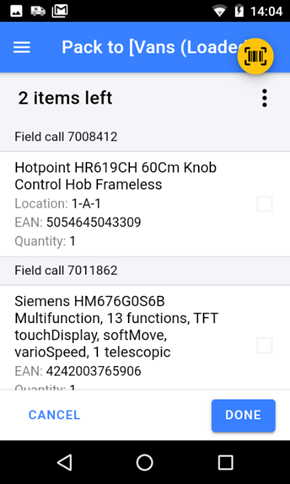](https://kb.findesolutions.com/uploads/images/gallery/2025-12/ytUizpIJkgOvhR3s-image.png) - Locate each item on the list and scan the stock number label - Once the item is picked, it will have a tick against the item (or the item may disappear of the list)If your configuration allows you to, you can scan a different stock number to the one displayed and NCompass will stock swap the stock number for the one you scanned.
- Once you have finished picking click **DONE** ### Settings Clicking on the 3 dots gives you the option to: - **Group by**: - **Stock Location** - Sorts them into order by location instead of by time. - **Field Call (Default)** - Sorts by time of call - **Branch** - Shows all branches not just your physical location - **Sort by**: - **Time DESC (Default)** - logical order for loading van, first on is last off. - **Time ASC** - flips the loading order - **Show Picked** - Shows the item picked if enabled but with a Green Tick, otherwise they will be hidden. [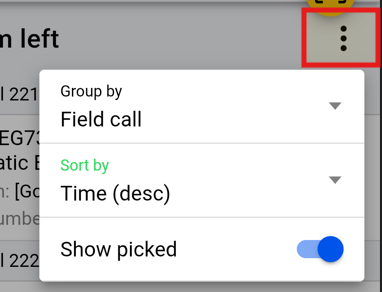](https://kb.findesolutions.com/uploads/images/gallery/2025-12/P3FulVnu998b5dc5-image.png) # Picking Jobs Picking Jobs are used in conjunction with Load Vans to get stock ready for Deliveries/Couriers. They can be used and set up in many different ways and it will require consultation before use so it can be configured correctly for your business. Picking Jobs would be used to get stock ready in a Pre-load location as a step before Loading Vans. Picking Jobs allow for picking by location instead of by engineer/courier. It works by checking the list of all items which are due to be going out on a selected date, ordering them by location, and then allocating X number of items for a user to pick, these items are then excluded from any future picking jobs raised. This allows for more efficiency when picking stock, especially where multiple operatives are picking stock at the same time. If you feel this feature may benefit your business please contact Admin to arrange a consultancy call with the Implementation Team. # Unload Vans The **Unload Vans** feature is used for scanning items that were failed deliveries or collections that the delivery team has picked up during the day. These items are scanned back into the business to mark them as received. The **Manual Store** feature is used to store specific stock numbers into a stock location. To navigate to the Unload Vans section on the warehouse scanner, click the burger menu icon in the top left of the screen. From the menu, select **Unload Vans**. [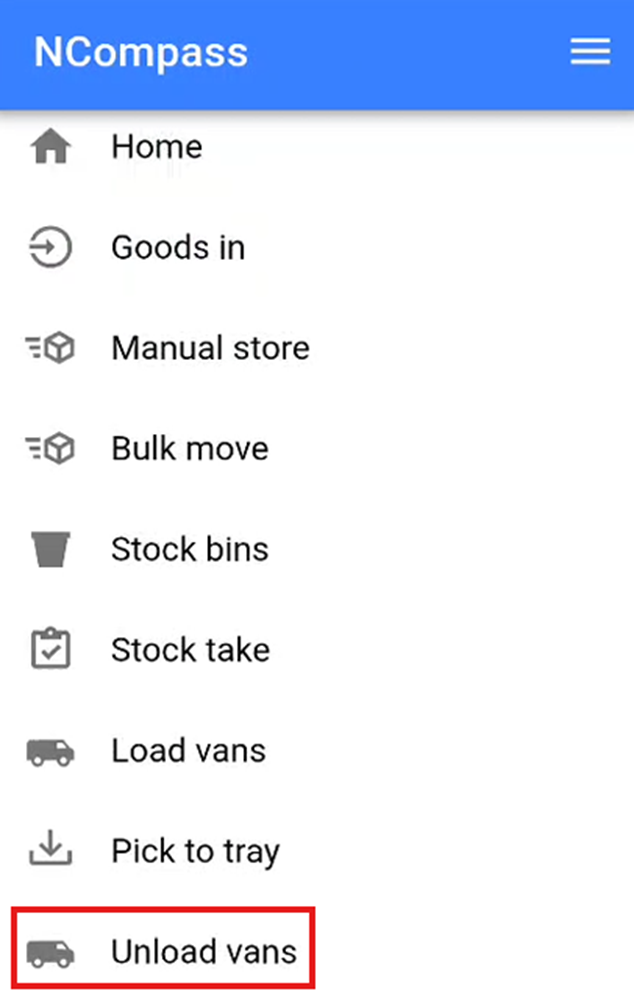](https://kb.findesolutions.com/uploads/images/gallery/2025-12/v1sh6HXn40eOE6OM-image.png) This will open the Unload Vans screen. --- ### Selecting Engineer and Location Select the **Engineer** for whom you are unloading the van. Set a location for the items by either: - Scanning a location barcode, or - Manually selecting a location. Once the engineer and unload location have been selected, click **Submit** to start unloading the van. [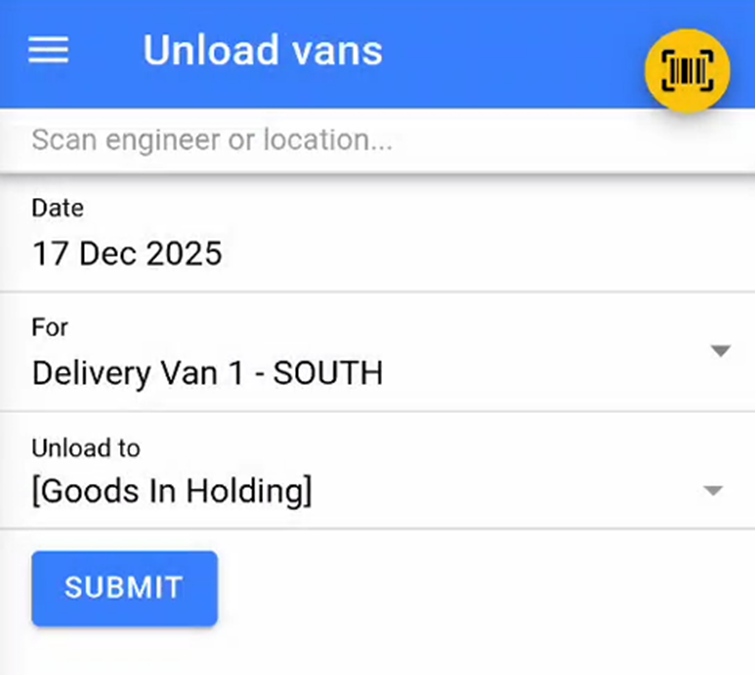](https://kb.findesolutions.com/uploads/images/gallery/2025-12/6rVNk8WpbKxiAU7I-image.png) Once you have selected the engineer and the unload location click 'Submit' to start unloading the Vans. --- ### Scanning Items A list of items on the van that need to be scanned off will appear. Scan each stock number to check it off the list. [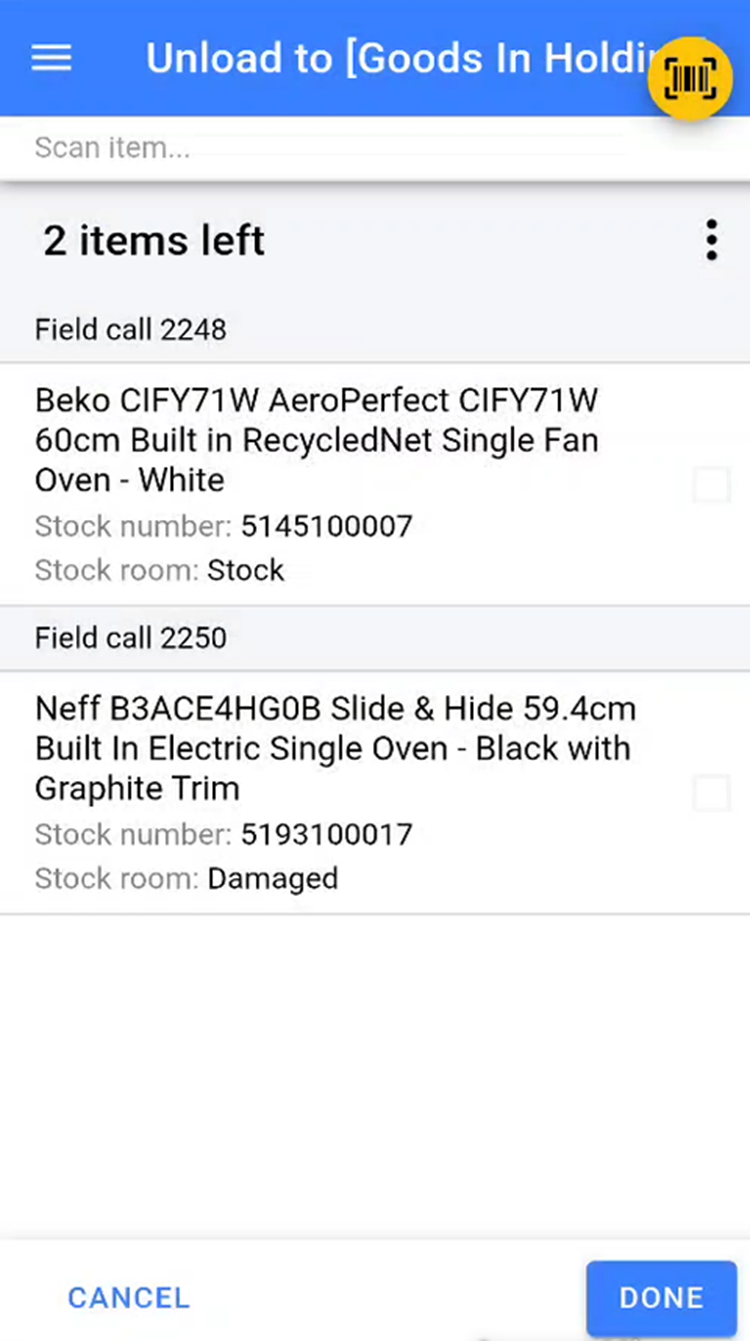](https://kb.findesolutions.com/uploads/images/gallery/2025-12/kGUDPgJRhaXrAWmD-image.png)\*\*Note:\*\* The list includes items that were failed deliveries by the selected engineer or any collections marked as completed.
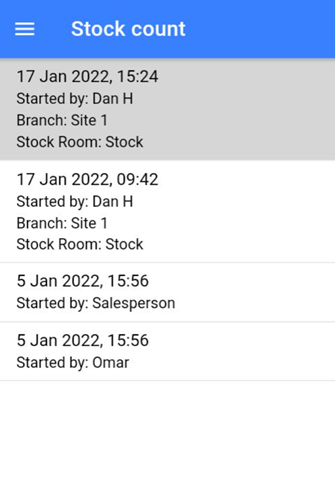
If an item has had its stock number removed and cannot be scanned, swipe left on the item to access two additional options: for that item so you can put the stock sticker back onto the item. - **Printer Icon** – Prints another stock label for the item. - **Check Icon** – Manually marks the item as scanned. [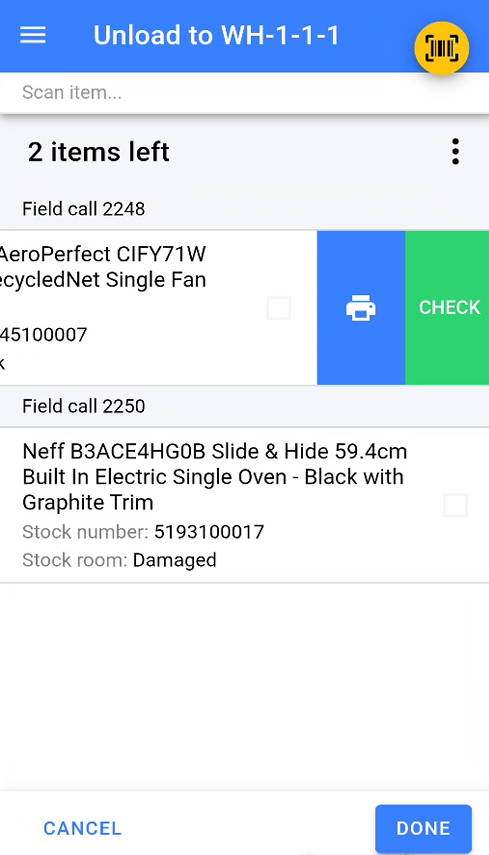](https://kb.findesolutions.com/uploads/images/gallery/2025-12/T89QMtsBFYQ77wHT-image.png) Once all items have been scanned or marked as scanned, click **Done** to complete the unload van process. [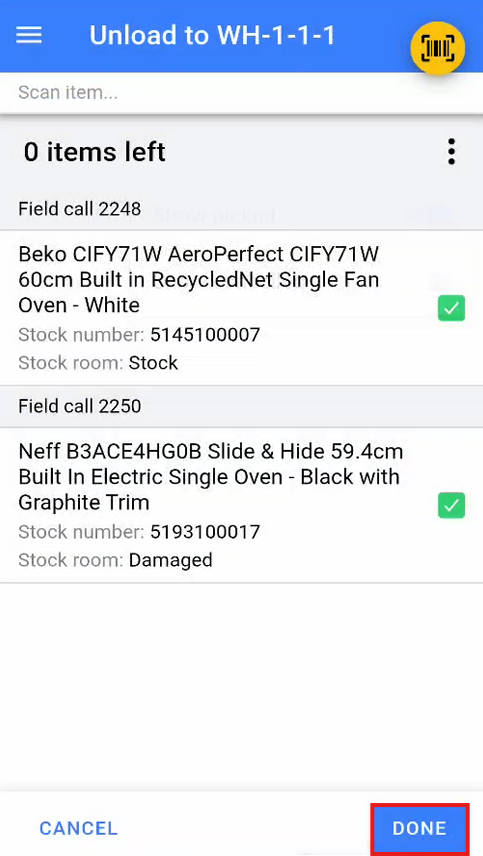](https://kb.findesolutions.com/uploads/images/gallery/2025-12/wZcI1wgMZEjTwjVN-image.png) # Order Collection ### Picking a Customer Collection A customer collection is used when a customer collects items directly from the warehouse. Customers will be provided with a collection slip, which they must bring with them and hand over at collection. Click the burger menu in the top right of the screen, then select **Order Collection** from the menu. [](https://kb.findesolutions.com/uploads/images/gallery/2025-12/ZKwAcqZgg4oFv6ch-image.png) This will open the customer collection screen, ready for you to start the collection, and will prompt you to scan a field call. [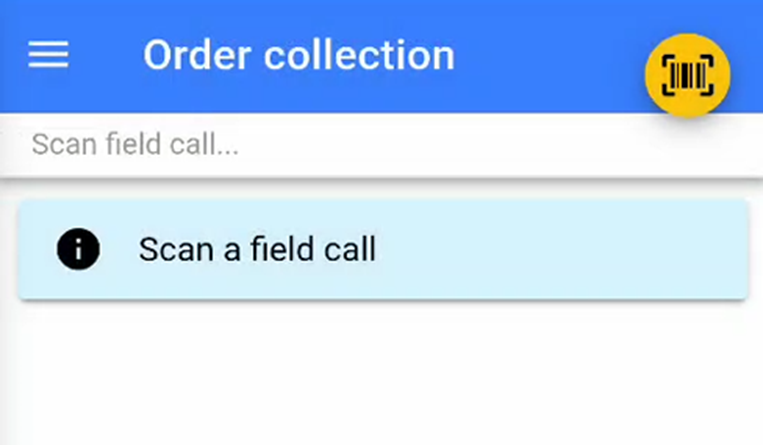](https://kb.findesolutions.com/uploads/images/gallery/2025-12/2HYFQHQwndqHhKV4-image.png) Scan the barcode at the bottom of the customer collection slip to select the collection you will be undertaking. Once the slip has been scanned, the warehouse app will display a list of items due on that collection. Locate the item due for the customer collection and scan the stock number being issued to the customer. The normal stock swapping rules apply if your system is configured for stock swapping. [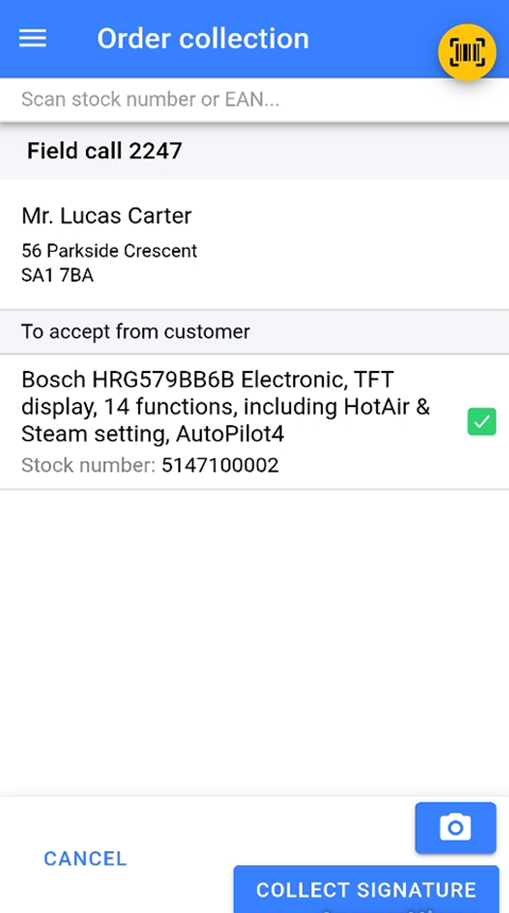](https://kb.findesolutions.com/uploads/images/gallery/2025-12/G1wohT59lieXoLK8-image.png) --- ### Adding photos to a customer collection You can add photos to a customer collection by pressing the camera icon in the bottom right of the screen. This will take you to the attachments section, where you can either take a photo directly by pressing the camera icon in the bottom left of the attachment screen. You can also attach photos that have already been saved to your device’s camera roll by clicking the image icon in the bottom left of the screen. You can choose whether to attach the photos to either the field call or the sale by selecting the relevant option from the dropdown in the bottom right of the screen. [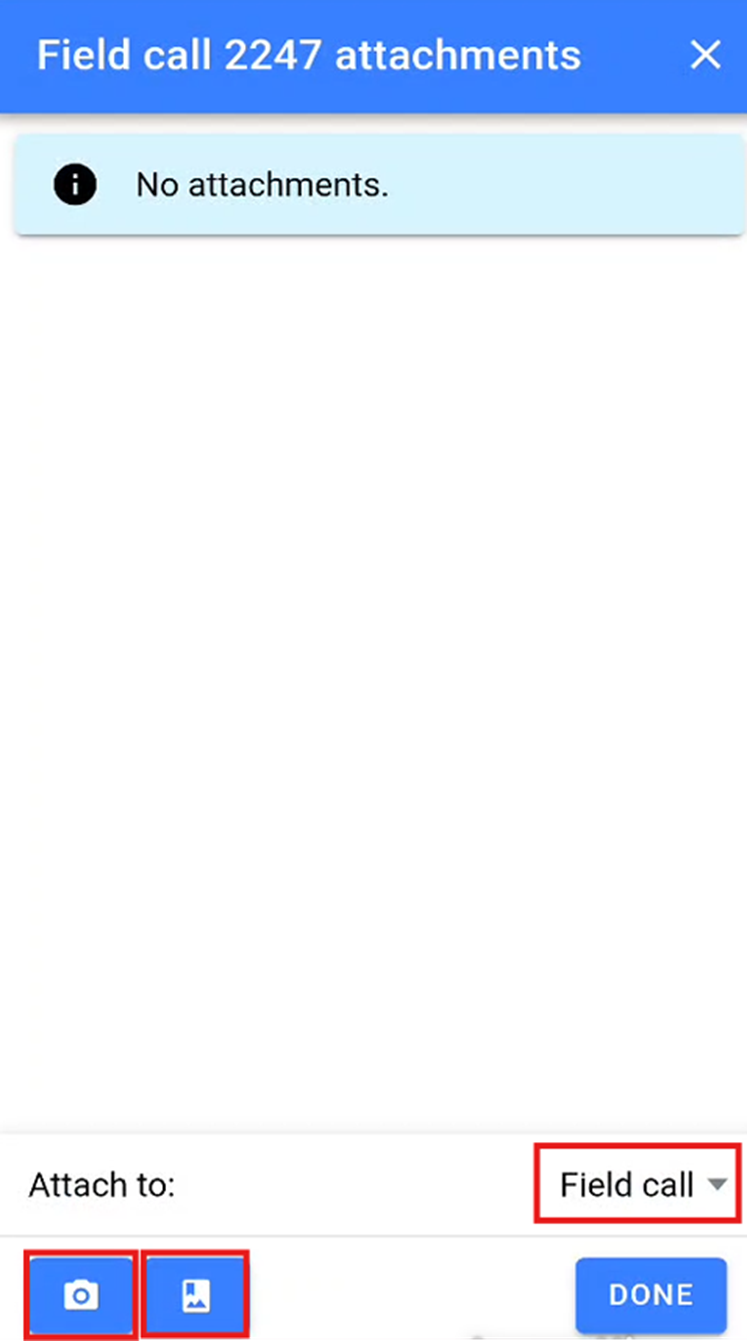](https://kb.findesolutions.com/uploads/images/gallery/2025-12/ioq6SPD2ugW0excd-image.png) Once you have added the relevant photos in the attachments section, you will be able to see all photos that have been added. Click **Done** to finish adding photos. [](https://kb.findesolutions.com/uploads/images/gallery/2025-12/yZS2fWorst83HXaq-image.png) --- ### Completing a Customer Collection Once all items have been picked and any required photos have been attached, you will need to collect a signature from the customer to confirm they are happy with the collection. Click the **Collect Signature** button in the bottom right of the collection screen. [](https://kb.findesolutions.com/uploads/images/gallery/2025-12/iyjSkBodqY1PLmAC-image.png) This will open the proof of delivery screen, where you can enter the name of the person collecting the items and add any notes if required. [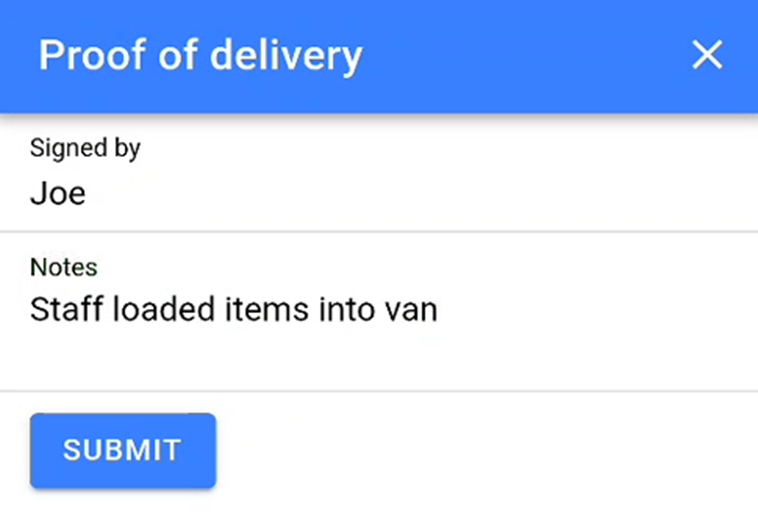](https://kb.findesolutions.com/uploads/images/gallery/2025-12/joKeRhzia2GD4m2H-image.png) The warehouse application will then switch to a landscape layout and display a signature pad. Ask the customer to sign on the device. Once the customer has signed, click **Save** to complete the collection. #### [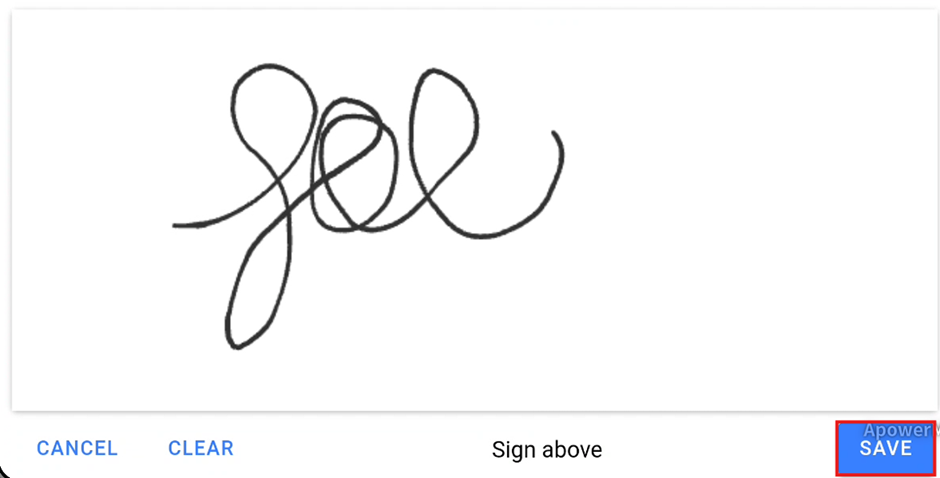](https://kb.findesolutions.com/uploads/images/gallery/2025-12/HWwfJFpGgWzhK4f5-image.png) Sorting Order of Items For those Larger collection orders you can now sort the items by location order: [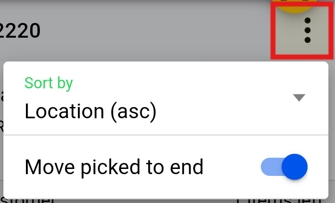](https://kb.findesolutions.com/uploads/images/gallery/2025-12/QOnBmfKCZ3SrXjK3-image.png) # Stock Count You can use WAS to populate a Stock Count created in NCompass, this is especially useful for Count Only items. There is a separate guide which covers using and setting up **Stock Counts** in NCompass. - Navigate on the main menu to **Stock Count** [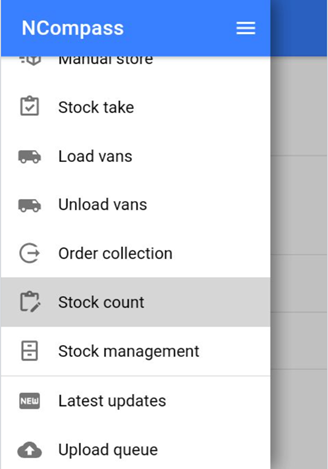](https://kb.findesolutions.com/uploads/images/gallery/2025-12/deXYsTXW5B6Ymsqn-image.png) - Click on the stock count with the correct Date/Branch/Stock room you are counting.**If there is no branch/stock room you can select where you are scanning on the next window.**
[](https://kb.findesolutions.com/uploads/images/gallery/2025-12/mgiBrurzTBomxgZE-image.png) - Once you are on the stock management screen, if not already preselected: - Set Branch you are in - Set Stock you are scanning - Now start scanning the EANs [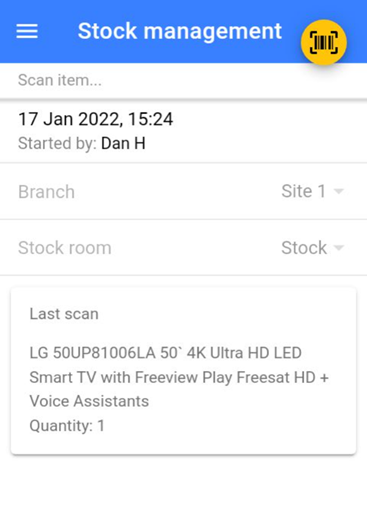](https://kb.findesolutions.com/uploads/images/gallery/2025-12/EEi8FxqcYmmlGOzB-image.png) - Start scanning the EANs and entering the QTY of items [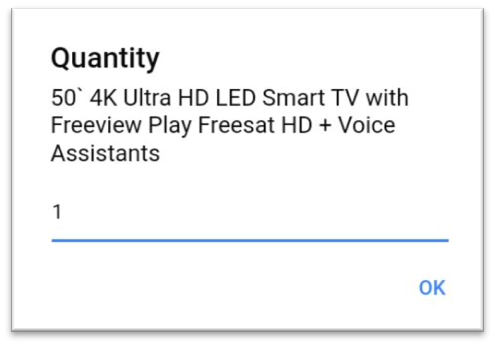](https://kb.findesolutions.com/uploads/images/gallery/2025-12/9PnbsquyTb4ANFFg-image.png)**Once you have finished scanning, just click the back button. If you miss anything or are scanning over multiple days just come back into the stock count and continue to scan. **
**You can amend your last scan if you made a mistake! You can also check the Retail Price at the same time to ensure it's correctly set.**
# Stock Management Stock Management is used to check details against an item without using Desktop NCompass. It can be used to: - View Current **Branch** - View Current **Stock Room** - View Current **Stock Location** - Check and amend **Serial Numbers** - Add **Condition** - Check and Change **Selling Prices** for all Categories - Add **Web Images** It can be used on both **Fully Tracked Items** and **Count Only**. ## Fully Tracked Items - Scan the NCompass Generated **Stock Number Label** [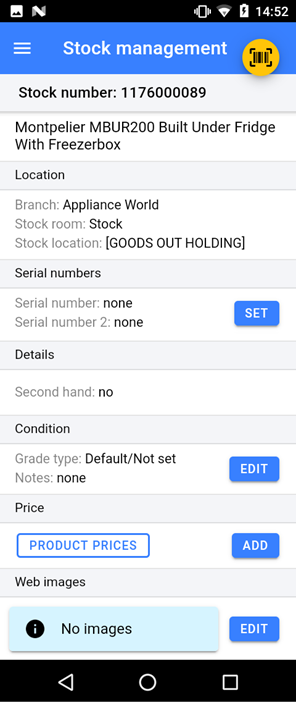](https://kb.findesolutions.com/uploads/images/gallery/2025-12/LRYreFJ70o9QWXSr-image.png) - You can update the serial numbers if they are incorrect or where not added at goods in, you can also add a second serial number. - You can edit the item **condition**, adding **notes** and **images**. - You can look up **product pricing** for the specific item. - Reprint the **Stock Number Label** --- ## Count Only Items - Scan the **EAN** [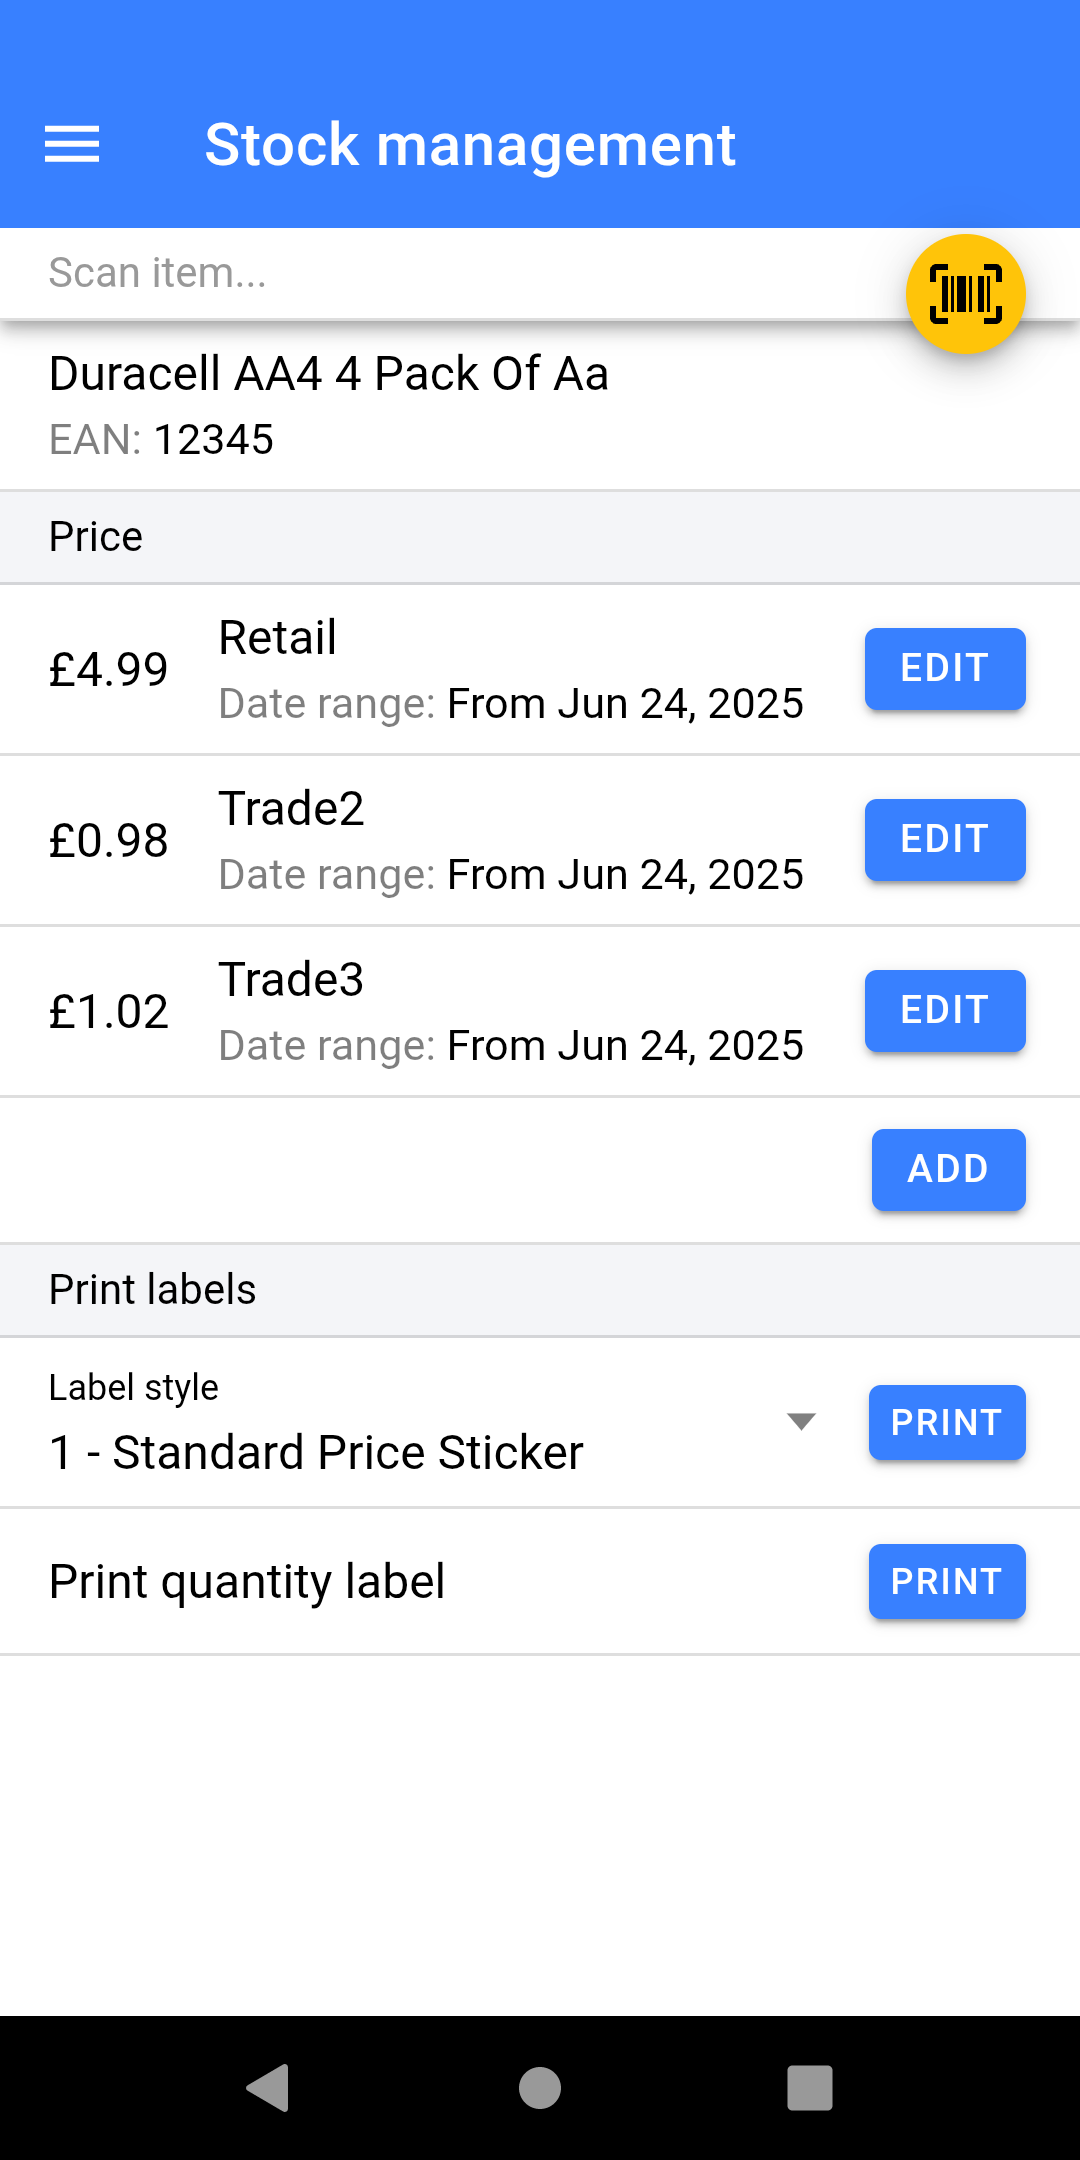](https://kb.findesolutions.com/uploads/images/gallery/2025-12/SKllPUvUr3ZvhRW0-screenshot-20251223-145432.png) - You can lookup and **change pricing, including quantity pricing**. - **Reprint the label** from a **variety of styles**. # Print Queued Labels This process is only used for retailers who want to: - Goods stock into NCompass on Desktop instead of the Warehouse Operatives doing it. - Want to get the stock Goods In quickly first and later Label. - Opening Stock process. If you believe this feature may be useful to you please speak to **Admin** to book a consultancy call with the Implementation Team. # Listed Item Swapping Stock swapping now supports both stock numbers and different models. If you’re already set up to swap stock numbers on the WAS scanner, no scanner changes are required you just need to configure the swappable products in the Desktop version of NCompass. ## Create an Item Group (to Allow Swapping) - Go to **Administration** > **Item Groups**. - Click **New** to create a group. - Enter a name for the group (e.g. the skill or swap category name). - Tick the checkbox **“Allow item swap within group.”** - Save the group. [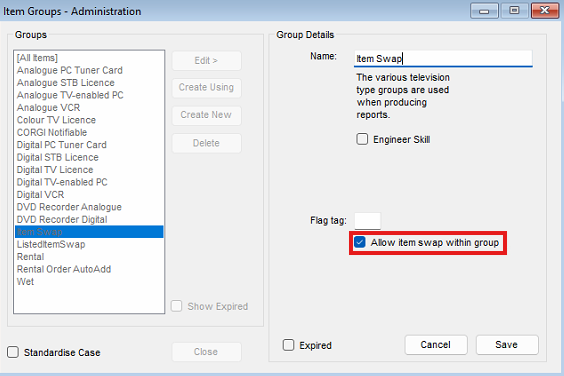](https://kb.findesolutions.com/uploads/images/gallery/2026-03/vO1KbCsE4lloJpwJ-image.png) Once enabled, any products added to this group can be swapped interchangeably. ## Add a Product to an Item Group - Open the **Product Info** record for the product you want to add. - Go to the **Stock Control** tab. - Click the **Groups** button. [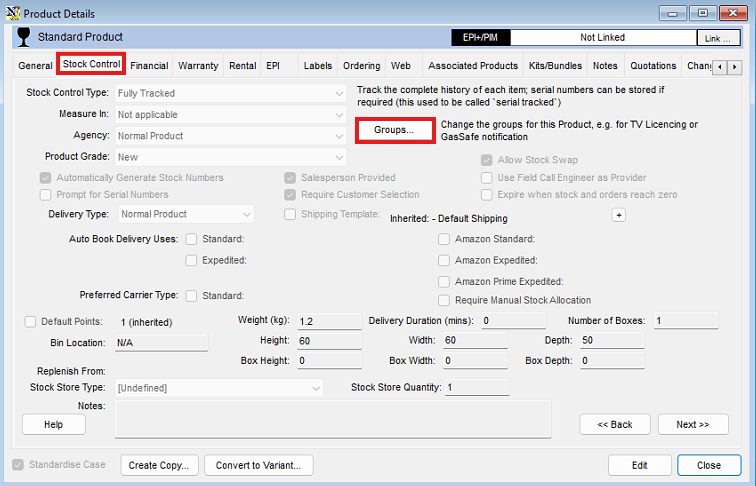](https://kb.findesolutions.com/uploads/images/gallery/2026-03/V7ZaOUsefFgma3md-image.png) - Select the relevant item group you created. - Add the group to the product. [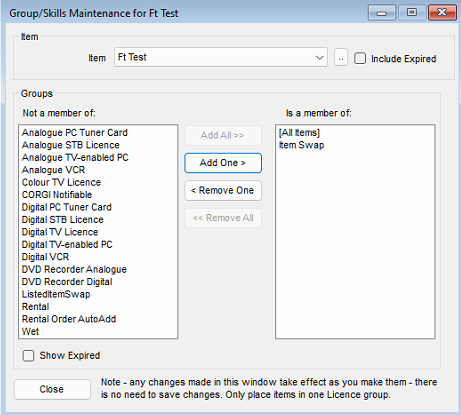](https://kb.findesolutions.com/uploads/images/gallery/2026-03/WMDzy6MU0ZejXuG0-image.png) The product can now be swapped with other items in the same group. # Updates, Queue, and Settings ### Software version and What’s New Select **Latest Updates** from the menu. This will show you’re the current software version (major release Version, swipe from right to left to see incremental versions) and what’s been added in the last major release. [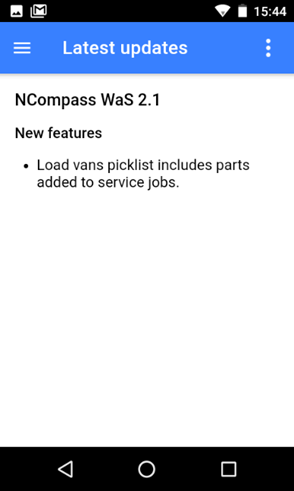](https://kb.findesolutions.com/uploads/images/gallery/2025-12/u9bASoNnrEjP6eSX-image.png) --- ### Check Upload Status Select **Upload queue** from the menu. [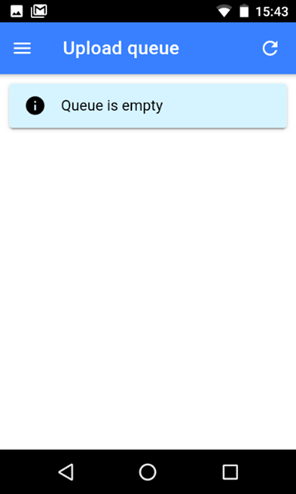](https://kb.findesolutions.com/uploads/images/gallery/2025-12/XcN0g1PFWZCYwZZ5-image.png) This option will let you see if there are any pending changes that have not been synced with your server. Typically the queue will empty quite fast so normally it will show empty. If your device loses network connectivity data may not sent to the server, the scanner stores the changes until the data network is reconnected. You can manually remove items from the queue or force an update. --- ### Settings #### NCompass Configuration Outlines details on what database and API the device is connecting to, this is something which the Support team may ask for when diagnosing any faults reported. #### User Settings This displays the user logged in, and can be changed with the **Change** button. #### Data **Reload Lookup Data** syncs the devices settings this is mainly used for when configuration changes are made whilst users are logged in. #### Printer - **Test Printer -** This is used to print a Test label out of the connected label printer. We recommend doing this before any instance of Goods In. - **Stock Error Labels to Print -** This will default to 2, when doing a stock take if an item is scanned which NCompass thinks is not in stock it will produce a stock error label. We suggest to print 2; the first to stick on the product, the second to keep in a pile to action. - **Previous years in label queue date picker -** This setting is used specifically for those companies who want to book the goods in on the desktop by a back office user instead of a warehouse operative, once the goods are booked in the warehouse operative can then load a list of labels to print and scan the EAN to trigger the label print. This setting is defaulting the number of years to look back for labels which have not been printed. #### App Settings Leave these settings as defaulted unless told otherwise by Support. #### Photo Settings - **Photo Quality** - To increase the upload speed of images taken on the scanner, and to save filling up server storage too quickly we suggest to set this to **Medium** on all devices. Without this being set images taken on the scanner will be in high res. - **Apply Watermark** - Toggle this on if you want the images to be Date/Time stamped. #### Load Van Defaults - **Date** - Default the date on the loads van screen to be **Today** or **Tomorrow** - **Engineer** - Default the selected engineer on load vans screen - **Stock Location** - Default the Load to Location selected (not reconmended) #### Picking Job Defaults Picking Jobs will require consultancy before use. #### Scanner You won't need to use this unless instructed to by Support. #### Device These settings are used to add padding around the application, to resolve the issue where NCompass Mobile and WAS were opening too large for the screen, this is a temporary measure while the third party plug ins resolve the issue. # Item Lists NCompass WAS can build lists of EAN Numbers, by scanning the EAN or the Stock Number label Start by pressing the Lists option in the Menu [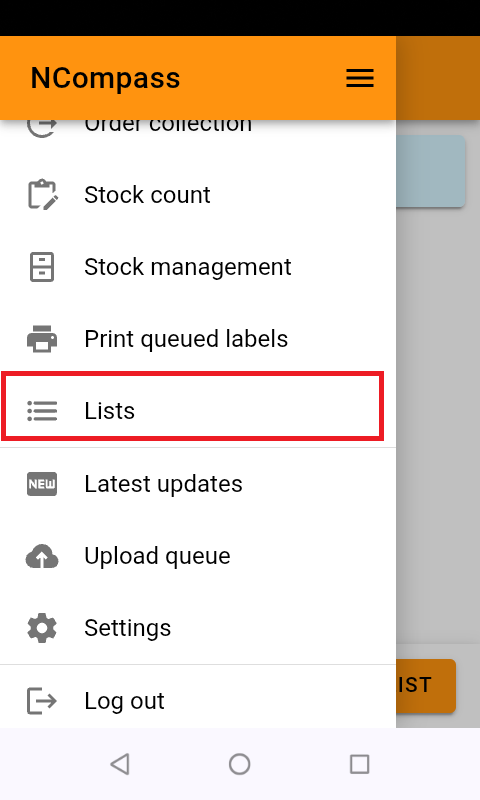](https://kb.findesolutions.com/uploads/images/gallery/2026-04/VNpFQCKFDKjAdJ0s-screenshot-20260325-104859.png) This will show you all lists that you have access to If you have no lists, this will be empty, you can create a new list by clicking the 'Create List' button [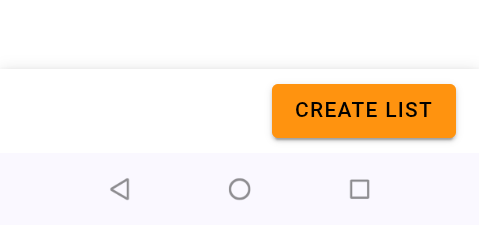](https://kb.findesolutions.com/uploads/images/gallery/2026-04/kOV9w0cUuXCz4Pmh-image.png) - Click the 'Show Options +' label You can now give your list a description and an expiry date [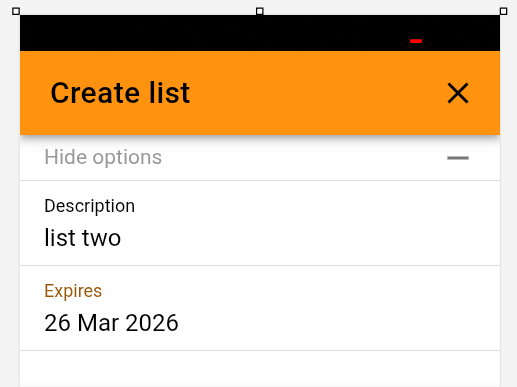](https://kb.findesolutions.com/uploads/images/gallery/2026-04/s9jg4U85CK9znqcn-image.png) - Then Click 'Submit' Your list will be added, and you will go back to the list selection screen [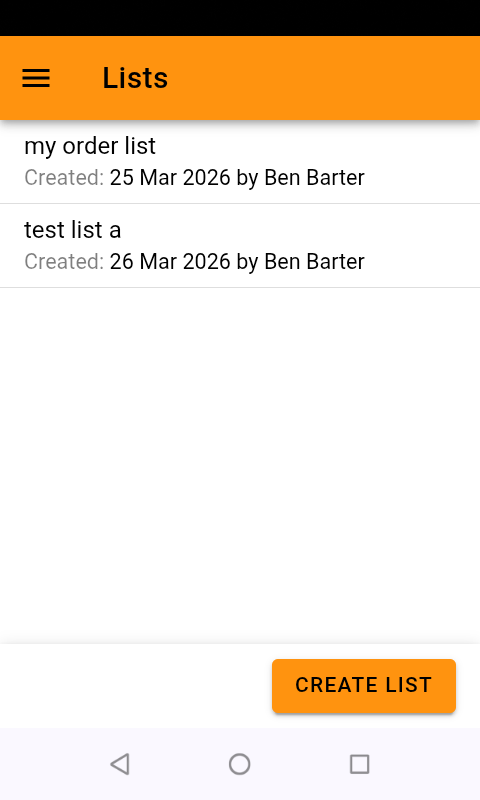](https://kb.findesolutions.com/uploads/images/gallery/2026-04/kf3yxAQNPbwl7O3O-screenshot-20260415-095645.png) - Click into your list, Your list will open, if you're revisiting a previous list its contents will loaded - Scan your items onto your list Each item will be confirmed [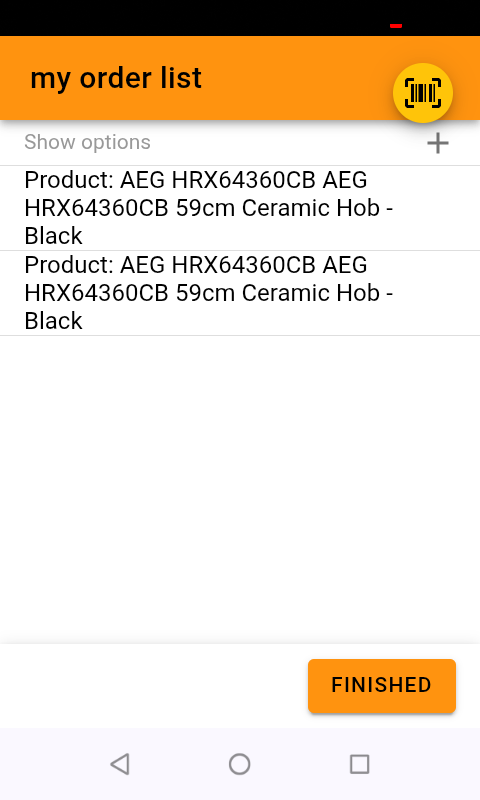](https://kb.findesolutions.com/uploads/images/gallery/2026-04/QXENzkFleZCEdY93-screenshot-20260325-105829.png) Click 'Finished' and your list will be saved #### **Scanning barcode that are not in your NCompass System** When you're in an active list, you can click the 'Show options' label you can turn on 'Allow unknown Barcodes' [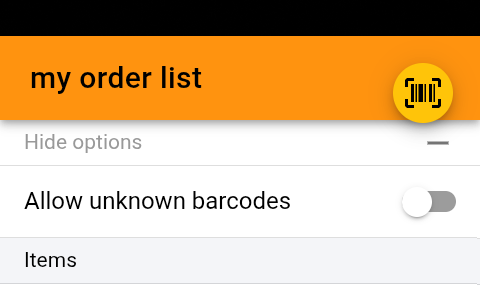](https://kb.findesolutions.com/uploads/images/gallery/2026-04/oQLwzPI5q0cz6I7S-image.png) Use of Lists in NCompass You can manage your lists in the products menu Products > Lists >Create List [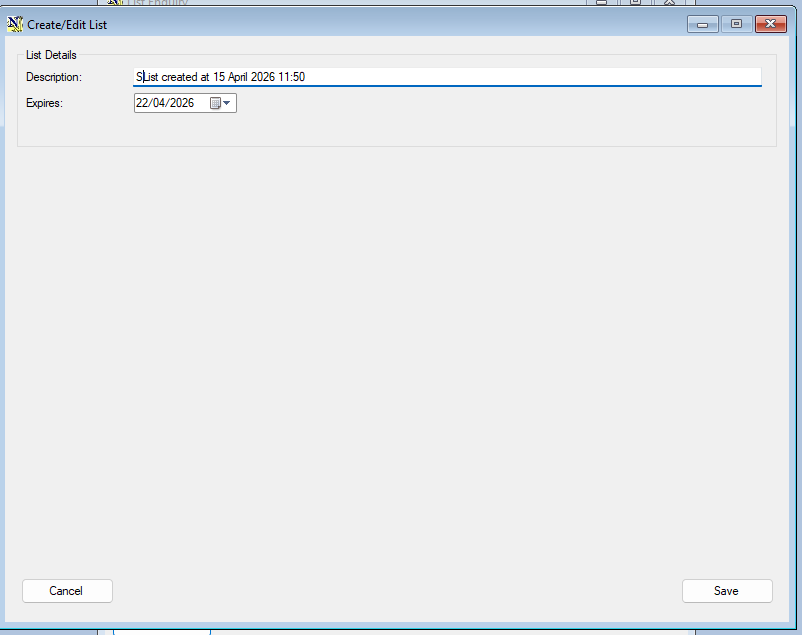](https://kb.findesolutions.com/uploads/images/gallery/2026-04/KuqmU5C82W11zAuG-image.png) Products > Lists > List enquiry [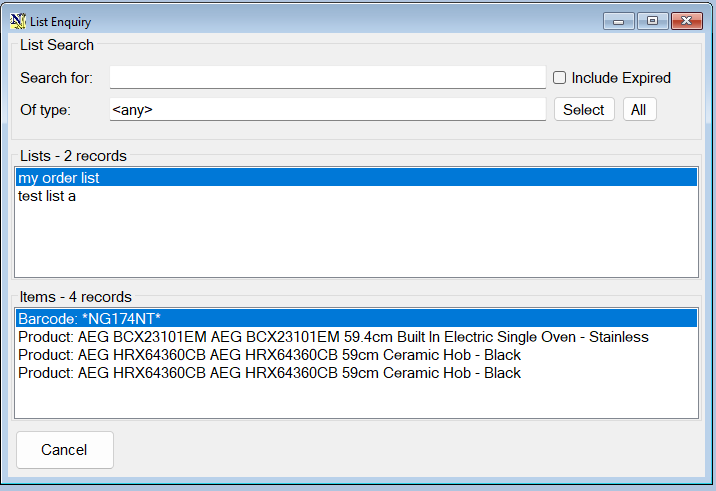](https://kb.findesolutions.com/uploads/images/gallery/2026-04/4YGMlrjO4tMwmysa-image.png) The use of list is being added to various screens in NCompass, at the time of writing, you can use lists to add products to quotes, orders and purchase orders, the lists are accessed by product enquiry [](https://kb.findesolutions.com/uploads/images/gallery/2026-04/u7p5zzaumud1mUnT-image.png) You can select the entire list, or items from the list [](https://kb.findesolutions.com/uploads/images/gallery/2026-04/Dsq6uU744vj5O5l1-image.png) # Customising Menus