Calculus can only provide support for Windows applications, but others do work. This guide covers Windows setup only.
Once you have downloaded the zip file, extact it to your desired location. You'll be presented with 2 files: [](https://kb.findesolutions.com/uploads/images/gallery/2025-09/LzRUmzRQRtPyK6CB-image.png) Run (by double-clicking) the `SmartVPNClient_X.X.X.msi` where `X.X.X` is the downloaded version. The file is a *Windows Installer Package* and is highlighted above. You will need administrative rights to install this. You will be presented with the following screen, press `Next`. [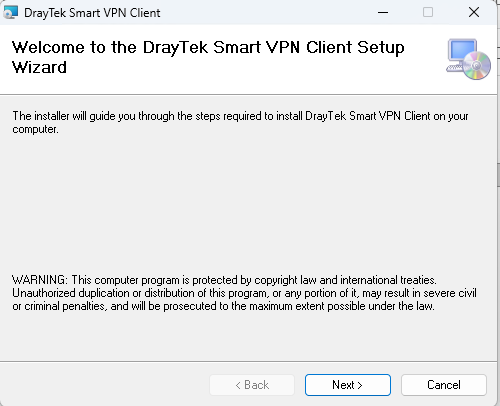](https://kb.findesolutions.com/uploads/images/gallery/2025-09/dR9tIbaYsOBQeiTt-image.png) This will install the app, once completed press the `Close` button. ## Running the App You'll find a `Smart VPN Client` in your start menu, click to open and run. [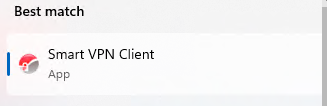](https://kb.findesolutions.com/uploads/images/gallery/2025-09/CD3AwT67lXtpkIBE-image.png) ### First Run The first time you run the application, you may be prompted to install the VPPP driver "`vppp.sys`" - press `OK` to install, it is a required feature for some VPN types. [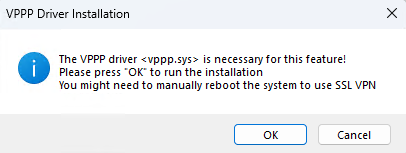](https://kb.findesolutions.com/uploads/images/gallery/2025-09/fRZadRGu5hpnA9h6-image.png) ### Configuring a VPN ProfileYou can have multiple VPN profiles, but may only be connected to one at once.
Select `Profiles` on the left-hand side, and press the `Add` button. [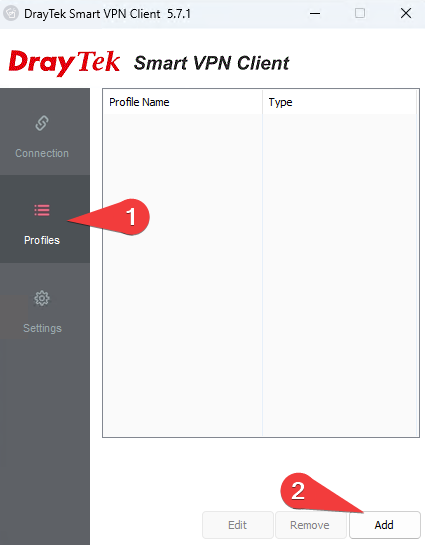](https://kb.findesolutions.com/uploads/images/gallery/2025-09/qIm71HRNlADk7JP0-image.png)| Enter a sensible profile name, this is purely what you will select to connect to.
The details below are for our most commonly used VPN types. If you need another type, details will be provided to you as required. **Server Information** These details will be provided to you by the support team. Select the relevant type. Typically, SSL VPN or IPSec VPN types are what is used. **VPN Information** These details will also be provided to you by the support team, enter them in the relevant fields. If using mOTP and SSL, the token and PIN will be provided to you. You may opt to remember your credentials here, which will mean you do not have to enter them every time. Make sure you turn off `Always Prompt for Credentials` if you do. **IP Property** Only make changes in here if expressly instructed. **Advanced Options** Only make changes in here if expressly instructed. | [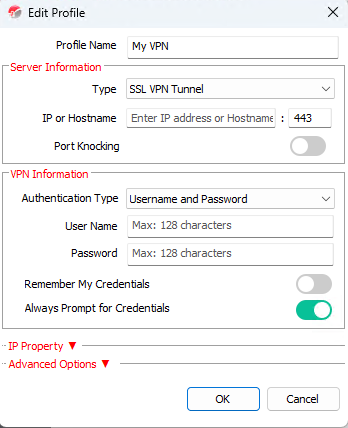](https://kb.findesolutions.com/uploads/images/gallery/2025-09/5mlz9CCwGuQgHy9I-image.png) |
These can only be changed when you do not have a VPN connected.
| 1\. Enable this option to have the Smart VPN Client start with your system. 2\. Enable this option to have the Smart VPN Client attempt to reconnect in the event your VPN loses connection at all. 3\. Press `Export` to save your profiles for importing elsewhere. This may be useful for when you are moving to a new PC for example. Note that the credentials will require inputting again, they are not transferred for security reasons. | [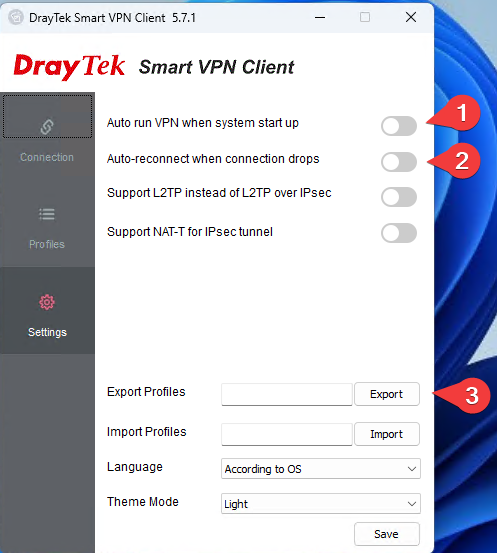](https://kb.findesolutions.com/uploads/images/gallery/2025-09/KiGpPLFMrfcbTVq0-image.png) |