Calculus can only provide support for Windows applications, but others do work. This guide covers Windows setup only.
Once you have downloaded the zip file, extact it to your desired location. You'll be presented with 2 files: [](https://kb.findesolutions.com/uploads/images/gallery/2025-09/LzRUmzRQRtPyK6CB-image.png) Run (by double-clicking) the `SmartVPNClient_X.X.X.msi` where `X.X.X` is the downloaded version. The file is a *Windows Installer Package* and is highlighted above. You will need administrative rights to install this. You will be presented with the following screen, press `Next`. [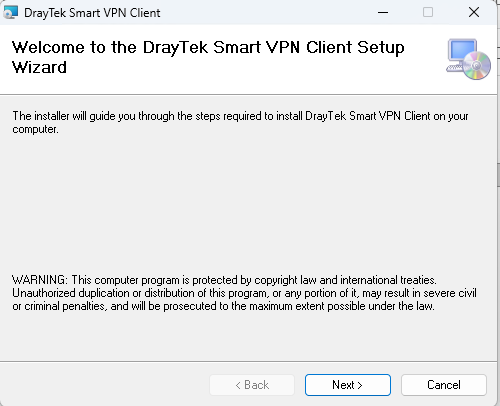](https://kb.findesolutions.com/uploads/images/gallery/2025-09/dR9tIbaYsOBQeiTt-image.png) This will install the app, once completed press the `Close` button. ## Running the App You'll find a `Smart VPN Client` in your start menu, click to open and run. [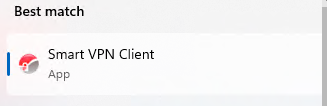](https://kb.findesolutions.com/uploads/images/gallery/2025-09/CD3AwT67lXtpkIBE-image.png) ### First Run The first time you run the application, you may be prompted to install the VPPP driver "`vppp.sys`" - press `OK` to install, it is a required feature for some VPN types. [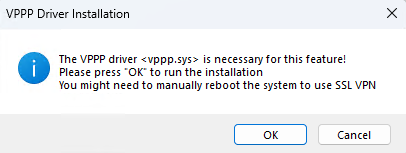](https://kb.findesolutions.com/uploads/images/gallery/2025-09/fRZadRGu5hpnA9h6-image.png) ### Configuring a VPN ProfileYou can have multiple VPN profiles, but may only be connected to one at once.
Select `Profiles` on the left-hand side, and press the `Add` button. [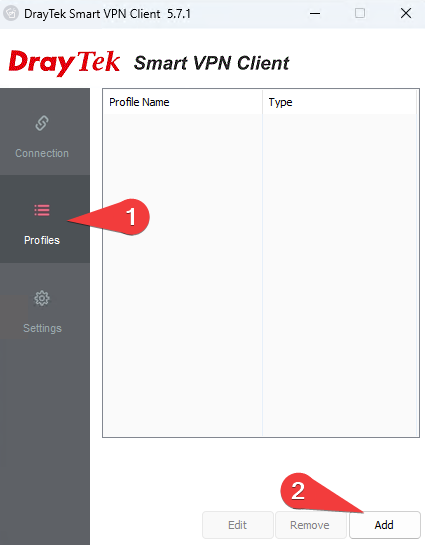](https://kb.findesolutions.com/uploads/images/gallery/2025-09/qIm71HRNlADk7JP0-image.png)| Enter a sensible profile name, this is purely what you will select to connect to.
The details below are for our most commonly used VPN types. If you need another type, details will be provided to you as required. **Server Information** These details will be provided to you by the support team. Select the relevant type. Typically, SSL VPN or IPSec VPN types are what is used. **VPN Information** These details will also be provided to you by the support team, enter them in the relevant fields. If using mOTP and SSL, the token and PIN will be provided to you. You may opt to remember your credentials here, which will mean you do not have to enter them every time. Make sure you turn off `Always Prompt for Credentials` if you do. **IP Property** Only make changes in here if expressly instructed. **Advanced Options** Only make changes in here if expressly instructed. | [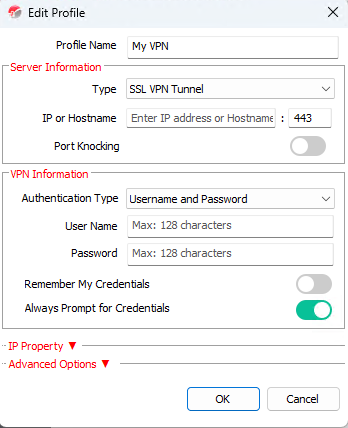](https://kb.findesolutions.com/uploads/images/gallery/2025-09/5mlz9CCwGuQgHy9I-image.png) |
These can only be changed when you do not have a VPN connected.
| 1\. Enable this option to have the Smart VPN Client start with your system. 2\. Enable this option to have the Smart VPN Client attempt to reconnect in the event your VPN loses connection at all. 3\. Press `Export` to save your profiles for importing elsewhere. This may be useful for when you are moving to a new PC for example. Note that the credentials will require inputting again, they are not transferred for security reasons. | [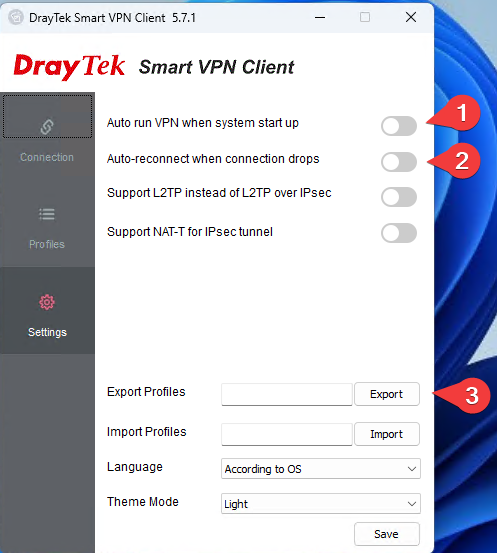](https://kb.findesolutions.com/uploads/images/gallery/2025-09/KiGpPLFMrfcbTVq0-image.png) |
Google requires a payment card to be able to use the Google API features. However, they do have a $200 free usage every month, and the NCM usage should not come close to hitting any charge thresholds.
If any payment details are incorrect or if the billing information has expired, the API will not work until updated
Repeat the same steps for the other API's in the above list Once you've added the API's you will see them in the list of API's & Services from the Enabled API's & services window [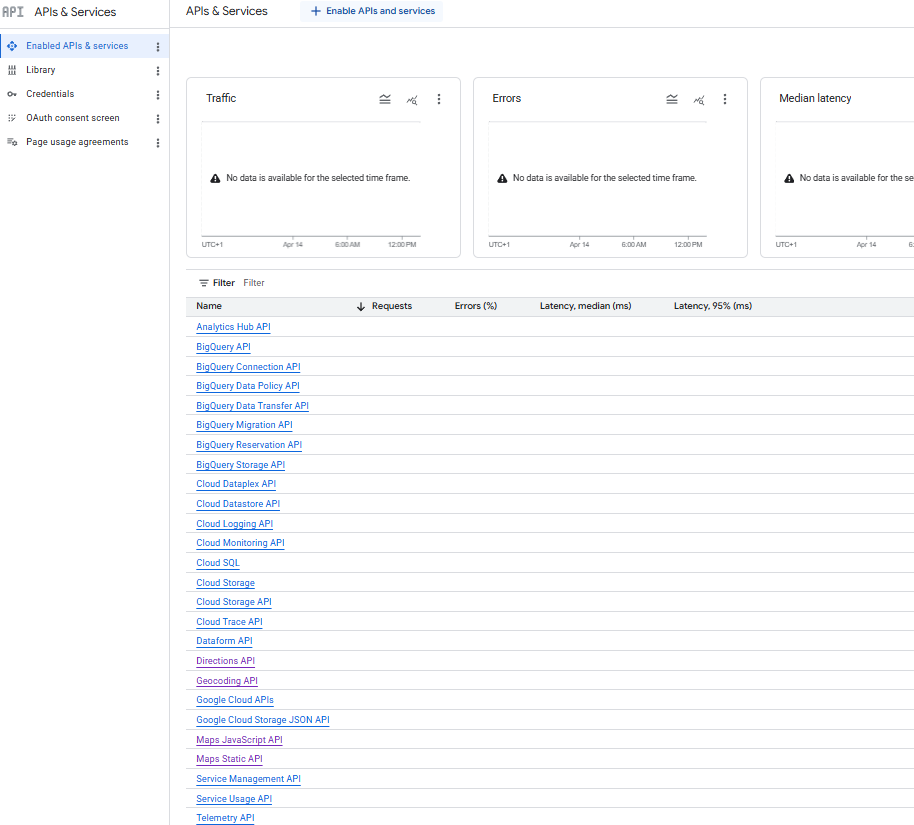](https://kb.findesolutions.com/uploads/images/gallery/2026-04/GwVwcP5EBTLsqH3Q-image.png) ### Creating Google API Key Now you have all the API's required on your account, you need to create an API key that links. To do this, from the API's & Services page, click on the Credentials button at the left of the screen and then press + Create credentials at the top of the window [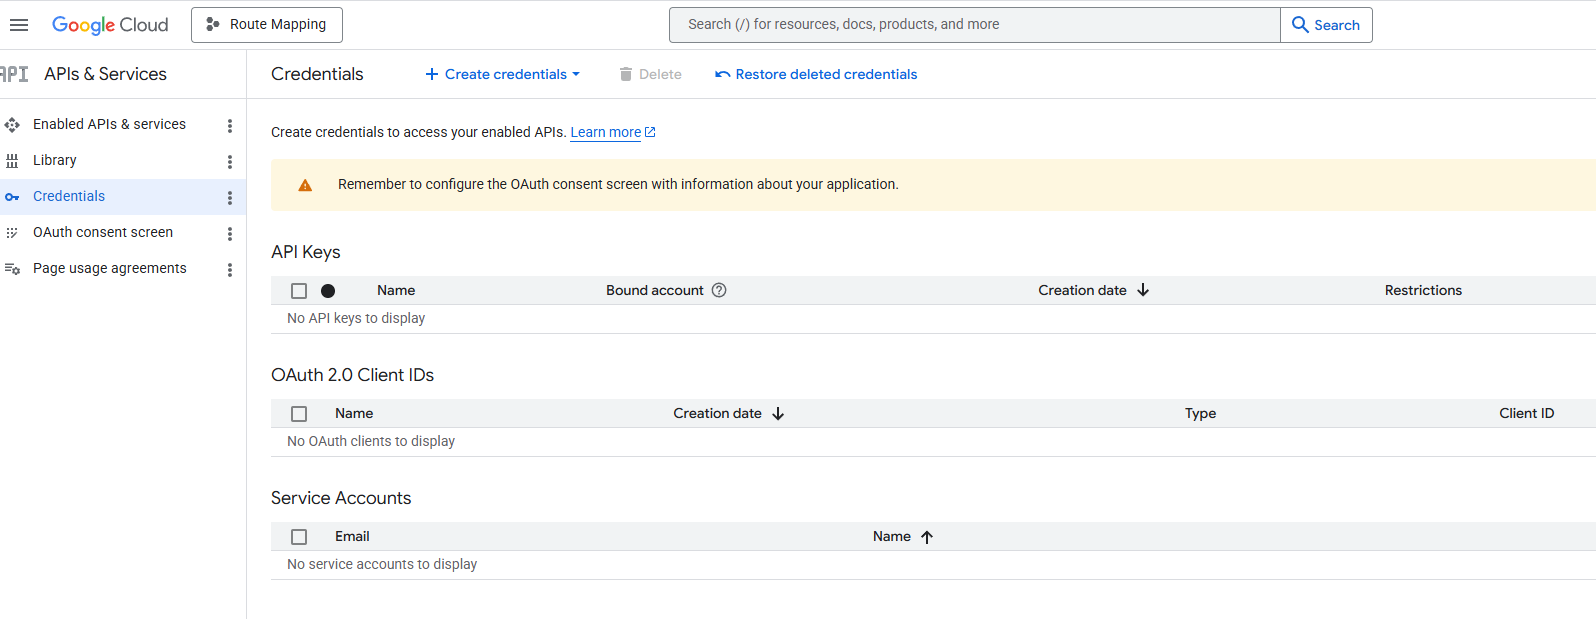](https://kb.findesolutions.com/uploads/images/gallery/2026-04/cIRo9c6c0qY5Fx8x-image.png) In the dropdown, select API Key [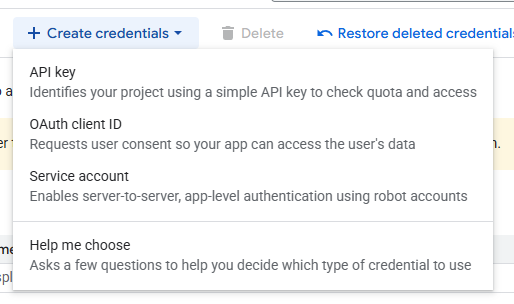](https://kb.findesolutions.com/uploads/images/gallery/2026-04/gDWlQusXNbm6CxQr-image.png) This will then open a side window where you can name the API key and select which API's you want in your key. Give the API an appropriate name e.g. Google API Key and in the Select API dropdown, tick all 4 API's you added previously: - Maps Static API - Directions API - Maps JavaScript API - Geocoding API So the API Key looks like: [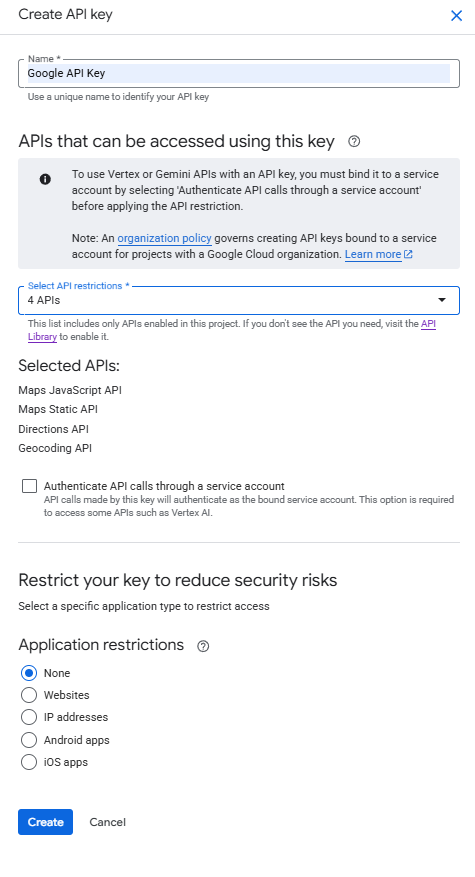](https://kb.findesolutions.com/uploads/images/gallery/2026-04/0oXqLft3uO57b5I1-image.png) Once this is done, click create, the side window will update and show you your API key. Please take a copy of this as it will be required later If you ever need to get a copy again, in the Credentials window where we went first to start creating the API key, you will now see your Google API Key in the list [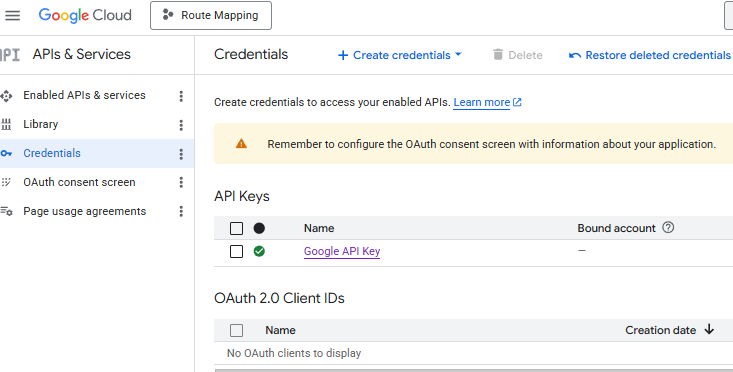](https://kb.findesolutions.com/uploads/images/gallery/2026-04/TY39Ed8XgBhRnrgD-image.png) You can click on this link to make any required changes or to see the key again ### Adding Google API Key to NCompass Go to NCompass. You will need to be logged in with administrator access. Click on Tools > Configuration, and then search for ‘Google API’ (ticking the search all groups box). Tick the Global box and paste in the Google API Key. Press Save. 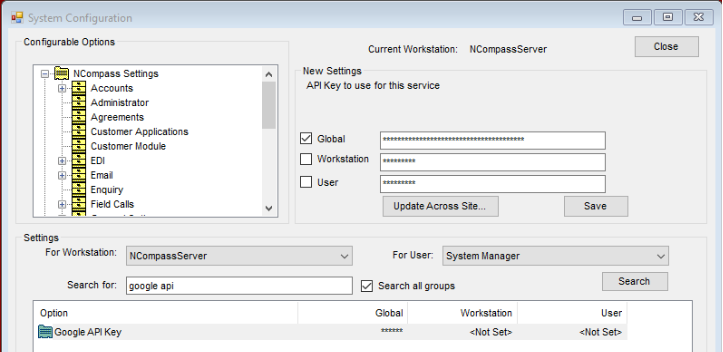 ### Adding Billing Details If you didn't add billing details before or if your billing details expire, they need to be added / updated To do this, go to: [https://console.cloud.google.com/](https://console.cloud.google.com/)As mentioned above, if any payment details are incorrect or if the billing information has expired, the API will not work until updated
It will likely auto select your route mapping product but if you have multiple, make sure you select the project you created at the start of the guide [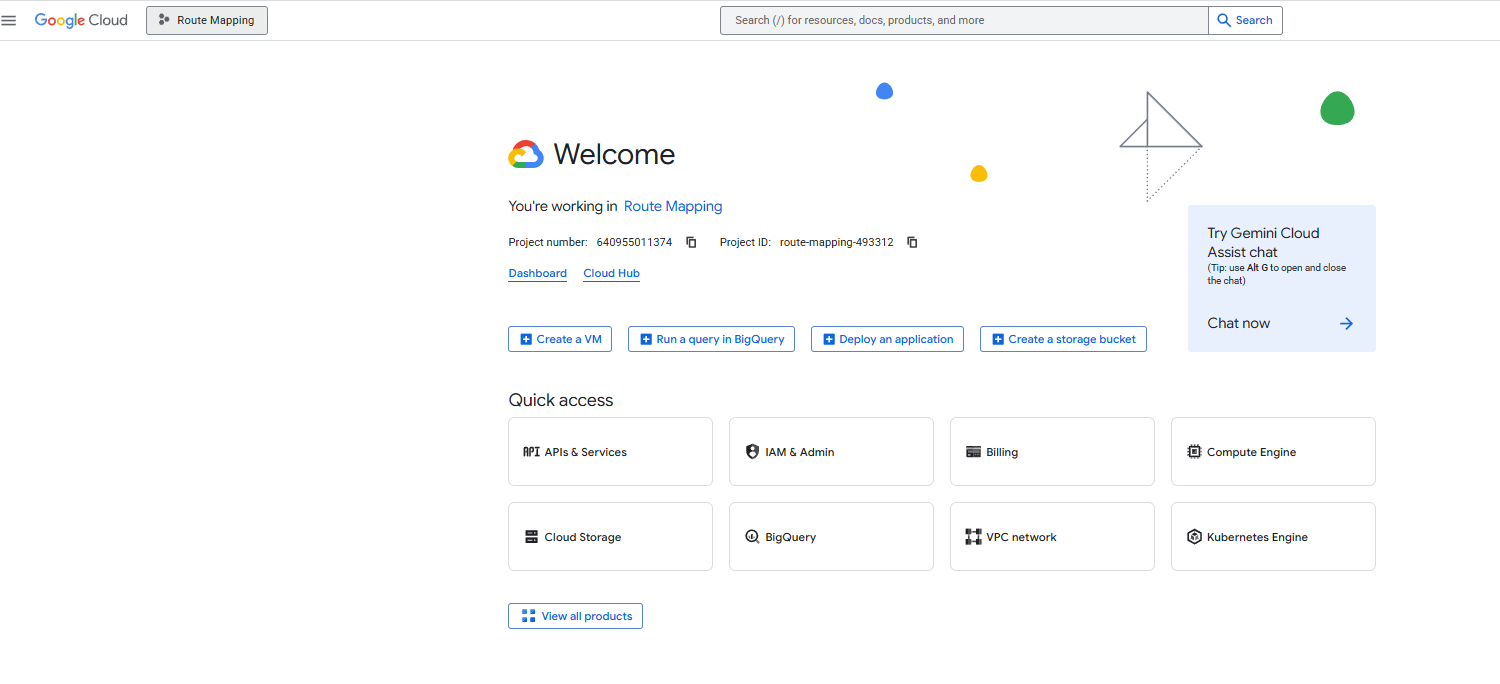](https://kb.findesolutions.com/uploads/images/gallery/2026-04/6GRxopMQjkTiW8aj-image.png) From this Welcome window, click billing and you can select link billing account if not created or Manage billing accounts if renewing card details. From here, fill in or update details as required [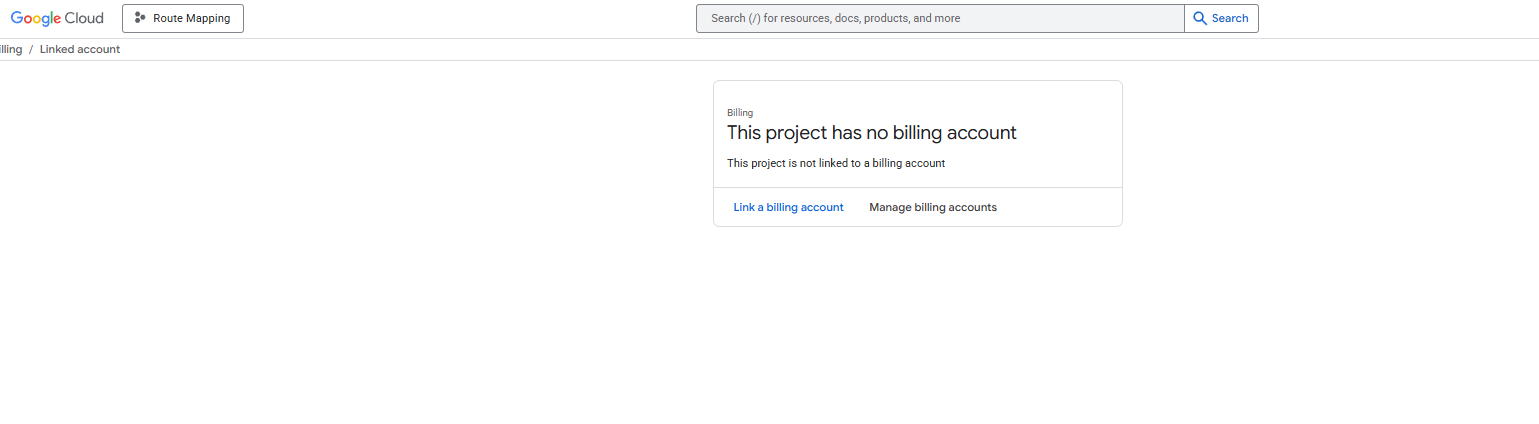](https://kb.findesolutions.com/uploads/images/gallery/2026-04/bJrbtrFXNvFM6FVQ-image.png) # Cyber Security # Securing Emails After a Security Breach In today's world, there are unfortunately bad actors which attempt to infiltrate various systems. AI is making this easier then ever, so its important to remain vigilant, however, some of the attack vectors are so convincing that they can fool anyone. This article will help you re-secure your account if you do become a victim.Whilst our focus here is on Microsoft 365 accounts, the principals can be applied to most email providers.
## Secure Your Account| Login to your [Microsoft Account](https://myaccount.microsoft.com) using your email and password | |
| Select to `Change Password` on the left-hand menu. | [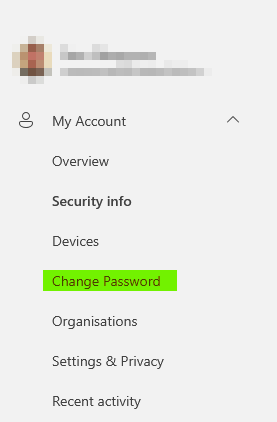](https://kb.findesolutions.com/uploads/images/gallery/2026-06/1gts26W95U1Am5IR-image.png) |
| Enter a new password, and confirm it.
A long password is more secure than a complex password. Consider using a [passphrase](https://www.useapassphrase.com/). | [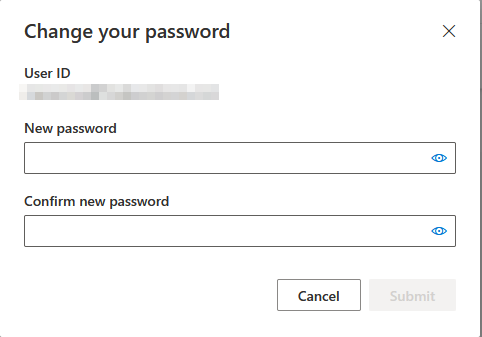](https://kb.findesolutions.com/uploads/images/gallery/2026-06/9tTi2Y5lB79t4ogj-image.png) |
| On the `Security info` page, you'll see an option to `Sign out everywhere`. Press this and follow the prompts.
This could take up to an hour to be effective. | [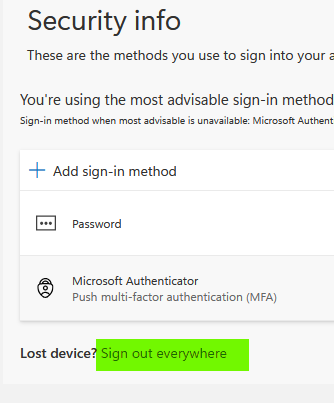](https://kb.findesolutions.com/uploads/images/gallery/2026-06/kD8unkre96BczkZI-image.png) |
| On the `Security info` page still, remove any devices you do not recognise that are used for MFA (Multi-Factor Authentication). | |
Its important to be aware that these rules are not restricted to the example above. It is better to remove any rules you are not sure of as these can be re-added later.
## Contacting Affected Recipients In your Outlook app, review the `Deleted Items` folder - you may find a copy of the phishing email that was sent. You'll then want to: - Reply again to the email - Remove the malicious links - Inform the recipients they link was not from yourself and to not click anything. - Direct them to this page if they require assistance if they have been phished. ## Further Support Contact your email provider if you require further support. **Do not delay** - its important to move quickly to limit damage potential.