Domestic and General Warranties Configuration and Use
Domestic and General Warranties
Configuration and Use
Procedure Guide for NCompass
Setting the providers availability
Updating the warranty templates
Adding Warranty Categories to your products
Setting your warranty category and action on departments level
Manufacturer’s part and labour periods
Selling warranties with the products
Selling a warranty for a previously sold product
Overview
NCompass Advanced Retail now supports direct integration for Domestic and General warranties, for both sale and submission.
Schemas include
· In store term warranty
· In store monthly warranty
· Online term warranty
If you want to be able to sell online monthly warranty, this will require extensions and development to your website, currently we do not offer the facility to sell monthly warranties via your website
Our cloud server will download warranty rates to your system, and can be set to auto tag products on the scheduled price update, you can set on a department basis the point of sales
in addition, when selling a warranty, a live rate check is performed at the point of sale, this ensures accuracy or warranty rates
Submission is a two-stage process, customer and warranty details are submitted real time, followed by a warranty start date confirmation when the goods are taken or delivery completed
Tasks
- Set Provider Availability and priority
- Set provider details and accounting options
- Set your dealer ID
- Update warranty templates
- Configure and map warranty Categories to your product department
- Map your manufacturers to Domestic and Generals manufacturers codes
- Ensure products have the correct manufacturers parts and labour periods set
- Enable Activation Sweep
Setting the providers availability
NCompass supports up to four providers simultaneously, these are set in the configuration menu as providers 1-4
Ø Go to: Tools > configuration
Enter ‘provider’ into the search box
· click the ‘search all groups’ checkbox, hit search
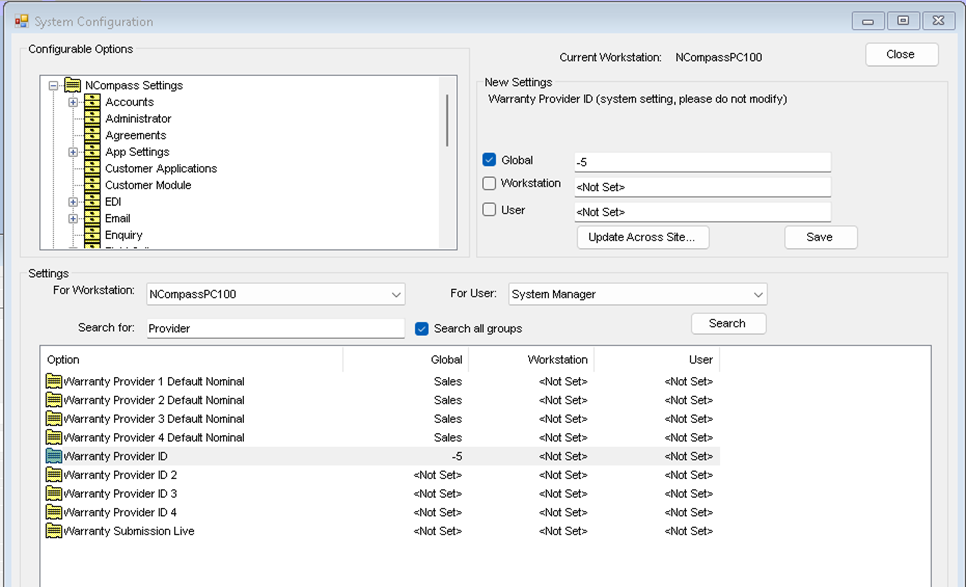
You should set the provider ID’s in the order you want them, and they should be set globally
Domestic and general is normally ID -5
If you have other providers, their id’s will already be populated, make a note of the ID numbers before changing them
If you unsure, please call support who will assist you
In the example above Domestic and General is set as the first provider and is the only provider
Activation Sweep
This enables server-side tasks to sweep for activations dates (when the sales are invoiced)
Search for ‘Sweep’

Setting the providers details
Ø Go to: Administration > Extended Warranties > Providers
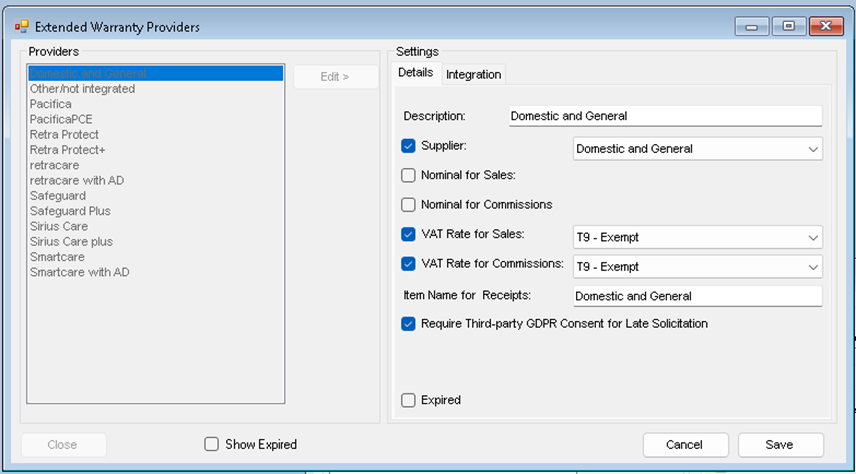
Select Domestic and General from the list
· click ‘Edit’
update the details
· Click ‘Save’
Description – this how the provider appears in NCompass – there is no need to change this
Supplier – NCompass links to accounting systems, and can supplier invoice match to sold warranties, you should link this provider to a supplier in your system, if Domestic and General is not in your supplier list, Go to: Administration > Manufacturers and Suppliers and add a new entry, ensure its marked as a supplier, link it to your accounts system in the normal way
Nominal for Sales – select the nominal to link to for accounts export
Nominal for commissions – not used
Vat Rates – set as exempt (although this is overridden by the warranty template
Item names for Receipts – how it appears on sales documents
Requires Third- Party GDPR consent – this should be ticked
· When complete click ‘Save’
Note: if your system is configured to exports account data, you should ensure that your nominals for warranty sales are set correctly, please see the accounts export guide
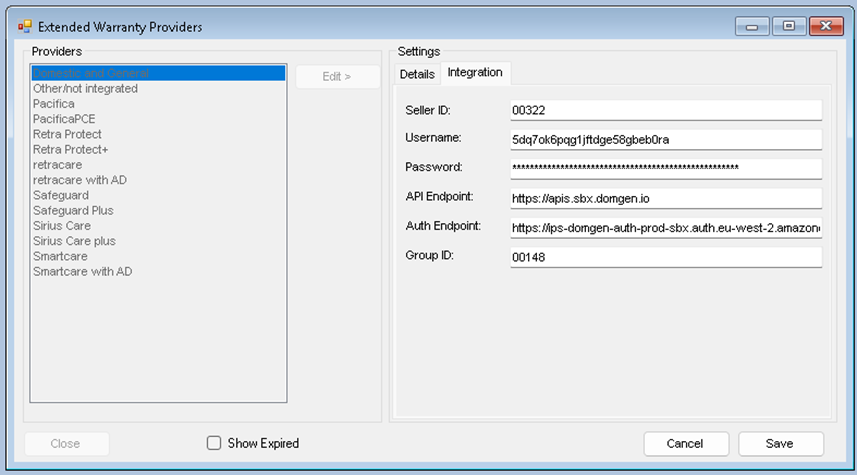
Now click on the Integration tab
Here you need to enter the credentials supplied by Domestic and General, our support or implementation teams may have already entered these for you, if there is already a username and ID’s present, you can skip this step
Setting Your Dealer ID
The dealer id can be set globally or on a branch level
Go to: Tools > configuration
Enter ‘Dealer’ into the search box and check the ‘Search all groups’
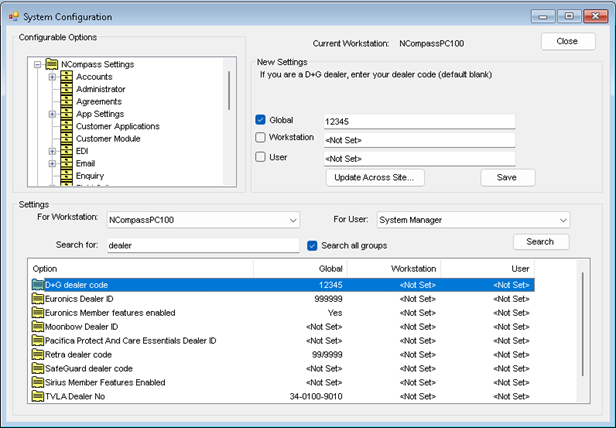
· Highlight the D+G entry and tick the global box
· Enter your dealer ID (this will be provided by Domestic and Genera)
· Click Save
You can also set your dealer ID at Branch Level (tis overrides the config setting )
Go to: Administration > Branches
· Select your branch
· Click on the Euronics tab
· Click Edit
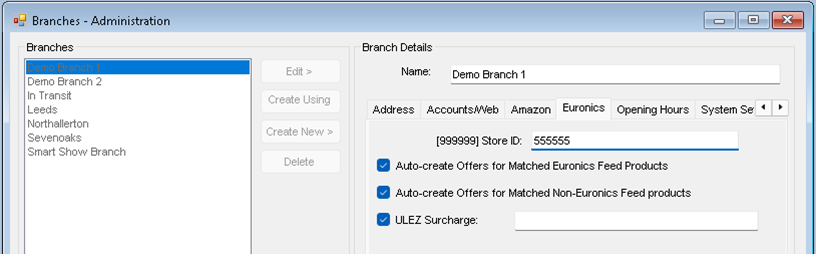
· Enter your dealer / Store ID and Click ‘Save’
Updating the warranty templates
Warranty templates are the list of available warranties for the provider, this is managed in the Calculus cloud, our cloud download allows bulk updates to warranties and the warranty category list
Ø Go to: Administration > Extended Warranties > Templates
This Will open up the extended warranty administration window, and you will see all warranty templates that are currently in the system
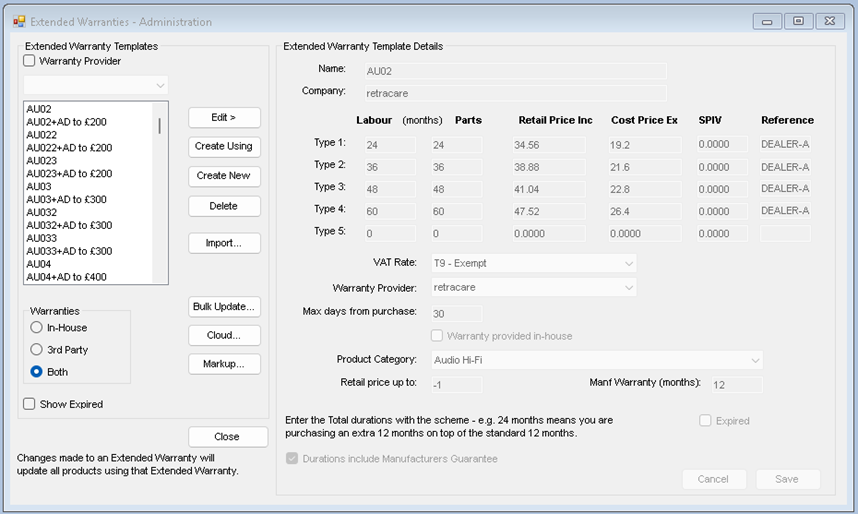
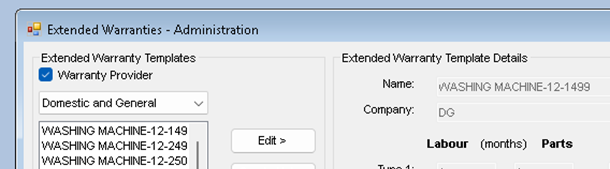
You can filter the view by provider
This administration window allows modification of the warranties, however with Domestic and General, this is all handled by the cloud services.
To download the rates andcategories
· Click the ‘Cloud’ button
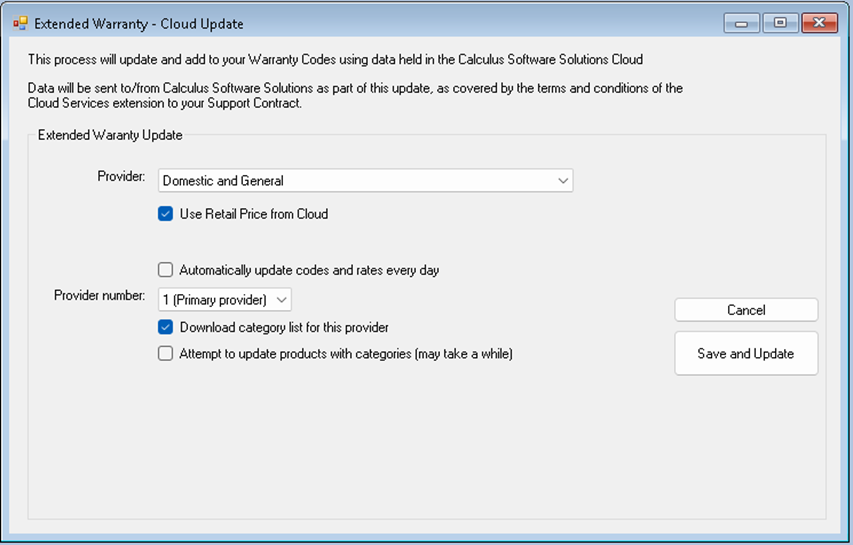
If this is the first time you have downloaded the rates, we will need to get the rates and categories first before we can add the categories to the products department.
Ensure the Automatically updates codes and rates is unchecked
Download Categories for this provider is checked
Attempt to update products is unchecked
· Click ‘Save and Download’
Adding Warranty Categories to your products
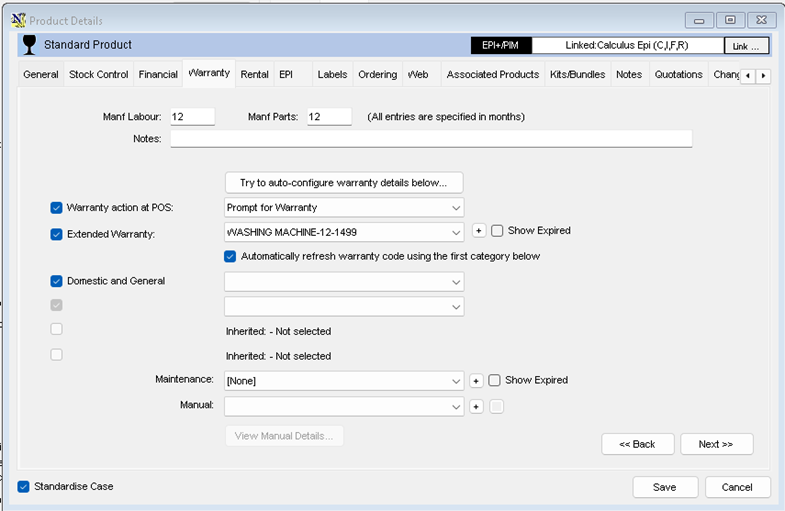
Categories can be added at product level, but this would mean updating every product you want to sell a warranty for, you can check if there has been a warranty set by checking product details (warranty tab)
It’s much simpler to let NCompass automatically select the warranty for your products, and by default new products will be set to inherit the warranty selection from the department tree
Setting your warranty category and action on departments level
Ø Go to: Administration > Departments Management
For each department you want to add warranties to, select the department where the warranty category changes
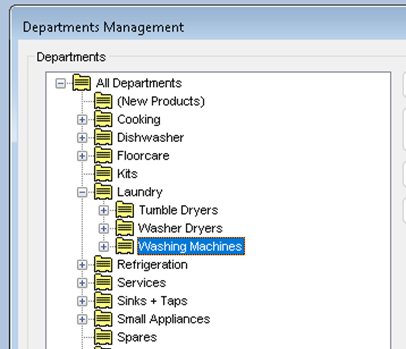
In this example above, the split in categories takes place under Laundry, where it splits between tumble dryers, washer dryers and washing machines, each of which have a different Domestic and General Category
Highlight your category and click ‘Edit’ then select the warranty tab on the right
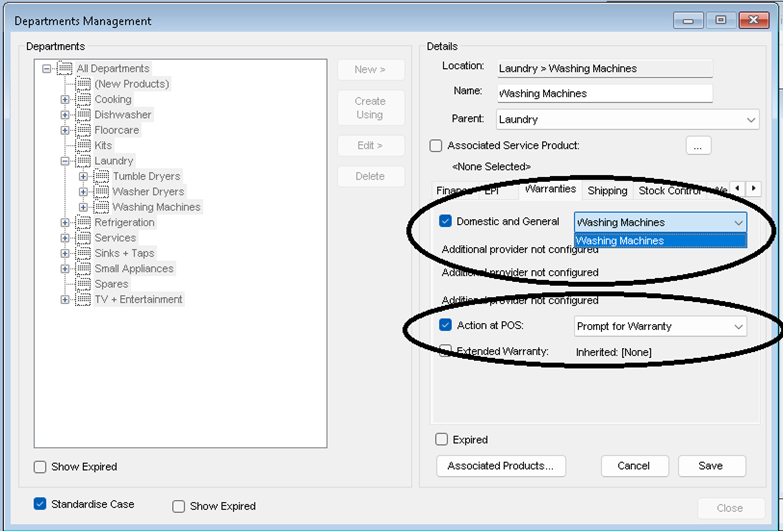
Set the warranty category for the department and your preferred action at point of sale, we recommend ‘Prompt for Warranty’
· Click ‘Save’
Repeat for all departments where you want to tag / sell warranties
We can now get NCompass to tag warranties against products
Ø Go to: Administration > Extended Warranties > Templates
· Click on the ‘Cloud’ button
Now we will refresh the template and set the tagging
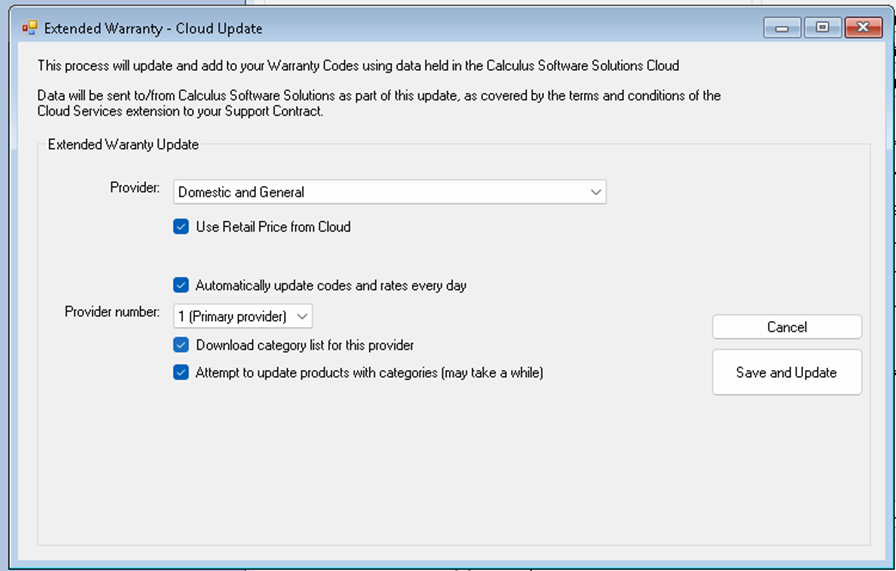
Make sure you have the selection as above ensuring you have selected the correct provider number 1-4 from the dropdown
This process will take some time as it’s going to look at all products on your system and tag them with the correct warranty based on category and price
· Click ‘Save and Update’
You will see progress boxes as the tagging takes place
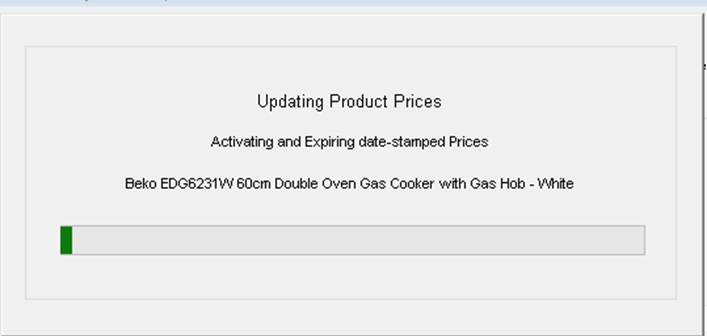
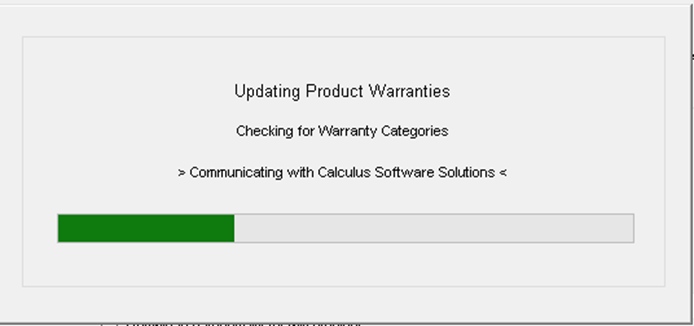
This may take several minutes to complete
Mapping your Manufacturer
Ø Go to: Administration > Manufacturers and Suppliers
Select your manufacturer and select the warranty tab, note you may have to scroll the tabs to find the warranty tab
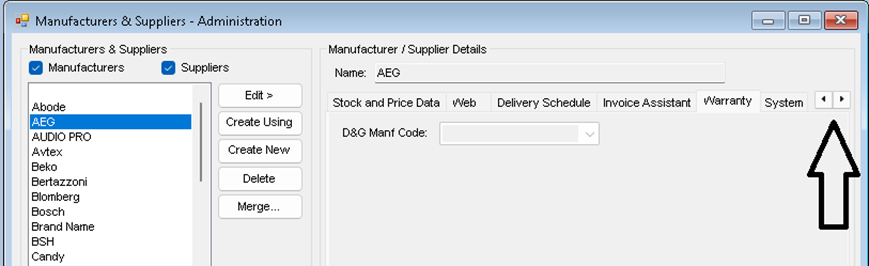
· Click ‘Edit’
Select the correct Domestic and General Code from the dropdown
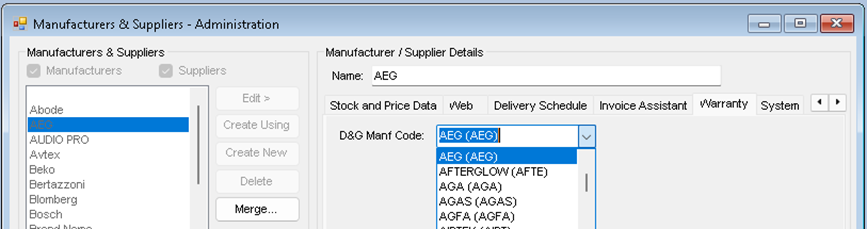
· Click ‘Save’
Manufacturer’s part and labour periods
It’s important that manufacturers parts and labour periods are set correctly on products , The Euronics product feed will normally supply theses details, if you have product data in your system that is old or from another source you must check that these periods are set
You will find these under product details on the warranty tab.
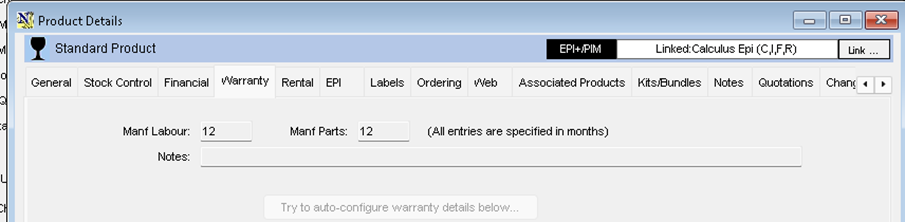
If not correct the wrong warranty maty be offered
Sales Process
NCompass can ‘Prompt’ the salesperson to add the warranty to the sale each time an item is added to the sales order or invoice.
If you want to sell a warranty for a product that’s already sold, this is also supported
Selling warranties with the products
· Start the sale process in the normal way usually this is via a sales order
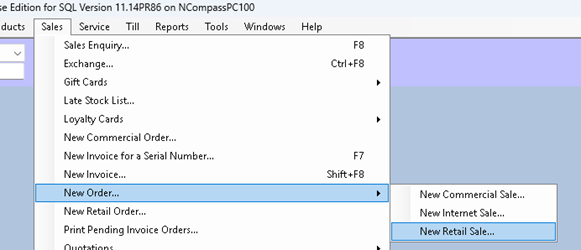
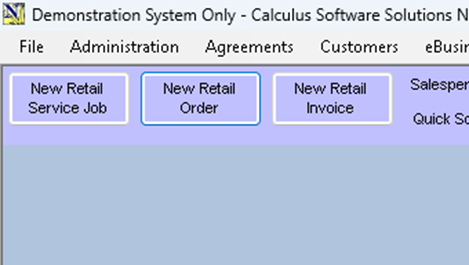
· Sign into the sales order window in the normal way
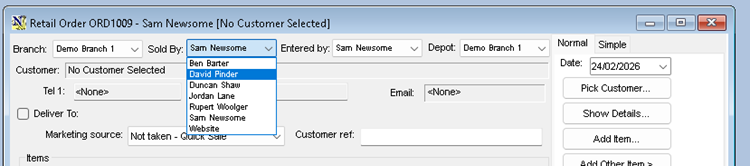
· Then Select Pick Customer
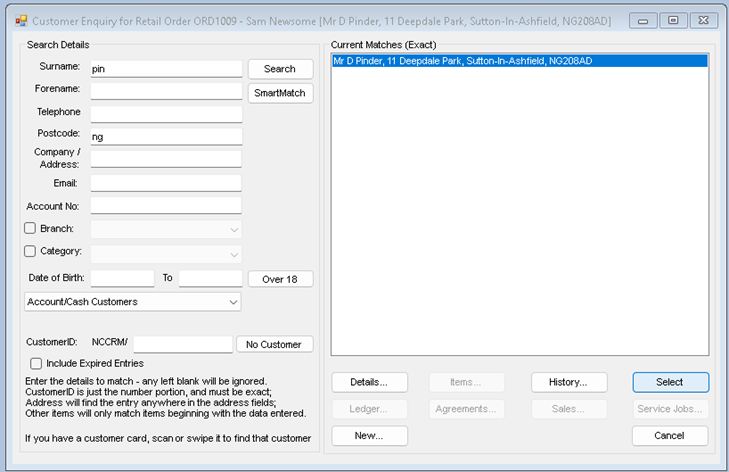
Search for your customer
· If your customer is already in NCompass, Highlight and click Select
If your customer is not found
Click ‘New’

Fill in the customer details and then click Save
Note: its important you get full customer details, full title, initial, Surname, correct address, postcode email and telephone numbers
· Click ‘Save’
Now Add your product to the sales
Click ‘Add Item’
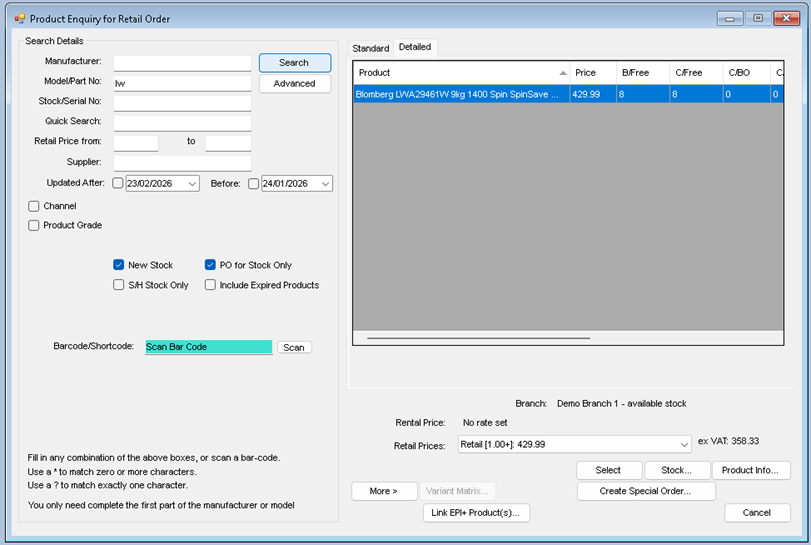
Search for your item the click’ Select ‘
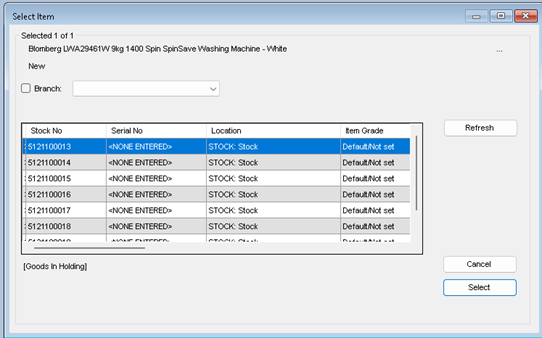
Depending on your system settings, you may or may not be required to pick a stock number, if required pick the first available stock number
· Highlight and Click ‘Select’
Your will then be presented with the price confirmation screen
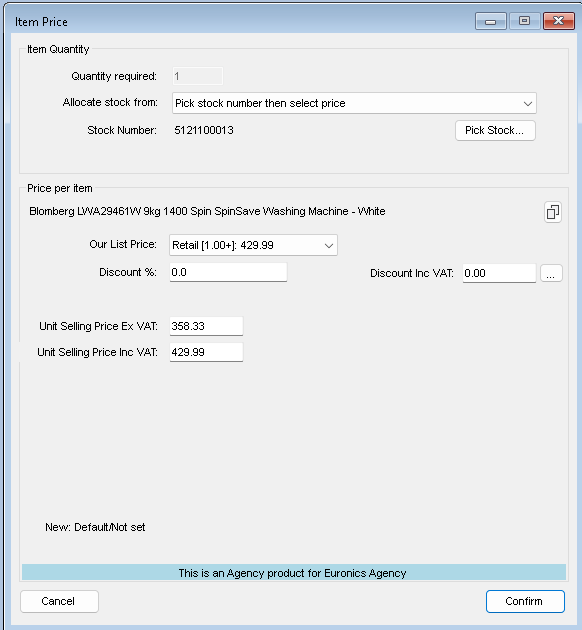
If you’re changing the price, you must do it before proceeding, as the next step will check the warranty category and retail price
· Click ‘Confirm’
If your system is set to not to prompt for warranties, you will be returned to your sales order, however its our recommendation that ‘Prompt for Warranty’ is turned on for all product categories, and the next window that opens is a list of available warranty purchase options
The Warranty window will do a live call to Domestic and Generals system to check the warranty rates and update if required, this should only take a few seconds and then you will be presented with the list
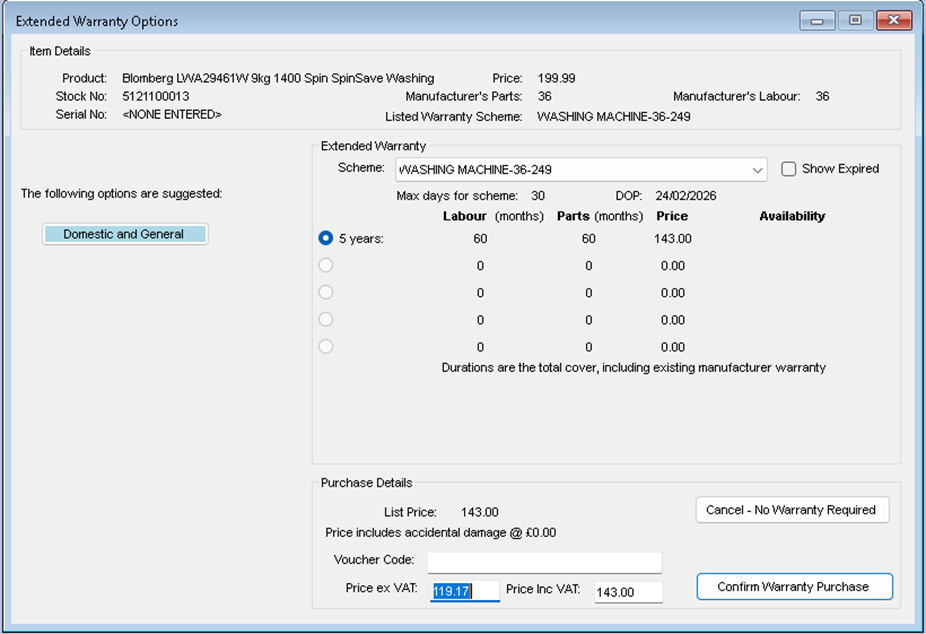
There may be more than one warranty purchase option available
This will show both term warranty.
36-month, 60-month, and the term includes the manufacturers original warranty
And monthly warranties, where the term will be set to 1 month and the price shown is the monthly price
Select the desired warranty option and the price will update, not you should not try and change the warranty price, if you do the warranty submission may be rejected
· Click ‘Confirm Warranty Purchase’ to continue with the sale and include the selected warranty
Or
· Click ‘Cancel – No Warranty required’
Note: if for any reason there is no access to Domestic and General’s systems the rate will not be able to be confirmed, and you will not be able to sell the warranty
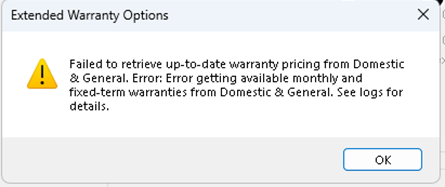
If this happens, check your internet access and the service status with Domestic and General
You can always return to the sales order later to add the warranty to the sales order.
Complete the IPID requirements
IDIP = Insurance Product Information Document
The PDF is stored the normal reports folder, and can be printed emailed or viewed directly from NCompass
This document can be different based on the warranty type, Monthly / Term
, It’s a requirement that the customer gets a copy of the IPID and has a chance to read through the basic terms before accepting the warranty sale, Domestic and General may also require confirmation of any questions or statements before the warranty can be purchased, so the following window will open
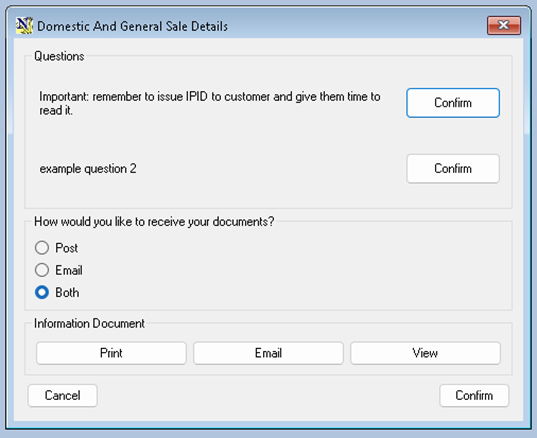
· Confirm Any Questions
· Select the warranty Document delivery method (this defaults to both)
If there are any questions or statements that require confirmation, they must be read out to the customer and then confirmed, normally for Domestic and General the only question will be to confirm that the customer has received read the IPID
Print Will send the correct IPID PDF to the default A4 Printer
Email will open up the NCompass Email client with the customers email address and a email template with the correctly worded text, and the PDF attached

Click ‘Send’
View will open the PDF in a mini-Browser
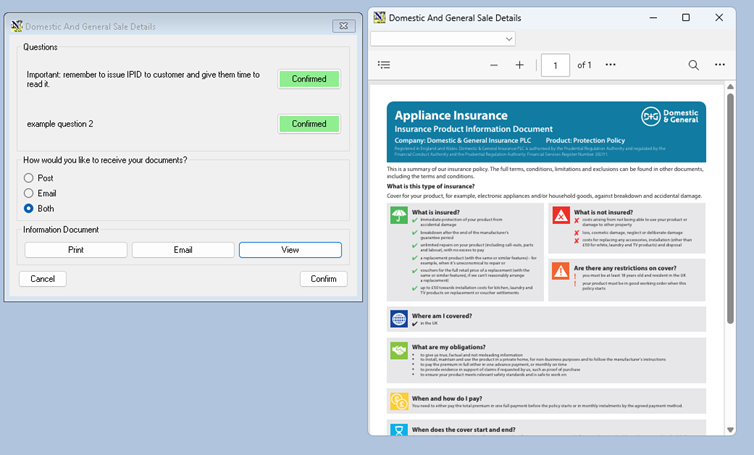
Once the customer has received / viewed the IPID you can Continue
Click ‘Confirm’
If a monthly warranty has been selected, you will be prompted to collect the customers Direct Debit details

Enter the customer bank details
The payment day defaults to the current day, the customer can have the direct debit taken on any day form the 1st to the 28th
You cannot submit monthly warranties without bank details, if click ‘details not taken’, you will be prompted again when confirming the sale
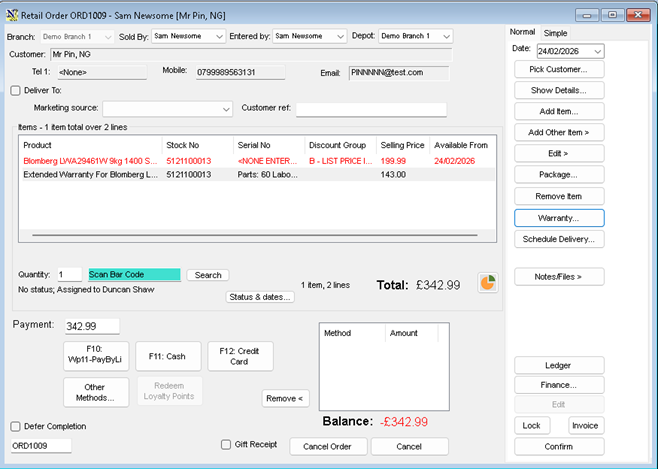
Back at the soles order screen, you can now continue to add more products, if additional products also have a tagged warranty, the same process will be available for each product line
When the sale is complete
· Click ‘Confirm’
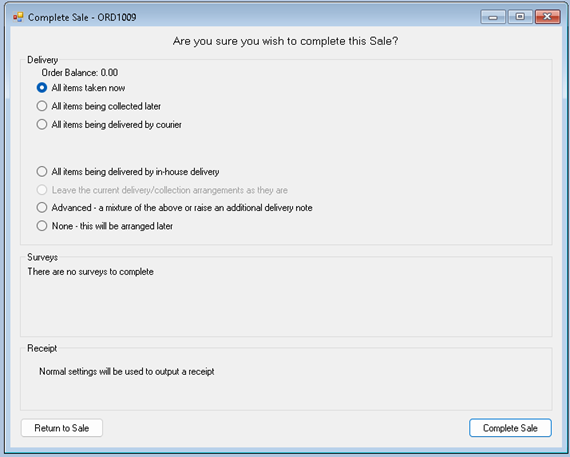
Select the item delivery / Shipping / Collection options required
· Click ‘Complete Sale’
If you have not taken the bank details and there is a monthly warranty present on the sale you get one final chance to eneter them, monthly warranties can not be submitted without bank details
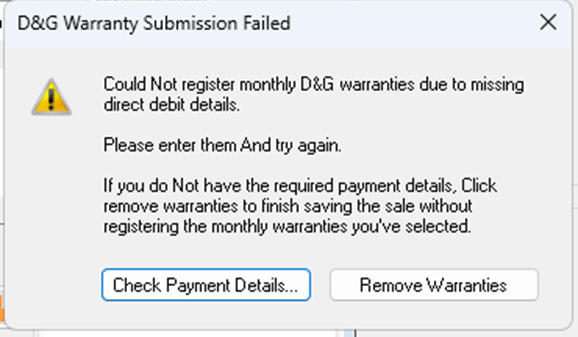
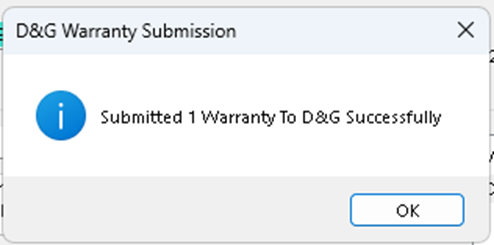
The Warranty Submission will now take place, there will be a short pause while NCompass connects to Domestic and Generals systems and submits the warranty, Once complete you will get a confirmation
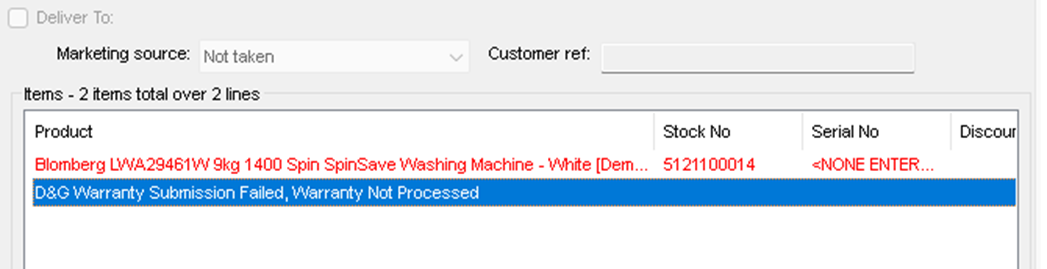
If the Warranty Fails to submit you will be given a reason
The Warranty is automatically removed for the sales order and is replaced with a sundry line indicating the submission has been cancelled
Selling a warranty for a previously sold product
· Start a new sales order
· Add the customer on to the sales order
· Click the Warranty button and select the option ‘For another item’
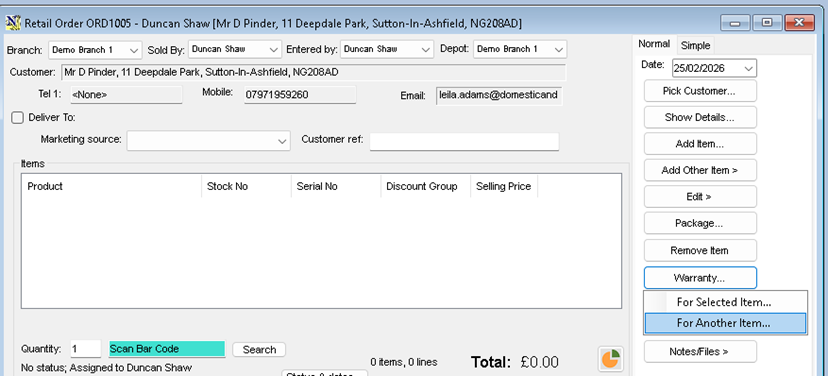
This will bring up a list of the customers previous purchases
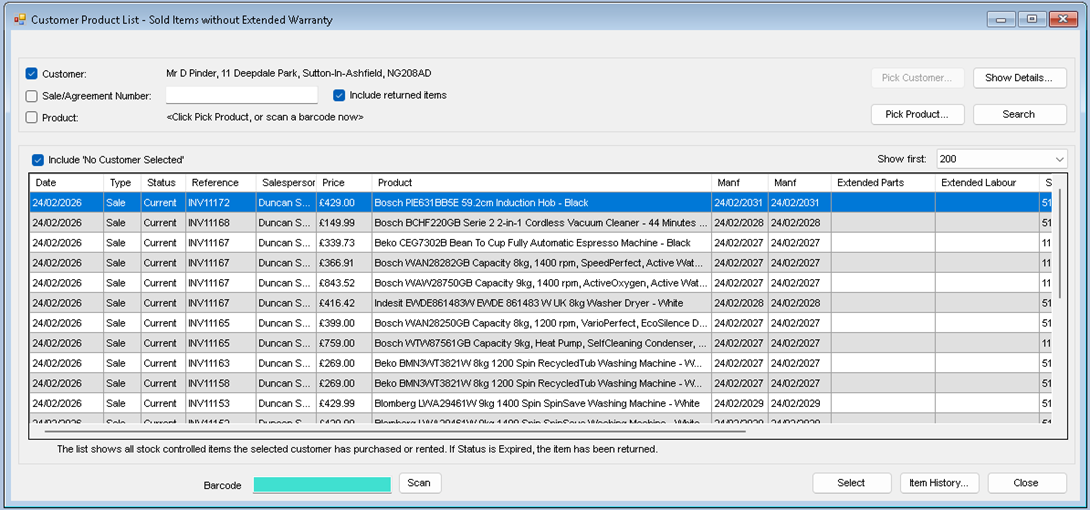
· Highlight the item and Click Select
· Proceed with the warranty purchase as above
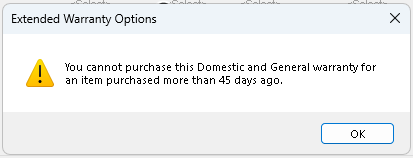
Domestic and General only allow the sale of the warranty up to 45 days after the product sale, if you attempt to sell a warranty outside of this period, you will be blocked
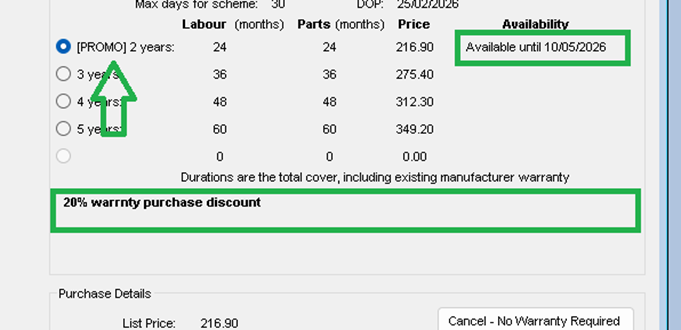
Promoted Warranties
There is provision in the rates table / API call for promoted warranties, if a promoted warranty is available it will be shown in the warranty selection screen, the warranty name will be prefixed with [Promo]
The availability field will show when the promotion is valid until and under the selection table the promotional test will be shown
Cancelled Transactions
As warranties are sent real time to Domestic and General, you must ensure that if the transaction is cancelled you inform them of this.
This could occur in the following scenarios
· Sales order is edited and the warranty or item and warranty removed
· Sales order is completely cancelled
· Warranty refunded from invoice
· Items and warranty refunded from invoice
In the first two scenarios, domestic and general will have received a valid warranty submission, but its start date will be set in the future
In the later scenarios, the warranty will have been submitted, and the warranty start date triggered, so the warranty will be live
Please see the section on warranty submissions to see the submission status
In all cases you should contact the Domestic and General dealer helpline and cancel the warranty
The is no option for NCompass to automatically cancel these in version 11.14.00
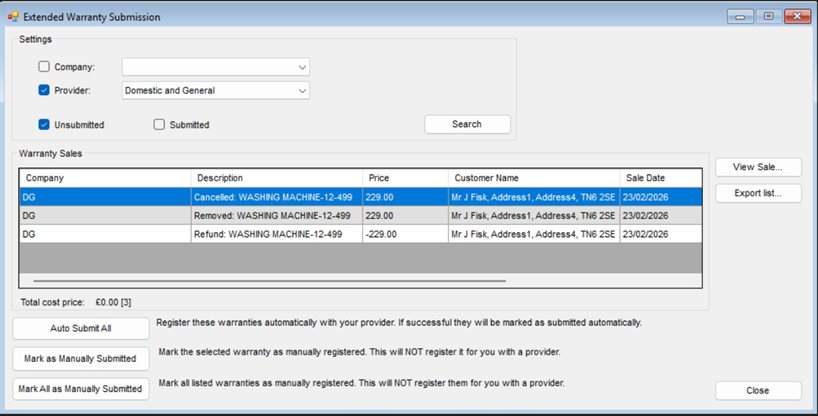
If a warranty is removed form a sales order, refunded or the sales order cancelled it will show in the submission enquiry screen
Go to : eBusiness > Extended Warranty Submissions
· Select the provider from the drop down selection
Warranty Submissions
The warranty is submitted at the point of sales however the contact start date is set in the future, this is due to fact we do not know the delivery / collection date at the point of submission.
The normal process is to complete the delivery or collection in your normal way, goods must be marked as taken, collected or delivered
Once the field call is marked as completed, you can invoice the sale or if you have auto invoicing turned on, it will invoice automatically
After the sale is delivery complete and invoice an update will be sent to Domestic and General with the delivery / contract start date
Checking submissions
Go to : eBusiness > Extended Warranty Submissions
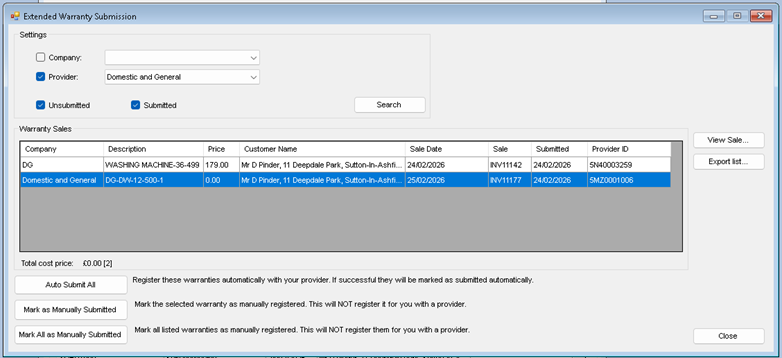
· Select the provider from the drop-down selection
· Check Submitted
You will now see all the submitted warranties for that provider
Note: this screen only shows warranties that are submitted and active, i.e. when the start date has been sent
This Window is subject to further changes
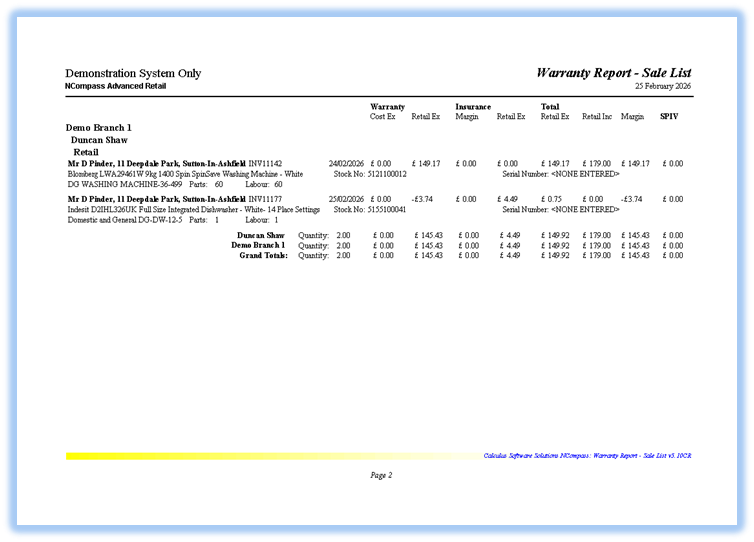
Warranty Sales Reports
There are a range of warranty reports, both summery and detailed
Go to: Reports > Sales > Warranty Sales
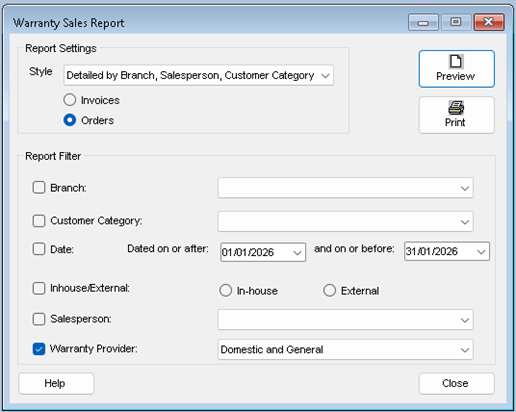
· Select if you want to report on warranties on sales invoices or sales order
· Select your report criteria
· Select your report date range
· Select the warranty provide
Preview or print your report